Popular Woodworking 2002-06 № 128, страница 39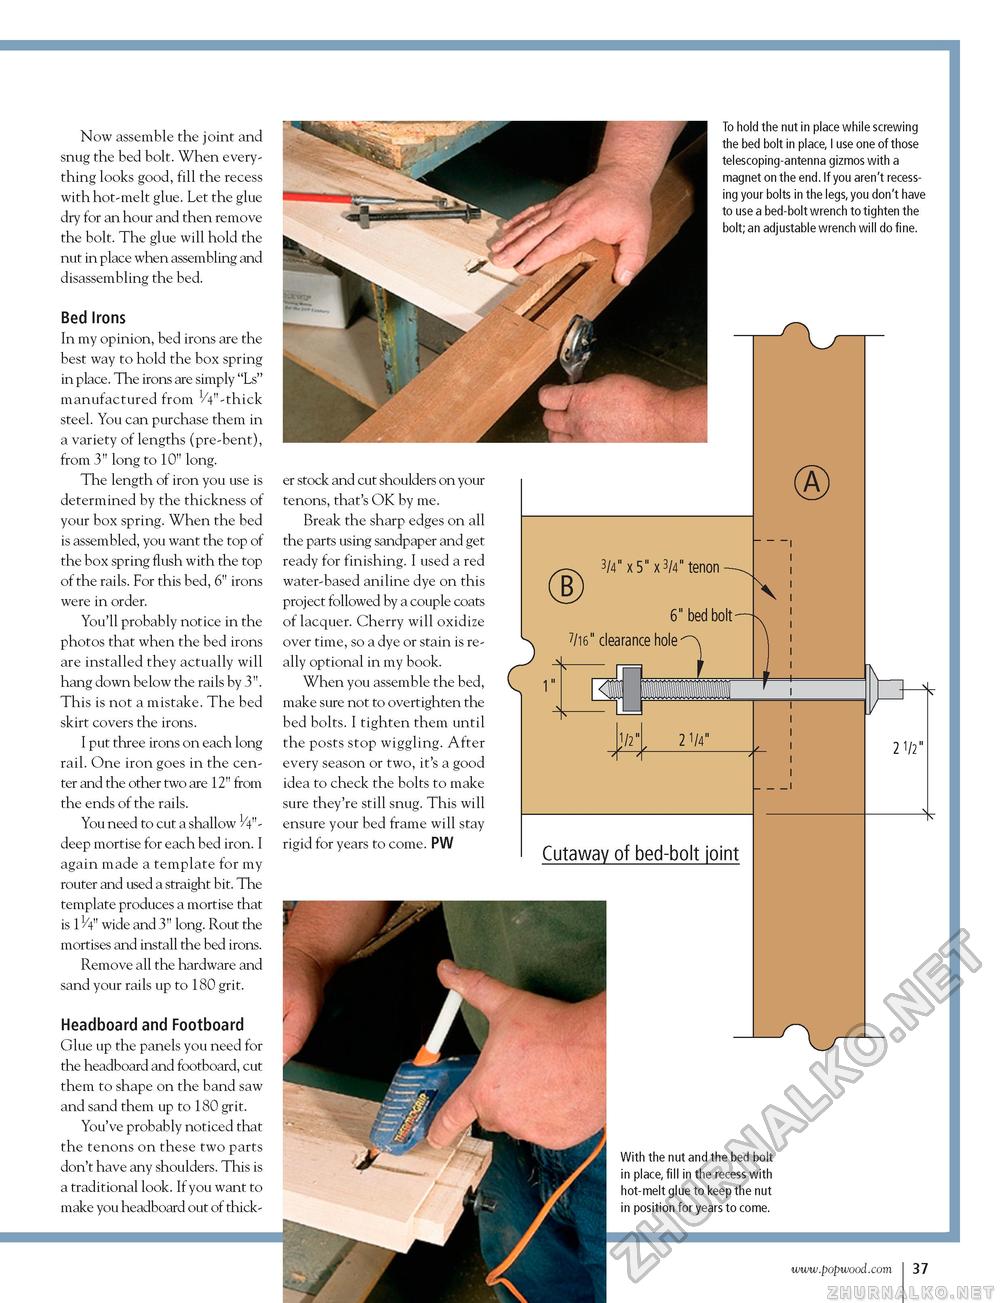
Now assemble the joint and snug the bed bolt. When everything looks good, fill the recess with hot-melt glue. Let the glue dry for an hour and then remove the bolt. The glue will hold the nut in place when assembling and disassembling the bed. Bed Irons In my opinion, bed irons are the best way to hold the box spring in place. The irons are simply "Ls" manufactured from 1/4"-thick steel. You can purchase them in a variety of lengths (pre-bent), from 3" long to 10" long. The length of iron you use is determined by the thickness of your box spring. When the bed is assembled, you want the top of the box spring flush with the top of the rails. For this bed, 6" irons were in order. You'll probably notice in the photos that when the bed irons are installed they actually will hang down below the rails by 3". This is not a mistake. The bed skirt covers the irons. I put three irons on each long rail. One iron goes in the center and the other two are 12" from the ends of the rails. You need to cut a shallow 1/4"-deep mortise for each bed iron. I again made a template for my router and used a straight bit. The template produces a mortise that is wide and 3" long. Rout the mortises and install the bed irons. Remove all the hardware and sand your rails up to 180 grit. Headboard and Footboard Glue up the panels you need for the headboard and footboard, cut them to shape on the band saw and sand them up to 180 grit. You've probably noticed that the tenons on these two parts don't have any shoulders. This is a traditional look. If you want to make you headboard out of thick To hold the nut in place while screwing the bed bolt in place, I use one of those telescoping-antenna gizmos with a magnet on the end. If you aren't recessing your bolts in the legs, you don't have to use a bed-bolt wrench to tighten the bolt; an adjustable wrench will do fine. er stock and cut shoulders on your tenons, that's OK by me. Break the sharp edges on all the parts using sandpaper and get ready for finishing. I used a red water-based aniline dye on this project followed by a couple coats of lacquer. Cherry will oxidize over time, so a dye or stain is really optional in my book. When you assemble the bed, make sure not to overtighten the bed bolts. I tighten them until the posts stop wiggling. After every season or two, it's a good idea to check the bolts to make sure they're still snug. This will ensure your bed frame will stay rigid for years to come. PW Cutaway of bed-bolt joint With the nut and the bed bolt in place, fill in the recess with hot-melt glue to keep the nut in position for years to come. 37 |


