Popular Woodworking 2002-10 № 130, страница 12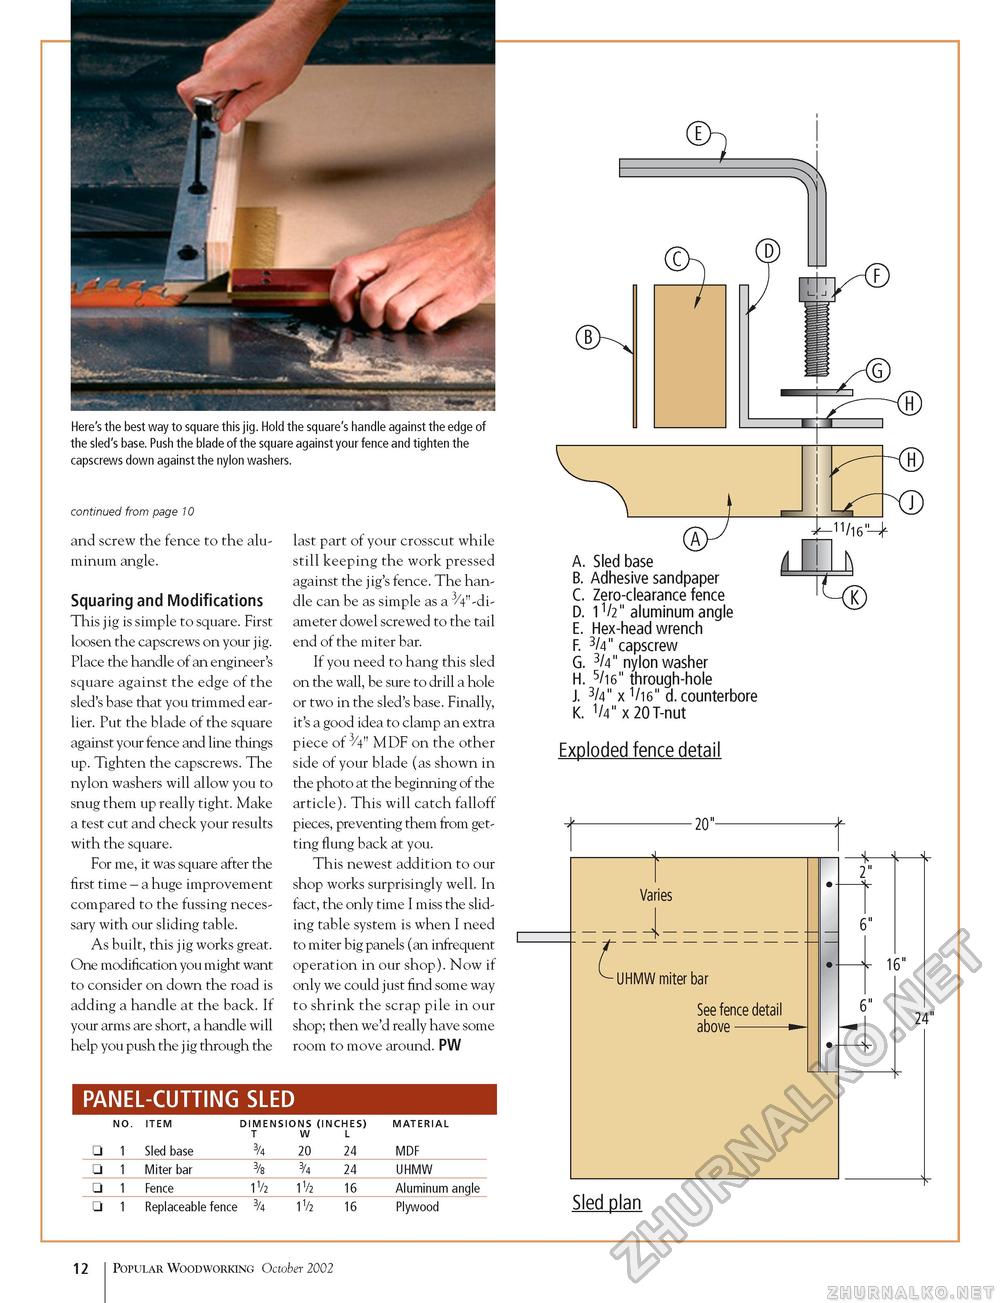
Here's the best way to square this jig. Hold the square's handle against the edge of the sled's base. Push the blade of the square against your fence and tighten the capscrews down against the nylon washers. continued from page 10 and screw the fence to the aluminum angle. Squaring and Modifications This jig is simple to square. First loosen the capscrews on your jig. Place the handle of an engineer's square against the edge of the sled's base that you trimmed earlier. Put the blade of the square against your fence and line things up. Tighten the capscrews. The nylon washers will allow you to snug them up really tight. Make a test cut and check your results with the square. For me, it was square after the first time - a huge improvement compared to the fussing necessary with our sliding table. As built, this jig works great. One modification you might want to consider on down the road is adding a handle at the back. If your arms are short, a handle will help you push the jig through the last part of your crosscut while still keeping the work pressed against the jig's fence. The handle can be as simple as a 3/4"-di-ameter dowel screwed to the tail end of the miter bar. If you need to hang this sled on the wall, be sure to drill a hole or two in the sled's base. Finally, it's a good idea to clamp an extra piece of 3/4" MDF on the other side of your blade (as shown in the photo at the beginning of the article). This will catch falloff pieces, preventing them from getting flung back at you. This newest addition to our shop works surprisingly well. In fact, the only time I miss the sliding table system is when I need to miter big panels (an infrequent operation in our shop). Now if only we could just find some way to shrink the scrap pile in our shop; then we'd really have some room to move around. PW PANEL-CUTTING SLED
A. Sled base B. Adhesive sandpaper C. Zero-clearance fence D. 11/2" aluminum angle E. Hex-head wrench F. 3/4" capscrew G. 3/4" nylon washer H. 5/16" through-hole J. 3/4" x 1/16" d. counterbore K. 1/4" x 20 T-nut Exploded fence detail -20"- Varies z UHMW miter bar See fence detail above - 2" 6" ■V 16" 6" 24" Sled plan 12 Popular Woodworking October 2002 |
||||||||||||||||||||||||||||||


