Popular Woodworking 2002-10 № 130, страница 16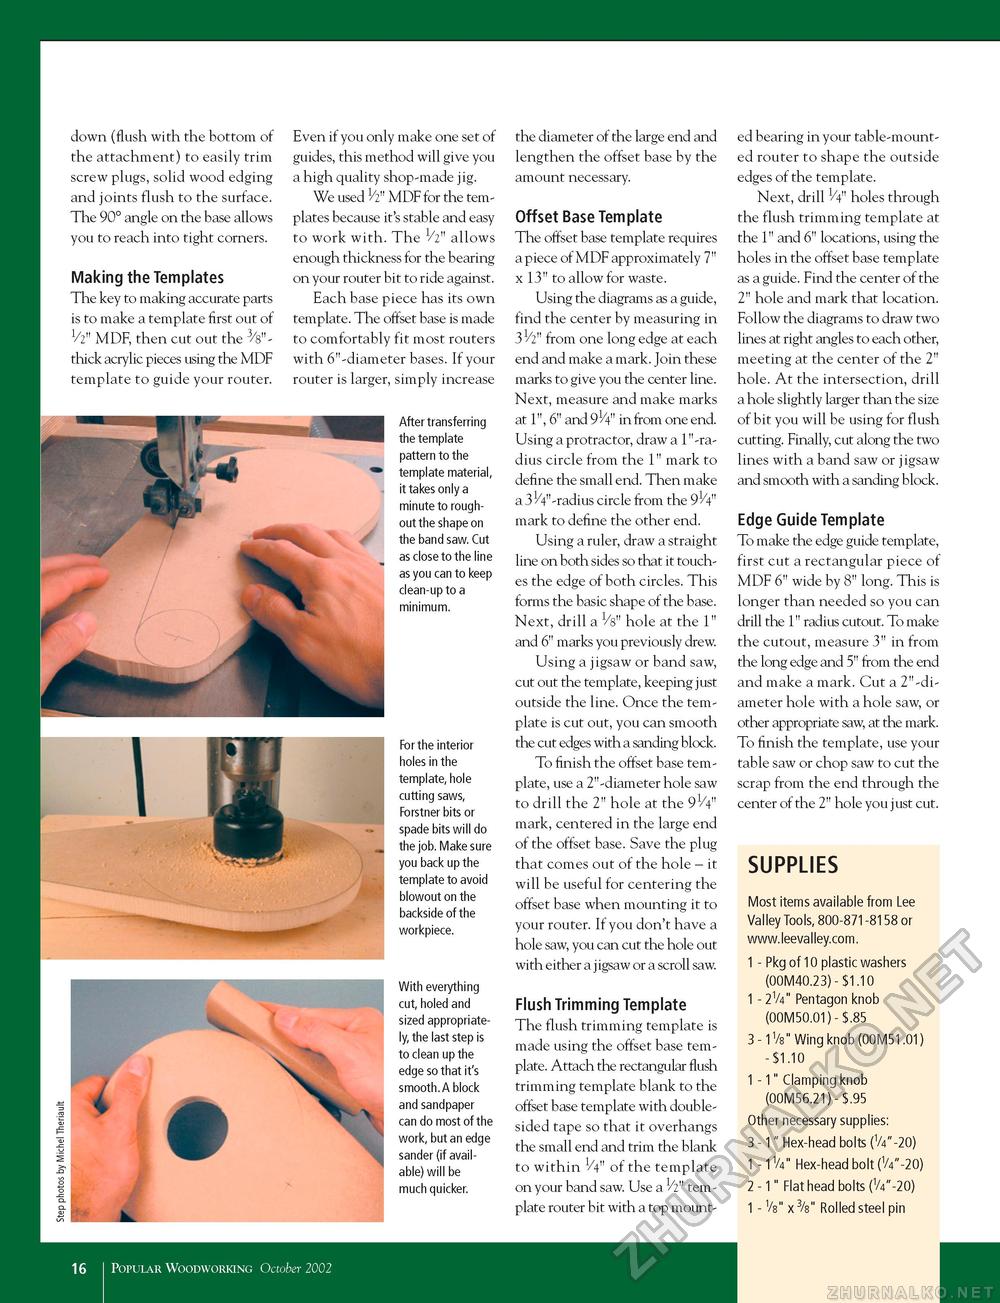
down (flush with the bottom of the attachment) to easily trim screw plugs, solid wood edging and joints flush to the surface. The 90° angle on the base allows you to reach into tight corners. Making the Templates The key to making accurate parts is to make a template first out of 1/2" MDF, then cut out the 3/s"-thick acrylic pieces using the MDF template to guide your router. Even if you only make one set of guides, this method will give you a high quality shop-made jig. We used h" MDF for the templates because it's stable and easy to work with. The 1/2" allows enough thickness for the bearing on your router bit to ride against. Each base piece has its own template. The offset base is made to comfortably fit most routers with 6"-diameter bases. If your router is larger, simply increase After transferring the template pattern to the template material, it takes only a minute to rough-out the shape on the band saw. Cut as close to the line as you can to keep clean-up to a minimum. For the interior holes in the template, hole cutting saws, Forstner bits or spade bits will do the job. Make sure you back up the template to avoid blowout on the backside of the workpiece. With everything cut, holed and sized appropriately, the last step is to clean up the edge so that it's smooth.A block and sandpaper can do most of the work, but an edge sander (if available) will be much quicker. the diameter of the large end and lengthen the offset base by the amount necessary. Offset Base Template The offset base template requires a piece of MDF approximately 7" x 13" to allow for waste. Using the diagrams as a guide, find the center by measuring in from one long edge at each end and make a mark. Join these marks to give you the center line. Next, measure and make marks at 1", 6" and 91/4" in from one end. Using a protractor, draw a 1"-ra-dius circle from the 1" mark to define the small end. Then make a 31/4" -radius circle from the 91/4" mark to define the other end. Using a ruler, draw a straight line on both sides so that it touches the edge of both circles. This forms the basic shape of the base. Next, drill a 1/s" hole at the 1" and 6" marks you previously drew. Using a jigsaw or band saw, cut out the template, keeping just outside the line. Once the template is cut out, you can smooth the cut edges with a sanding block. To finish the offset base template, use a 2"-diameter hole saw to drill the 2" hole at the 91/4" mark, centered in the large end of the offset base. Save the plug that comes out of the hole - it will be useful for centering the offset base when mounting it to your router. If you don't have a hole saw, you can cut the hole out with either a jigsaw or a scroll saw. Flush Trimming Template The flush trimming template is made using the offset base template. Attach the rectangular flush trimming template blank to the offset base template with double-sided tape so that it overhangs the small end and trim the blank to within 1/4" of the template on your band saw. Use a 1/2" template router bit with a top mount ed bearing in your table-mounted router to shape the outside edges of the template. Next, drill 1/4" holes through the flush trimming template at the 1" and 6" locations, using the holes in the offset base template as a guide. Find the center of the 2" hole and mark that location. Follow the diagrams to draw two lines at right angles to each other, meeting at the center of the 2" hole. At the intersection, drill a hole slightly larger than the size of bit you will be using for flush cutting. Finally, cut along the two lines with a band saw or jigsaw and smooth with a sanding block. Edge Guide Template To make the edge guide template, first cut a rectangular piece of MDF 6" wide by 8" long. This is longer than needed so you can drill the 1" radius cutout. To make the cutout, measure 3" in from the long edge and 5" from the end and make a mark. Cut a 2"-di-ameter hole with a hole saw, or other appropriate saw, at the mark. To finish the template, use your table saw or chop saw to cut the scrap from the end through the center of the 2" hole you just cut. SUPPLIES Most items available from Lee Valley Tools, 800-871-8158 or www.leevalley.com. 1 - Pkg of 10 plastic washers (00M40.23) - $1.10 1 - 21/4" Pentagon knob (00M50.01) - $.85 3 - 1Vs" Wing knob (00M51.01) - $1.10 1 - 1" Clamping knob (00M56.21) - $.95 Other necessary supplies: 3 - 1" Hex-head bolts (v/4"-20) 1 - V/4" Hex-head bolt (v/4"-20) 2 - 1" Flat head bolts (v/4"-20) 1 - Vs" x 3/s" Rolled steel pin 16 I Popular Woodworking October 2002 |


