Popular Woodworking 2002-10 № 130, страница 18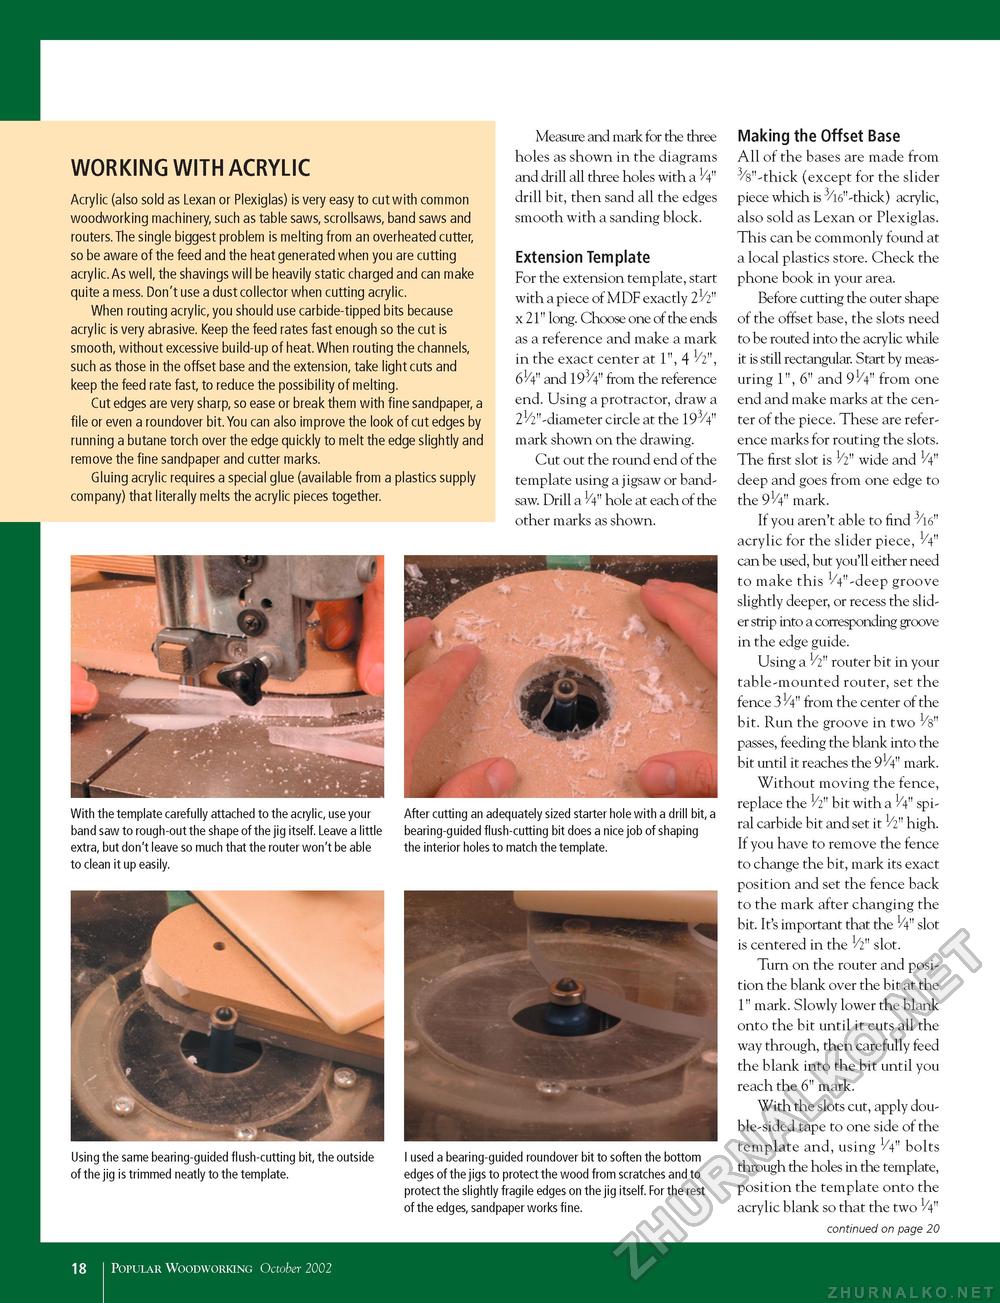
WORKING WITH ACRYLIC Acrylic (also sold as Lexan or Plexiglas) is very easy to cut with common woodworking machinery, such as table saws, scrollsaws, band saws and routers.The single biggest problem is melting from an overheated cutter, so be aware of the feed and the heat generated when you are cutting acrylic.As well, the shavings will be heavily static charged and can make quite a mess. Don't use a dust collector when cutting acrylic. When routing acrylic, you should use carbide-tipped bits because acrylic is very abrasive. Keep the feed rates fast enough so the cut is smooth, without excessive build-up of heat.When routing the channels, such as those in the offset base and the extension, take light cuts and keep the feed rate fast, to reduce the possibility of melting. Cut edges are very sharp, so ease or break them with fine sandpaper, a file or even a roundover bit.You can also improve the look of cut edges by running a butane torch over the edge quickly to melt the edge slightly and remove the fine sandpaper and cutter marks. Gluing acrylic requires a special glue (available from a plastics supply company) that literally melts the acrylic pieces together. Measure and mark for the three holes as shown in the diagrams and drill all three holes with a H" drill bit, then sand all the edges smooth with a sanding block. Extension Template For the extension template, start with a piece of MDF exactly 21/2" x 21" long. Choose one of the ends as a reference and make a mark in the exact center at 1", 4 1/2", 61/4" and 193/4" from the reference end. Using a protractor, draw a 21/2"-diameter circle at the 193/4" mark shown on the drawing. Cut out the round end of the template using a jigsaw or band-saw. Drill a 1/4" hole at each of the other marks as shown. With the template carefully attached to the acrylic, use your band saw to rough-out the shape of the jig itself. Leave a little extra, but don't leave so much that the router won't be able to clean it up easily. After cutting an adequately sized starter hole with a drill bit, a bearing-guided flush-cutting bit does a nice job of shaping the interior holes to match the template. Using the same bearing-guided flush-cutting bit, the outside of the jig is trimmed neatly to the template. I used a bearing-guided roundover bit to soften the bottom edges of the jigs to protect the wood from scratches and to protect the slightly fragile edges on the jig itself. For the rest of the edges, sandpaper works fine. Making the Offset Base All of the bases are made from 3/8"-thick (except for the slider piece which is -thick) acrylic, also sold as Lexan or Plexiglas. This can be commonly found at a local plastics store. Check the phone book in your area. Before cutting the outer shape of the offset base, the slots need to be routed into the acrylic while it is still rectangular. Start by measuring 1", 6" and 91/4" from one end and make marks at the center of the piece. These are reference marks for routing the slots. The first slot is 1/2" wide and 1/4n deep and goes from one edge to the 9V4" mark. If you aren't able to find 3/16" acrylic for the slider piece, V4" can be used, but you'll either need to make this 1/4"-deep groove slightly deeper, or recess the slider strip into a corresponding groove in the edge guide. Using a V2" router bit in your table-mounted router, set the fence 3 H" from the center of the bit. Run the groove in two V8" passes, feeding the blank into the bit until it reaches the 91/4" mark. Without moving the fence, replace the 1/2" bit with a 1/4" spiral carbide bit and set it 1/2" high. If you have to remove the fence to change the bit, mark its exact position and set the fence back to the mark after changing the bit. It's important that the 1/4" slot is centered in the 1/2" slot. Turn on the router and position the blank over the bit at the 1" mark. Slowly lower the blank onto the bit until it cuts all the way through, then carefully feed the blank into the bit until you reach the 6" mark. With the slots cut, apply double-sided tape to one side of the template and, using 1/4" bolts through the holes in the template, position the template onto the acrylic blank so that the two 1/4n continued on page 20 18 I Popular Woodworking October 2002 |


