Popular Woodworking 2002-12 № 131, страница 68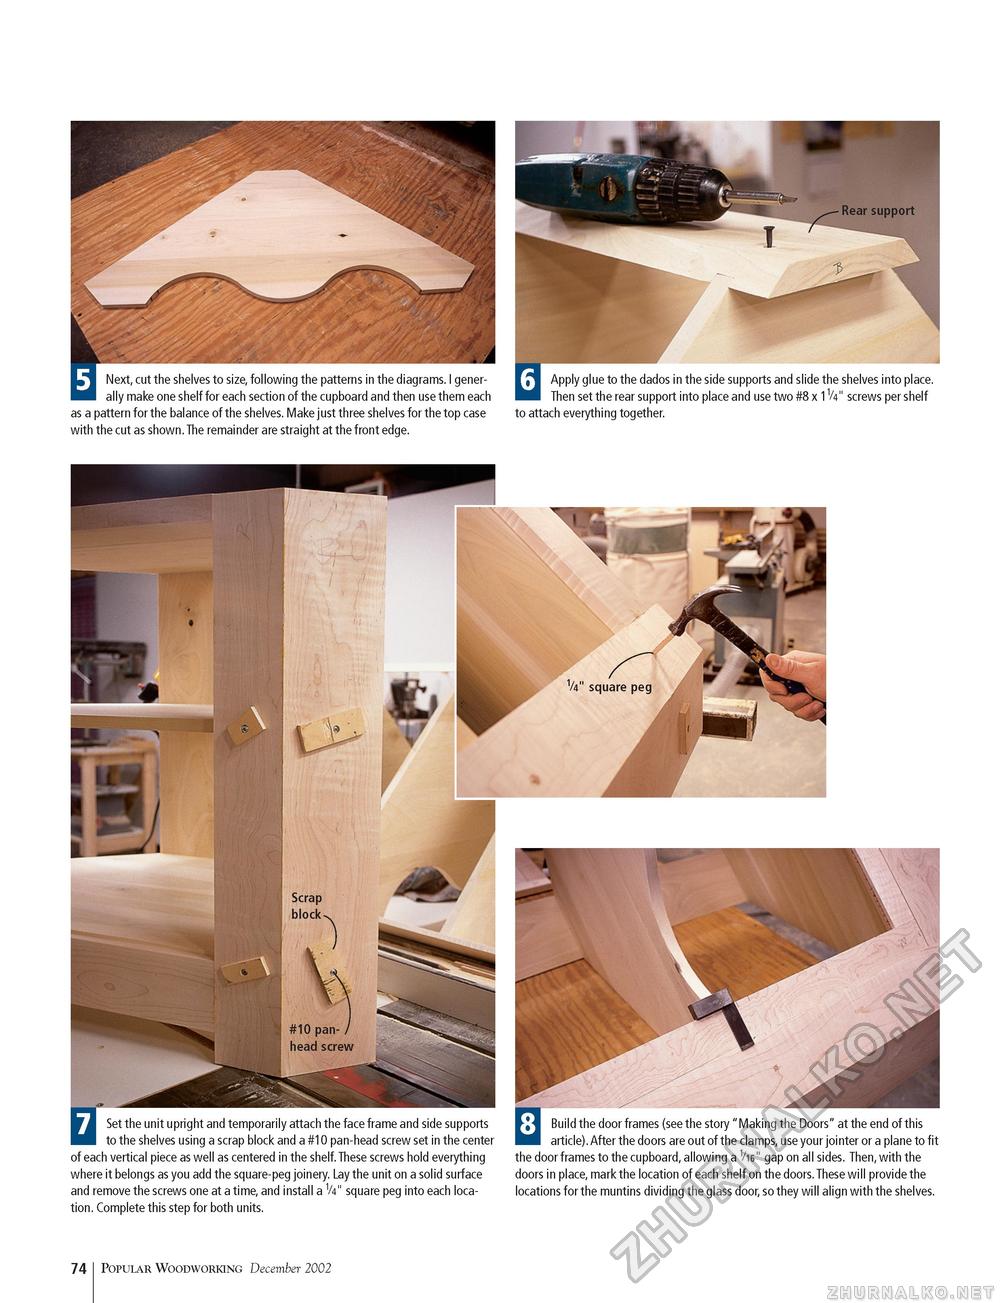
Next, cut the shelves to size, following the patterns in the diagrams. I generally make one shelf for each section of the cupboard and then use them each as a pattern for the balance of the shelves. Make just three shelves for the top case with the cut as shown.The remainder are straight at the front edge. U Apply glue to the dados in the side supports and slide the shelves into place. Then set the rear support into place and use two #8 x 1V4" screws per shelf to attach everything together. USet the unit upright and temporarily attach the face frame and side supports to the shelves using a scrap block and a #10 pan-head screw set in the center of each vertical piece as well as centered in the shelf. These screws hold everything where it belongs as you add the square-peg joinery. Lay the unit on a solid surface and remove the screws one at a time, and install a V4" square peg into each location. Complete this step for both units. U Build the door frames (see the story "Making the Doors" at the end of this article).After the doors are out of the clamps, use your jointer or a plane to fit the door frames to the cupboard, allowing a V16" gap on all sides. Then, with the doors in place, mark the location of each shelf on the doors.These will provide the locations for the muntins dividing the glass door, so they will align with the shelves. 74 Popular Woodworking December 2002 |


