Popular Woodworking 2002-12 № 131, страница 66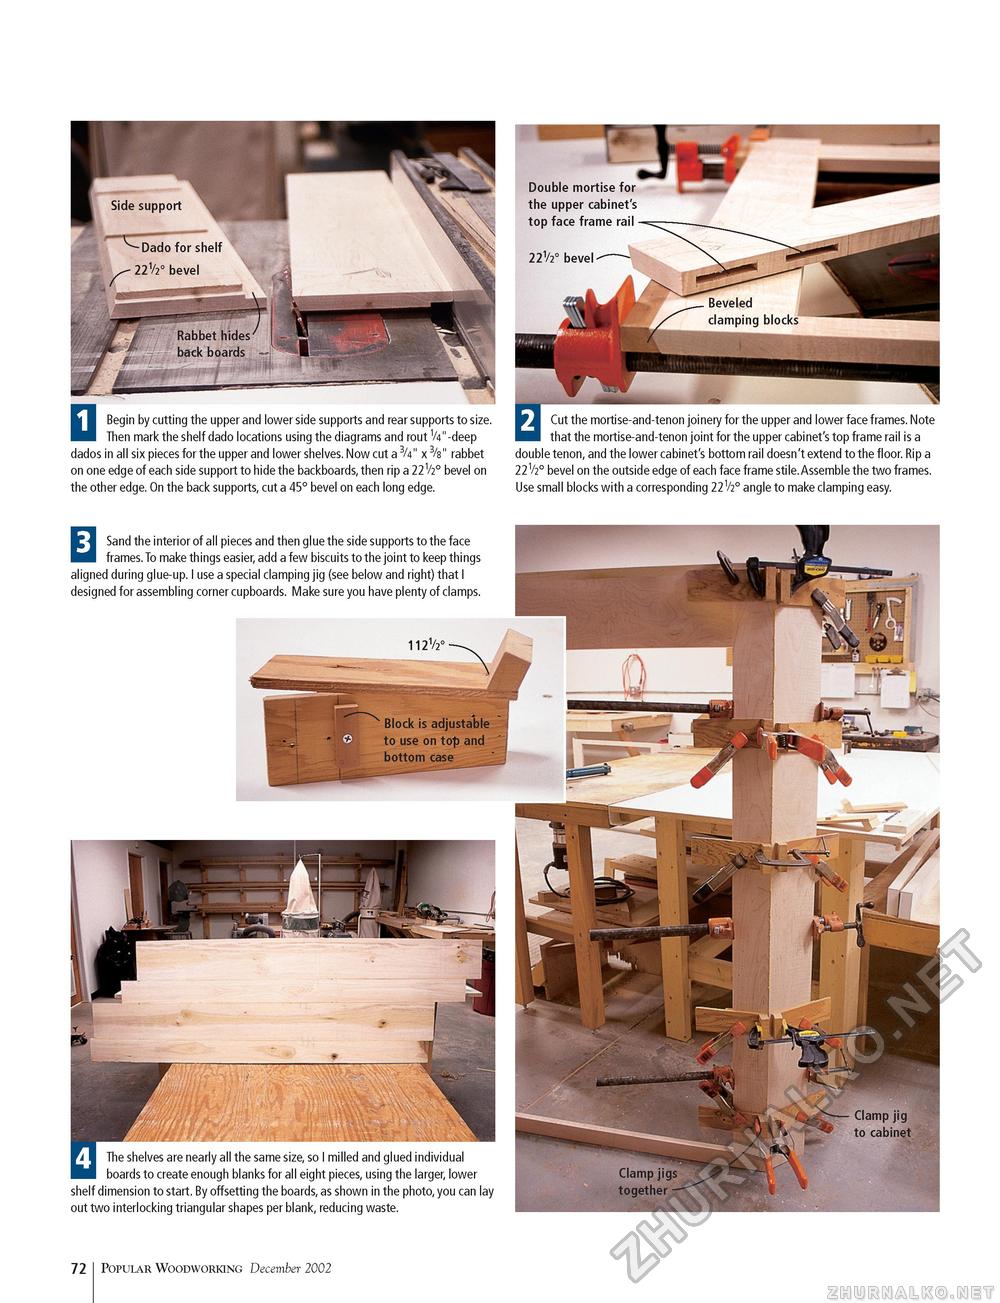
Begin by cutting the upper and lower side supports and rear supports to size. Then mark the shelf dado locations using the diagrams and rout '/V'-deep dados in all six pieces for the upper and lower shelves. Now cut a 3/4" x 3/s" rabbet on one edge of each side support to hide the backboards, then rip a 22'/2° bevel on the other edge. On the back supports, cut a 45° bevel on each long edge. Double mortise for the upper cabinet's top face frame rail 221/2° bevel HCut the mortise-and-tenon joinery for the upper and lower face frames. Note that the mortise-and-tenon joint for the upper cabinet's top frame rail is a double tenon, and the lower cabinet's bottom rail doesn't extend to the floor. Rip a 22'/2° bevel on the outside edge of each face frame stile.Assemble the two frames. Use small blocks with a corresponding 22'/2° angle to make clamping easy. HSand the interior of all pieces and then glue the side supports to the face frames.To make things easier, add a few biscuits to the joint to keep things aligned during glue-up. I use a special clamping jig (see below and right) that I designed for assembling corner cupboards. Make sure you have plenty of clamps s shelves are nearly all the same size, so I milled and glued individual boards to create enough blanks for all eight pieces, using the larger, lower shelf dimension to start. By offsetting the boards, as shown in the photo, you can lay out two interlocking triangular shapes per blank, reducing waste. 72 Popular Woodworking December 2002 |


