Popular Woodworking 2002-12 № 131, страница 63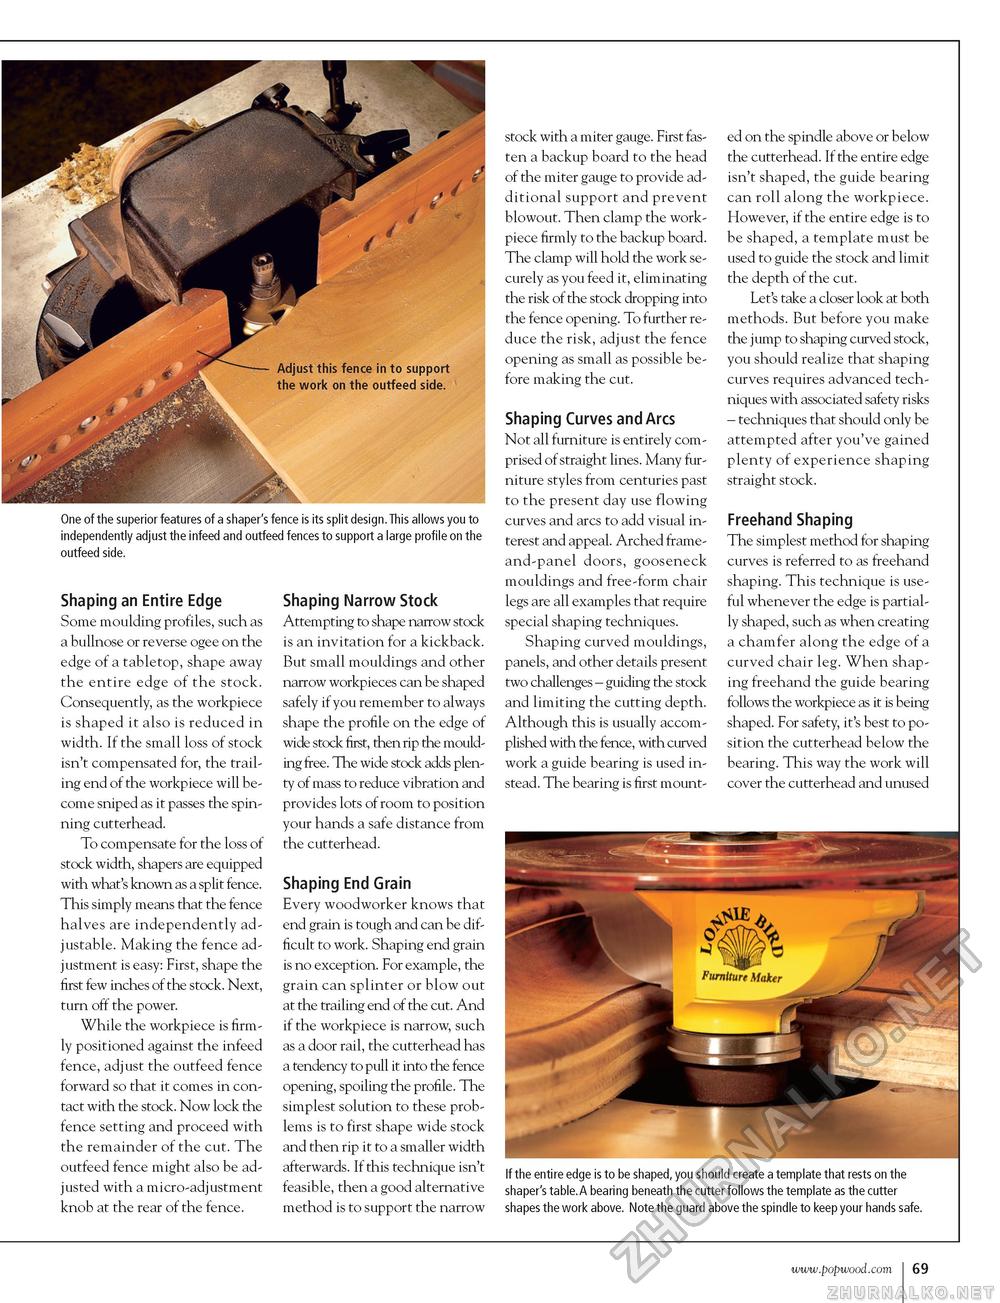
Adjust this fence in to support the work on the outfeed side. One of the superior features of a shaper's fence is its split design. This allows you to independently adjust the infeed and outfeed fences to support a large profile on the outfeed side. Shaping an Entire Edge Some moulding profiles, such as a bullnose or reverse ogee on the edge of a tabletop, shape away the entire edge of the stock. Consequently, as the workpiece is shaped it also is reduced in width. If the small loss of stock isn't compensated for, the trailing end of the workpiece will become sniped as it passes the spinning cutterhead. To compensate for the loss of stock width, shapers are equipped with what's known as a split fence. This simply means that the fence halves are independently adjustable. Making the fence adjustment is easy: First, shape the first few inches of the stock. Next, turn off the power. While the workpiece is firmly positioned against the infeed fence, adjust the outfeed fence forward so that it comes in contact with the stock. Now lock the fence setting and proceed with the remainder of the cut. The outfeed fence might also be adjusted with a micro-adjustment knob at the rear of the fence. Shaping Narrow Stock Attempting to shape narrow stock is an invitation for a kickback. But small mouldings and other narrow workpieces can be shaped safely if you remember to always shape the profile on the edge of wide stock first, then rip the moulding free. The wide stock adds plenty of mass to reduce vibration and provides lots of room to position your hands a safe distance from the cutterhead. Shaping End Grain Every woodworker knows that end grain is tough and can be difficult to work. Shaping end grain is no exception. For example, the grain can splinter or blow out at the trailing end of the cut. And if the workpiece is narrow, such as a door rail, the cutterhead has a tendency to pull it into the fence opening, spoiling the profile. The simplest solution to these problems is to first shape wide stock and then rip it to a smaller width afterwards. If this technique isn't feasible, then a good alternative method is to support the narrow stock with a miter gauge. First fasten a backup board to the head of the miter gauge to provide additional support and prevent blowout. Then clamp the work-piece firmly to the backup board. The clamp will hold the work securely as you feed it, eliminating the risk of the stock dropping into the fence opening. To further reduce the risk, adjust the fence opening as small as possible before making the cut. Shaping Curves and Arcs Not all furniture is entirely comprised of straight lines. Many furniture styles from centuries past to the present day use flowing curves and arcs to add visual interest and appeal. Arched frame-and-panel doors, gooseneck mouldings and free-form chair legs are all examples that require special shaping techniques. Shaping curved mouldings, panels, and other details present two challenges - guiding the stock and limiting the cutting depth. Although this is usually accomplished with the fence, with curved work a guide bearing is used instead. The bearing is first mount ed on the spindle above or below the cutterhead. If the entire edge isn't shaped, the guide bearing can roll along the workpiece. However, if the entire edge is to be shaped, a template must be used to guide the stock and limit the depth of the cut. Let's take a closer look at both methods. But before you make the jump to shaping curved stock, you should realize that shaping curves requires advanced techniques with associated safety risks - techniques that should only be attempted after you've gained plenty of experience shaping straight stock. Freehand Shaping The simplest method for shaping curves is referred to as freehand shaping. This technique is useful whenever the edge is partially shaped, such as when creating a chamfer along the edge of a curved chair leg. When shaping freehand the guide bearing follows the workpiece as it is being shaped. For safety, it's best to position the cutterhead below the bearing. This way the work will cover the cutterhead and unused If the entire edge is to be shaped, you should create a template that rests on the shaper's table.A bearing beneath the cutter follows the template as the cutter shapes the work above. Note the guard above the spindle to keep your hands safe. |


