Popular Woodworking 2003-02 № 132, страница 52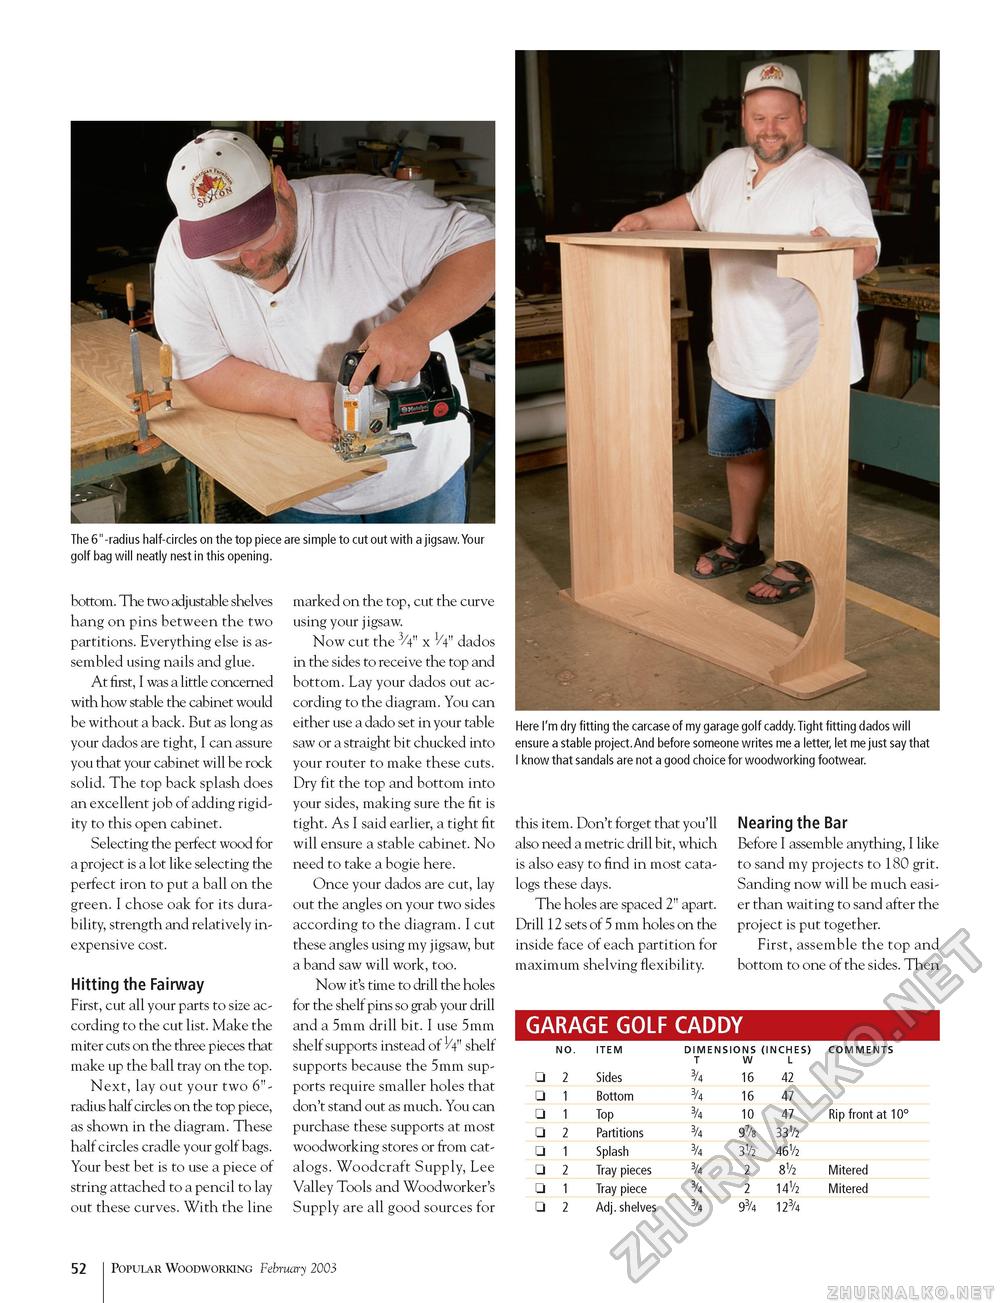
The 6"-radius half-circles on the top piece are simple to cut out with a jigsaw. Your golf bag will neatly nest in this opening. bottom. The two adjustable shelves hang on pins between the two partitions. Everything else is assembled using nails and glue. At first, I was a little concerned with how stable the cabinet would be without a back. But as long as your dados are tight, I can assure you that your cabinet will be rock solid. The top back splash does an excellent job of adding rigidity to this open cabinet. Selecting the perfect wood for a project is a lot like selecting the perfect iron to put a ball on the green. I chose oak for its durability, strength and relatively inexpensive cost. Hitting the Fairway First, cut all your parts to size according to the cut list. Make the miter cuts on the three pieces that make up the ball tray on the top. Next, lay out your two 6"-radius half circles on the top piece, as shown in the diagram. These half circles cradle your golf bags. Your best bet is to use a piece of string attached to a pencil to lay out these curves. With the line marked on the top, cut the curve using your jigsaw. Now cut the 3/4" x 1/4" dados in the sides to receive the top and bottom. Lay your dados out according to the diagram. You can either use a dado set in your table saw or a straight bit chucked into your router to make these cuts. Dry fit the top and bottom into your sides, making sure the fit is tight. As I said earlier, a tight fit will ensure a stable cabinet. No need to take a bogie here. Once your dados are cut, lay out the angles on your two sides according to the diagram. I cut these angles using my jigsaw, but a band saw will work, too. Now it's time to drill the holes for the shelf pins so grab your drill and a 5mm drill bit. I use 5mm shelf supports instead of 1/4" shelf supports because the 5mm supports require smaller holes that don't stand out as much. You can purchase these supports at most woodworking stores or from catalogs. Woodcraft Supply, Lee Valley Tools and Woodworker's Supply are all good sources for Here I'm dry fitting the carcase of my garage golf caddy. Tight fitting dados will ensure a stable project.And before someone writes me a letter, let me just say that I know that sandals are not a good choice for woodworking footwear. this item. Don't forget that you'll also need a metric drill bit, which is also easy to find in most catalogs these days. The holes are spaced 2" apart. Drill 12 sets of 5 mm holes on the inside face of each partition for maximum shelving flexibility. Nearing the Bar Before I assemble anything, I like to sand my projects to 180 grit. Sanding now will be much easier than waiting to sand after the project is put together. First, assemble the top and bottom to one of the sides. Then GARAGE GOLF CADDY
52 Popular Woodworking February 2003 |
||||||||||||||||||||||||||||||||||||||||||||||||||||||||||||||||||||||


