Popular Woodworking 2003-02 № 132, страница 53
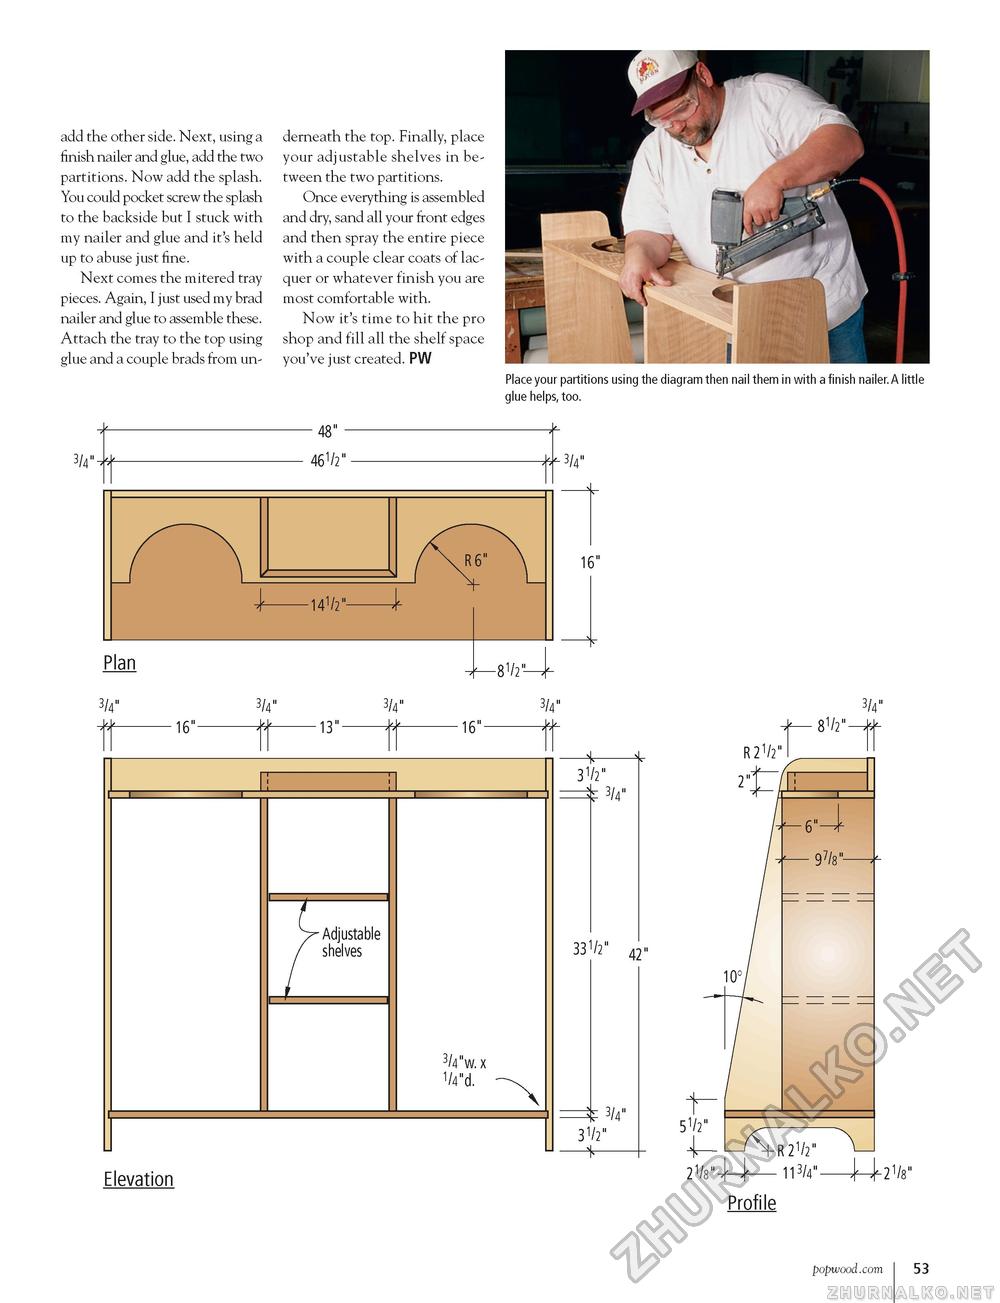
add the other side. Next, using a finish nailer and glue, add the two partitions. Now add the splash. You could pocket screw the splash to the backside but I stuck with my nailer and glue and it's held up to abuse just fine. Next comes the mitered tray pieces. Again, I just used my brad nailer and glue to assemble these. Attach the tray to the top using glue and a couple brads from un- 3/4" derneath the top. Finally, place your adjustable shelves in between the two partitions. Once everything is assembled and dry, sand all your front edges and then spray the entire piece with a couple clear coats of lacquer or whatever finish you are most comfortable with. Now it's time to hit the pro shop and fill all the shelf space you've just created. PW 48" Place your partitions using the diagram then nail them in with a finish nailer.A little glue helps, too. 461/2" ^ 3/4" Plan 3/4" 16"- Elevation -141/2"- 3/4" 3/4" -13"- - Adjustable shelves 16" -81/2^ 16" 3/4"w. x 1/4"d. 3/4" -4- 31/2" =t 3/4" 331/2" 42" fc 3/4" 31/2" —S— R 21/2" 2" 51/2" 21/2" 2V8"^—113/4"—J-^hw Profile popwood.com 53 |


