Popular Woodworking 2003-02 № 132, страница 56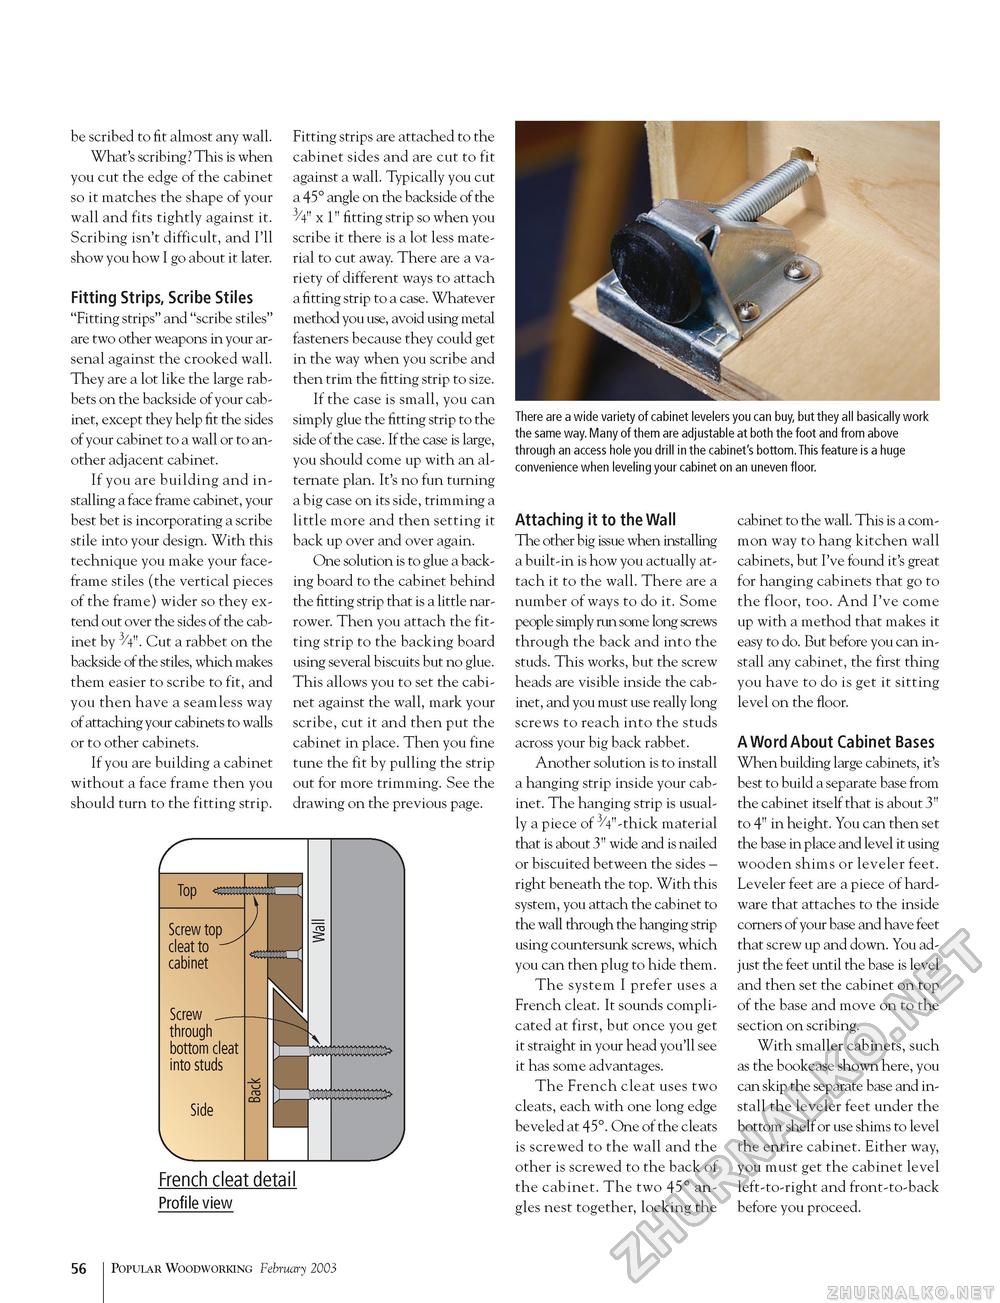
There are a wide variety of cabinet levelers you can buy, but they all basically work the same way. Many of them are adjustable at both the foot and from above through an access hole you drill in the cabinet's bottom.This feature is a huge convenience when leveling your cabinet on an uneven floor. be scribed to fit almost any wall. What's scribing? This is when you cut the edge of the cabinet so it matches the shape of your wall and fits tightly against it. Scribing isn't difficult, and I'll show you how I go about it later. Fitting Strips, Scribe Stiles "Fitting strips" and "scribe stiles" are two other weapons in your arsenal against the crooked wall. They are a lot like the large rabbets on the backside of your cabinet, except they help fit the sides of your cabinet to a wall or to another adjacent cabinet. If you are building and installing a face frame cabinet, your best bet is incorporating a scribe stile into your design. With this technique you make your face-frame stiles (the vertical pieces of the frame) wider so they extend out over the sides of the cabinet by 3/4". Cut a rabbet on the backside of the stiles, which makes them easier to scribe to fit, and you then have a seamless way of attaching your cabinets to walls or to other cabinets. If you are building a cabinet without a face frame then you should turn to the fitting strip. Fitting strips are attached to the cabinet sides and are cut to fit against a wall. Typically you cut a 45° angle on the backside of the 3/4" x 1" fitting strip so when you scribe it there is a lot less material to cut away. There are a variety of different ways to attach a fitting strip to a case. Whatever method you use, avoid using metal fasteners because they could get in the way when you scribe and then trim the fitting strip to size. If the case is small, you can simply glue the fitting strip to the side of the case. If the case is large, you should come up with an alternate plan. It's no fun turning a big case on its side, trimming a little more and then setting it back up over and over again. One solution is to glue a backing board to the cabinet behind the fitting strip that is a little narrower. Then you attach the fitting strip to the backing board using several biscuits but no glue. This allows you to set the cabinet against the wall, mark your scribe, cut it and then put the cabinet in place. Then you fine tune the fit by pulling the strip out for more trimming. See the drawing on the previous page. Attaching it to the Wall The other big issue when installing a built-in is how you actually attach it to the wall. There are a number of ways to do it. Some people simply run some long screws through the back and into the studs. This works, but the screw heads are visible inside the cabinet, and you must use really long screws to reach into the studs across your big back rabbet. Another solution is to install a hanging strip inside your cabinet. The hanging strip is usually a piece of 3/4"-thick material that is about 3" wide and is nailed or biscuited between the sides -right beneath the top. With this system, you attach the cabinet to the wall through the hanging strip using countersunk screws, which you can then plug to hide them. The system I prefer uses a French cleat. It sounds complicated at first, but once you get it straight in your head you'll see it has some advantages. The French cleat uses two cleats, each with one long edge beveled at 45°. One of the cleats is screwed to the wall and the other is screwed to the back of the cabinet. The two 45° angles nest together, locking the cabinet to the wall. This is a common way to hang kitchen wall cabinets, but I've found it's great for hanging cabinets that go to the floor, too. And I've come up with a method that makes it easy to do. But before you can install any cabinet, the first thing you have to do is get it sitting level on the floor. A Word About Cabinet Bases When building large cabinets, it's best to build a separate base from the cabinet itself that is about 3" to 4" in height. You can then set the base in place and level it using wooden shims or leveler feet. Leveler feet are a piece of hardware that attaches to the inside corners of your base and have feet that screw up and down. You adjust the feet until the base is level and then set the cabinet on top of the base and move on to the section on scribing. With smaller cabinets, such as the bookcase shown here, you can skip the separate base and install the leveler feet under the bottom shelf or use shims to level the entire cabinet. Either way, you must get the cabinet level left-to-right and front-to-back before you proceed. French cleat detail Profile view 56 Popular Woodworking February 2003 |


