Popular Woodworking 2003-02 № 132, страница 58
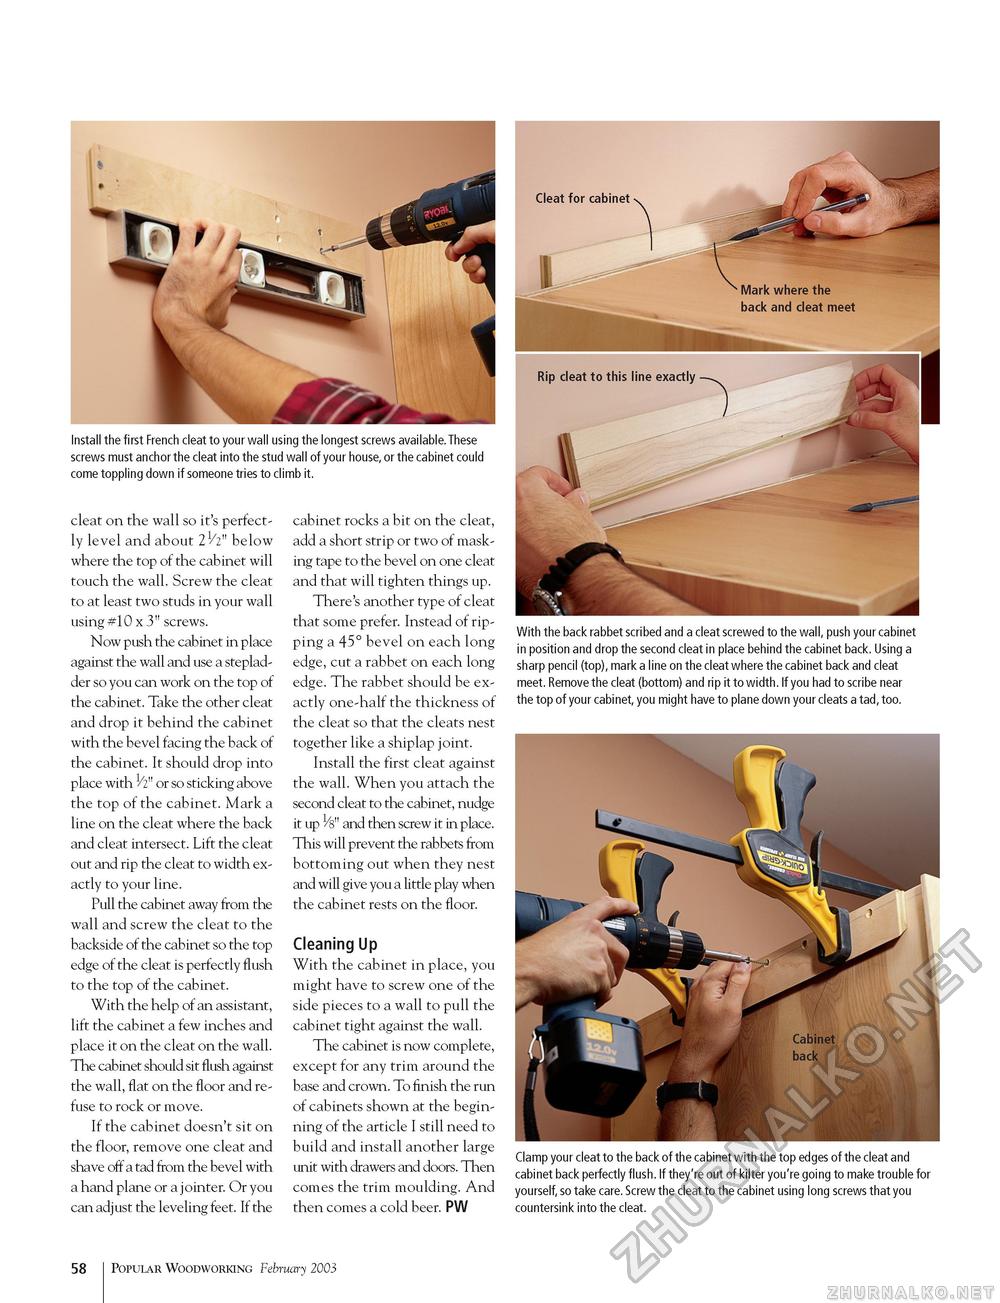
Install the first French cleat to your wall using the longest screws available.These screws must anchor the cleat into the stud wall of your house, or the cabinet could come toppling down if someone tries to climb it. cleat on the wall so it's perfectly level and about 21/2" below where the top of the cabinet will touch the wall. Screw the cleat to at least two studs in your wall using #10 x 3" screws. Now push the cabinet in place against the wall and use a steplad-der so you can work on the top of the cabinet. Take the other cleat and drop it behind the cabinet with the bevel facing the back of the cabinet. It should drop into place with 1/2" or so sticking above the top of the cabinet. Mark a line on the cleat where the back and cleat intersect. Lift the cleat out and rip the cleat to width exactly to your line. Pull the cabinet away from the wall and screw the cleat to the backside of the cabinet so the top edge of the cleat is perfectly flush to the top of the cabinet. With the help of an assistant, lift the cabinet a few inches and place it on the cleat on the wall. The cabinet should sit flush against the wall, flat on the floor and refuse to rock or move. If the cabinet doesn't sit on the floor, remove one cleat and shave off a tad from the bevel with a hand plane or a jointer. Or you can adjust the leveling feet. If the Cleat for cabinet • Mark where the back and cleat meet cabinet rocks a bit on the cleat, add a short strip or two of masking tape to the bevel on one cleat and that will tighten things up. There's another type of cleat that some prefer. Instead of ripping a 45° bevel on each long edge, cut a rabbet on each long edge. The rabbet should be exactly one-half the thickness of the cleat so that the cleats nest together like a shiplap joint. Install the first cleat against the wall. When you attach the second cleat to the cabinet, nudge it up 1/8" and then screw it in place. This will prevent the rabbets from bottoming out when they nest and will give you a little play when the cabinet rests on the floor. Cleaning Up With the cabinet in place, you might have to screw one of the side pieces to a wall to pull the cabinet tight against the wall. The cabinet is now complete, except for any trim around the base and crown. To finish the run of cabinets shown at the beginning of the article I still need to build and install another large unit with drawers and doors. Then comes the trim moulding. And then comes a cold beer. PW With the back rabbet scribed and a cleat screwed to the wall, push your cabinet in position and drop the second cleat in place behind the cabinet back. Using a sharp pencil (top), mark a line on the cleat where the cabinet back and cleat meet. Remove the cleat (bottom) and rip it to width. If you had to scribe near the top of your cabinet, you might have to plane down your cleats a tad, too. Clamp your cleat to the back of the cabinet with the top edges of the cleat and cabinet back perfectly flush. If they're out of kilter you're going to make trouble for yourself, so take care. Screw the cleat to the cabinet using long screws that you countersink into the cleat. 58 Popular Woodworking February 2003 |


