Popular Woodworking 2003-02 № 132, страница 57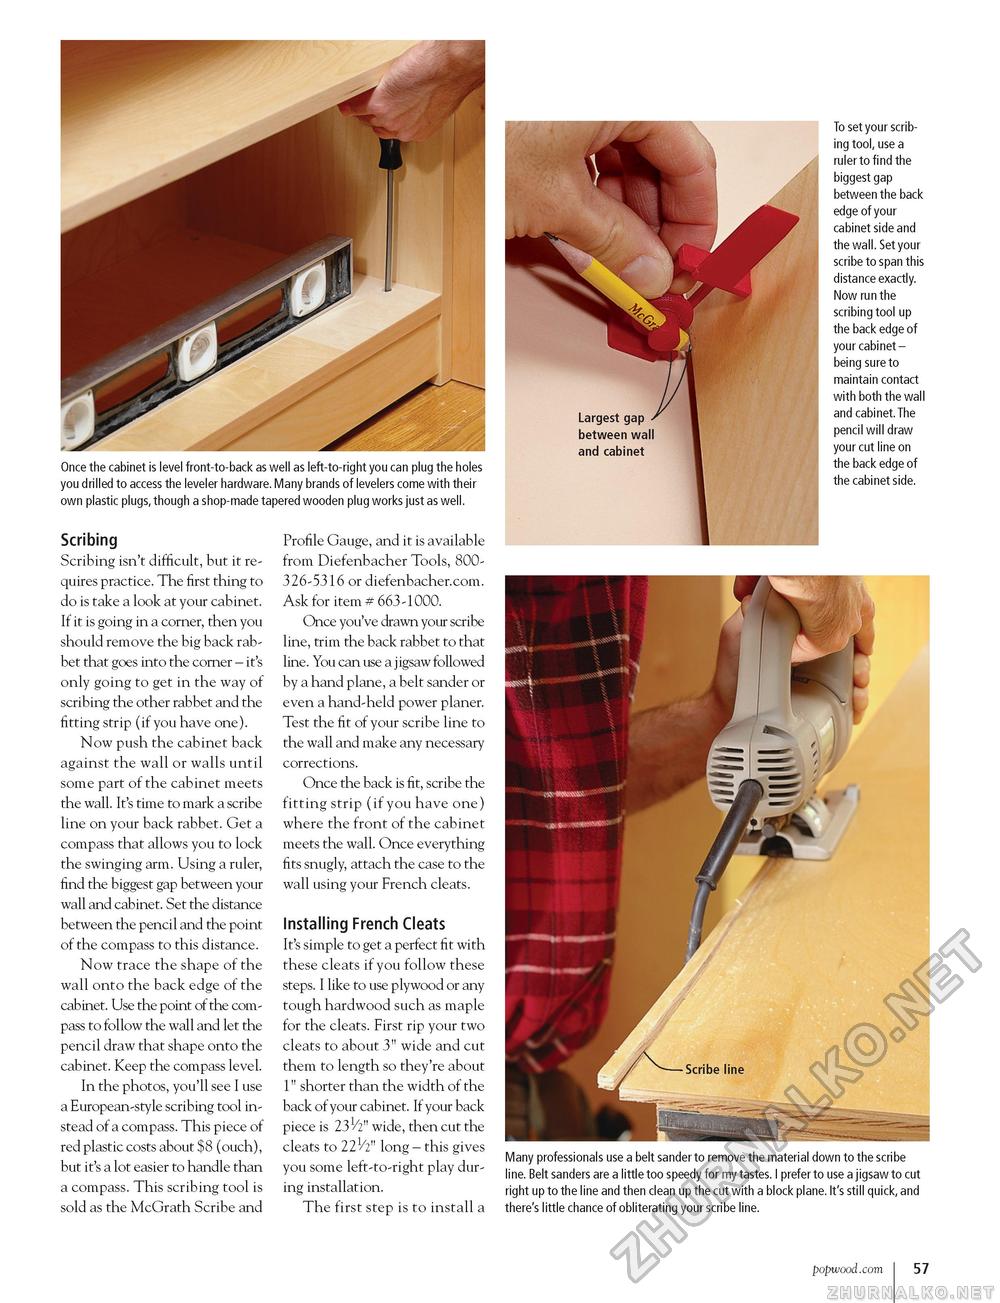
Once the cabinet is level front-to-back as well as left-to-right you can plug the holes you drilled to access the leveler hardware. Many brands of levelers come with their own plastic plugs, though a shop-made tapered wooden plug works just as well. Scribing Scribing isn't difficult, but it requires practice. The first thing to do is take a look at your cabinet. If it is going in a corner, then you should remove the big back rabbet that goes into the corner - it's only going to get in the way of scribing the other rabbet and the fitting strip (if you have one). Now push the cabinet back against the wall or walls until some part of the cabinet meets the wall. It's time to mark a scribe line on your back rabbet. Get a compass that allows you to lock the swinging arm. Using a ruler, find the biggest gap between your wall and cabinet. Set the distance between the pencil and the point of the compass to this distance. Now trace the shape of the wall onto the back edge of the cabinet. Use the point of the compass to follow the wall and let the pencil draw that shape onto the cabinet. Keep the compass level. In the photos, you'll see I use a European-style scribing tool instead of a compass. This piece of red plastic costs about $8 (ouch), but it's a lot easier to handle than a compass. This scribing tool is sold as the McGrath Scribe and Profile Gauge, and it is available from Diefenbacher Tools, 800326-5316 or diefenbacher.com. Ask for item # 663-1000. Once you've drawn your scribe line, trim the back rabbet to that line. You can use a jigsaw followed by a hand plane, a belt sander or even a hand-held power planer. Test the fit of your scribe line to the wall and make any necessary corrections. Once the back is fit, scribe the fitting strip (if you have one) where the front of the cabinet meets the wall. Once everything fits snugly, attach the case to the wall using your French cleats. Installing French Cleats It's simple to get a perfect fit with these cleats if you follow these steps. I like to use plywood or any tough hardwood such as maple for the cleats. First rip your two cleats to about 3" wide and cut them to length so they're about 1" shorter than the width of the back of your cabinet. If your back piece is 231/2" wide, then cut the cleats to 221/2" long - this gives you some left-to-right play during installation. The first step is to install a To set your scribing tool, use a ruler to find the biggest gap between the back edge of your cabinet side and the wall. Set your scribe to span this distance exactly. Now run the scribing tool up the back edge of your cabinet -being sure to maintain contact with both the wall and cabinet. The pencil will draw your cut line on the back edge of the cabinet side. Many professionals use a belt sander to remove the material down to the scribe line. Belt sanders are a little too speedy for my tastes. I prefer to use a jigsaw to cut right up to the line and then clean up the cut with a block plane. It's still quick, and there's little chance of obliterating your scribe line. popwood.com 57 |


