Popular Woodworking 2003-02 № 132, страница 61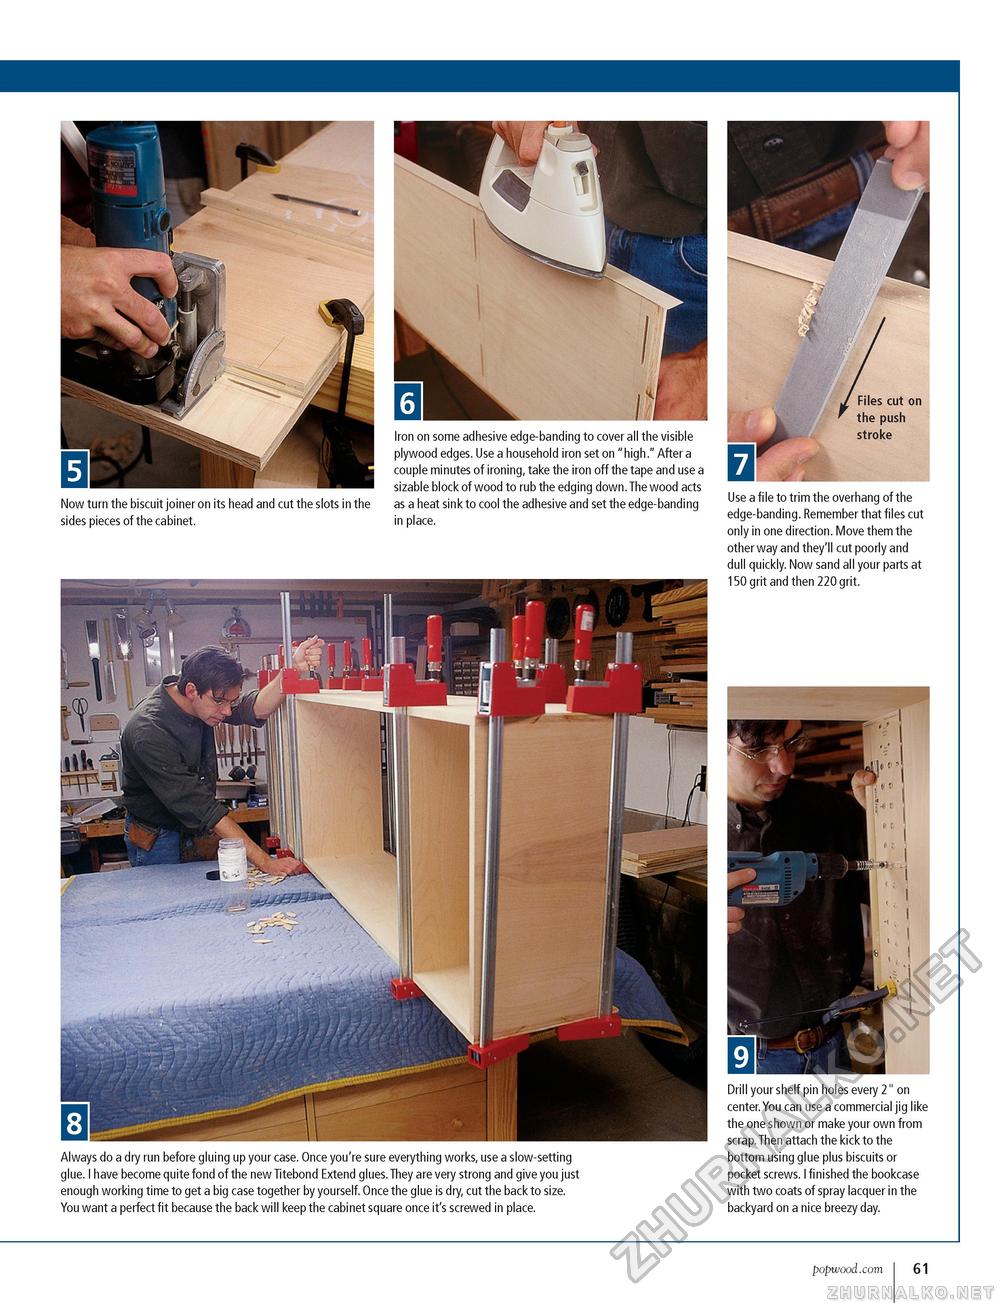
Now turn the biscuit joiner on its head and cut the slots in the sides pieces of the cabinet. Iron on some adhesive edge-banding to cover all the visible plywood edges. Use a household iron set on "high." After a couple minutes of ironing, take the iron off the tape and use a sizable block of wood to rub the edging down.The wood acts as a heat sink to cool the adhesive and set the edge-banding in place. Use a file to trim the overhang of the edge-banding. Remember that files cut only in one direction. Move them the other way and they'll cut poorly and dull quickly. Now sand all your parts at 150 grit and then 220 grit. Always do a dry run before gluing up your case. Once you're sure everything works, use a slow-setting glue. I have become quite fond of the new Titebond Extend glues.They are very strong and give you just enough working time to get a big case together by yourself. Once the glue is dry, cut the back to size. You want a perfect fit because the back will keep the cabinet square once it's screwed in place. Drill your shelf pin holes every 2" on center.You can use a commercial jig like the one shown or make your own from scrap. Then attach the kick to the bottom using glue plus biscuits or pocket screws. I finished the bookcase with two coats of spray lacquer in the backyard on a nice breezy day. popwood.com 61 |


