Popular Woodworking 2003-02 № 132, страница 92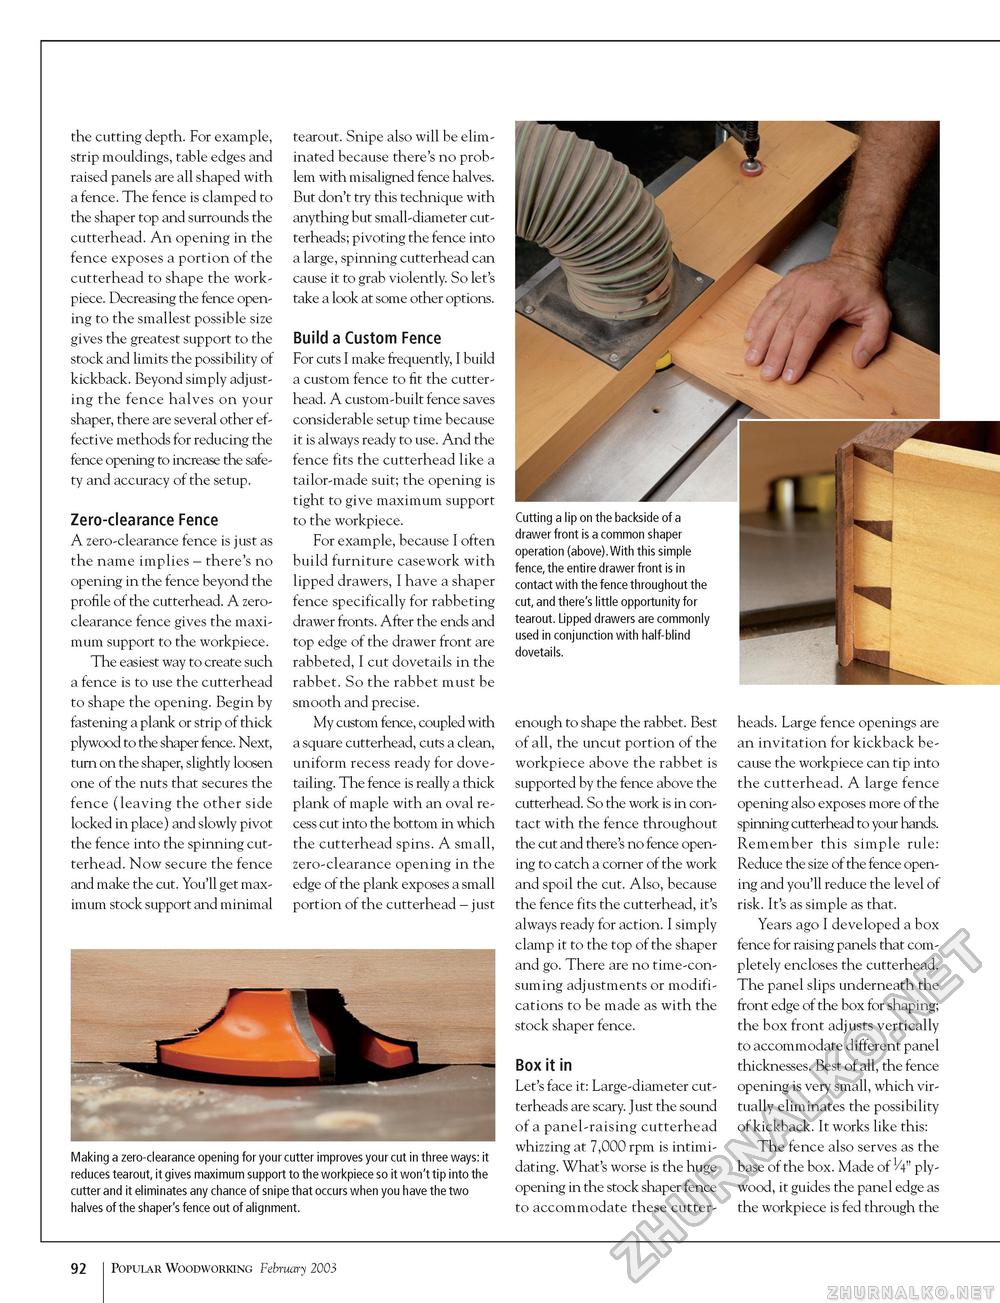
the cutting depth. For example, strip mouldings, table edges and raised panels are all shaped with a fence. The fence is clamped to the shaper top and surrounds the cutterhead. An opening in the fence exposes a portion of the cutterhead to shape the work-piece. Decreasing the fence opening to the smallest possible size gives the greatest support to the stock and limits the possibility of kickback. Beyond simply adjusting the fence halves on your shaper, there are several other effective methods for reducing the fence opening to increase the safety and accuracy of the setup. Zero-clearance Fence A zero-clearance fence is just as the name implies - there's no opening in the fence beyond the profile of the cutterhead. A zero-clearance fence gives the maximum support to the workpiece. The easiest way to create such a fence is to use the cutterhead to shape the opening. Begin by fastening a plank or strip of thick plywood to the shaper fence. Next, turn on the shaper, slightly loosen one of the nuts that secures the fence (leaving the other side locked in place) and slowly pivot the fence into the spinning cut-terhead. Now secure the fence and make the cut. You'll get maximum stock support and minimal tearout. Snipe also will be eliminated because there's no problem with misaligned fence halves. But don't try this technique with anything but small-diameter cut-terheads; pivoting the fence into a large, spinning cutterhead can cause it to grab violently. So let's take a look at some other options. Build a Custom Fence For cuts I make frequently, I build a custom fence to fit the cutter-head. A custom-built fence saves considerable setup time because it is always ready to use. And the fence fits the cutterhead like a tailor-made suit; the opening is tight to give maximum support to the workpiece. For example, because I often build furniture casework with lipped drawers, I have a shaper fence specifically for rabbeting drawer fronts. After the ends and top edge of the drawer front are rabbeted, I cut dovetails in the rabbet. So the rabbet must be smooth and precise. My custom fence, coupled with a square cutterhead, cuts a clean, uniform recess ready for dovetailing. The fence is really a thick plank of maple with an oval recess cut into the bottom in which the cutterhead spins. A small, zero-clearance opening in the edge of the plank exposes a small portion of the cutterhead - just Making a zero-clearance opening for your cutter improves your cut in three ways: it reduces tearout, it gives maximum support to the workpiece so it won't tip into the cutter and it eliminates any chance of snipe that occurs when you have the two halves of the shaper's fence out of alignment. Cutting a lip on the backside of a drawer front is a common shaper operation (above). With this simple fence, the entire drawer front is in contact with the fence throughout the cut, and there's little opportunity for tearout. Lipped drawers are commonly used in conjunction with half-blind dovetails. enough to shape the rabbet. Best of all, the uncut portion of the workpiece above the rabbet is supported by the fence above the cutterhead. So the work is in contact with the fence throughout the cut and there's no fence opening to catch a corner of the work and spoil the cut. Also, because the fence fits the cutterhead, it's always ready for action. I simply clamp it to the top of the shaper and go. There are no time-consuming adjustments or modifications to be made as with the stock shaper fence. Box it in Let's face it: Large-diameter cut-terheads are scary. Just the sound of a panel-raising cutterhead whizzing at 7,000 rpm is intimidating. What's worse is the huge opening in the stock shaper fence to accommodate these cutter- heads. Large fence openings are an invitation for kickback because the workpiece can tip into the cutterhead. A large fence opening also exposes more of the spinning cutterhead to your hands. Remember this simple rule: Reduce the size of the fence opening and you'll reduce the level of risk. It's as simple as that. Years ago I developed a box fence for raising panels that completely encloses the cutterhead. The panel slips underneath the front edge of the box for shaping; the box front adjusts vertically to accommodate different panel thicknesses. Best of all, the fence opening is very small, which virtually eliminates the possibility of kickback. It works like this: The fence also serves as the base of the box. Made of H" plywood, it guides the panel edge as the workpiece is fed through the 92 Popular Woodworking February 2003 |


