Popular Woodworking 2003-04 № 133, страница 37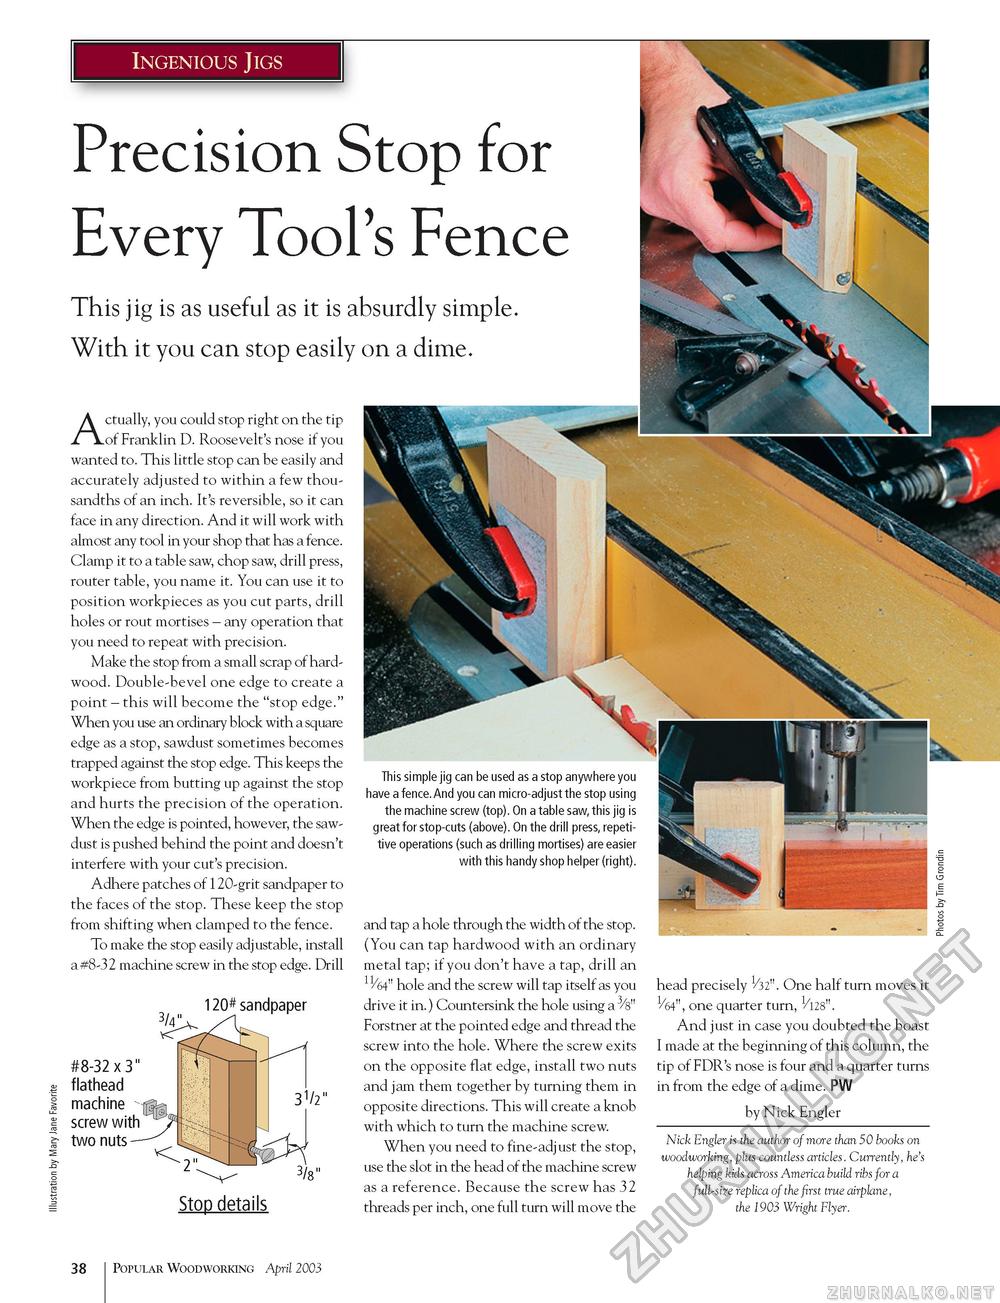
Ingenious Jigs Precision Stop for Every Tool's Fence This jig is as useful as it is absurdly simple. With it you can stop easily on a dime. Actually, you could stop right on the tip of Franklin D. Roosevelt's nose if you wanted to. This little stop can be easily and accurately adjusted to within a few thousandths of an inch. It's reversible, so it can face in any direction. And it will work with almost any tool in your shop that has a fence. Clamp it to a table saw, chop saw, drill press, router table, you name it. You can use it to position workpieces as you cut parts, drill holes or rout mortises - any operation that you need to repeat with precision. Make the stop from a small scrap of hardwood. Double-bevel one edge to create a point - this will become the "stop edge." When you use an ordinary block with a square edge as a stop, sawdust sometimes becomes trapped against the stop edge. This keeps the workpiece from butting up against the stop and hurts the precision of the operation. When the edge is pointed, however, the sawdust is pushed behind the point and doesn't interfere with your cut's precision. Adhere patches of 120-grit sandpaper to the faces of the stop. These keep the stop from shifting when clamped to the fence. To make the stop easily adjustable, install a #8-32 machine screw in the stop edge. Drill 120# sandpaper #8-32 x 3" g flathead J machine -§ screw with g- two nuts Stop details This simple jig can be used as a stop anywhere you have a fence.And you can micro-adjust the stop using the machine screw (top). On a table saw, this jig is great for stop-cuts (above). On the drill press, repetitive operations (such as drilling mortises) are easier with this handy shop helper (right). and tap a hole through the width of the stop. (You can tap hardwood with an ordinary metal tap; if you don't have a tap, drill an hole and the screw will tap itself as you drive it in.) Countersink the hole using a 3/8" Forstner at the pointed edge and thread the screw into the hole. Where the screw exits on the opposite flat edge, install two nuts and jam them together by turning them in opposite directions. This will create a knob with which to turn the machine screw. When you need to fine-adjust the stop, use the slot in the head of the machine screw as a reference. Because the screw has 32 threads per inch, one full turn will move the head precisely 1/32". One half turn moves it 1/64", one quarter turn, Vm". And just in case you doubted the boast I made at the beginning of this column, the tip of FDR's nose is four and a quarter turns in from the edge of a dime. PW by Nick Engler Nick Engler is the author of more than 50 books on woodworking, plus countless articles. Currently, he's helping kids across America build ribs for a full-size replica of the first true airplane, the 1903 Wright Flyer. 38 Popular Woodworking April 2003 |


