Popular Woodworking 2003-04 № 133, страница 39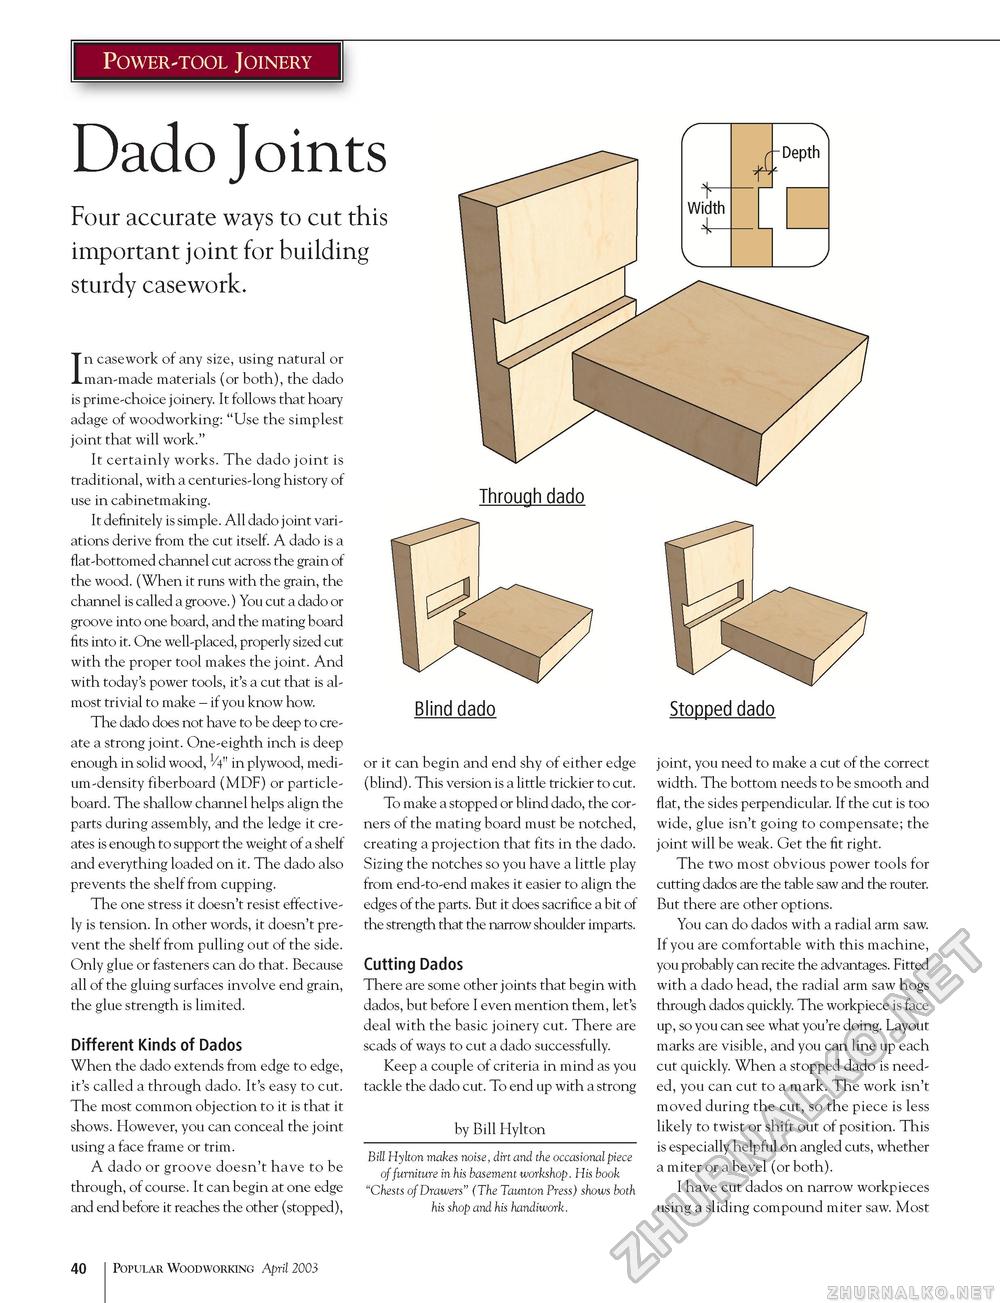
Power-tool Joinery Dado Joints Four accurate ways to cut this important joint for building sturdy casework. In casework of any size, using natural or man-made materials (or both), the dado is prime-choice joinery. It follows that hoary adage of woodworking: "Use the simplest joint that will work." It certainly works. The dado joint is traditional, with a centuries-long history of use in cabinetmaking. It definitely is simple. All dado joint variations derive from the cut itself. A dado is a flat-bottomed channel cut across the grain of the wood. (When it runs with the grain, the channel is called a groove.) You cut a dado or groove into one board, and the mating board fits into it. One well-placed, properly sized cut with the proper tool makes the joint. And with today's power tools, it's a cut that is almost trivial to make - if you know how. The dado does not have to be deep to create a strong joint. One-eighth inch is deep enough in solid wood, 1/4" in plywood, medium-density fiberboard (MDF) or particle-board. The shallow channel helps align the parts during assembly, and the ledge it creates is enough to support the weight of a shelf and everything loaded on it. The dado also prevents the shelf from cupping. The one stress it doesn't resist effectively is tension. In other words, it doesn't prevent the shelf from pulling out of the side. Only glue or fasteners can do that. Because all of the gluing surfaces involve end grain, the glue strength is limited. Blind dado Different Kinds of Dados When the dado extends from edge to edge, it's called a through dado. It's easy to cut. The most common objection to it is that it shows. However, you can conceal the joint using a face frame or trim. A dado or groove doesn't have to be through, of course. It can begin at one edge and end before it reaches the other (stopped), or it can begin and end shy of either edge (blind). This version is a little trickier to cut. To make a stopped or blind dado, the corners of the mating board must be notched, creating a projection that fits in the dado. Sizing the notches so you have a little play from end-to-end makes it easier to align the edges of the parts. But it does sacrifice a bit of the strength that the narrow shoulder imparts. Cutting Dados There are some other joints that begin with dados, but before I even mention them, let's deal with the basic joinery cut. There are scads of ways to cut a dado successfully. Keep a couple of criteria in mind as you tackle the dado cut. To end up with a strong by Bill Hylton Bill Hylton makes noise, dirt and the occasional piece of furniture in his basement workshop. His book "Chests of Drawers" (The Taunton Press) shows both his shop and his handiwork. Stopped dado joint, you need to make a cut of the correct width. The bottom needs to be smooth and flat, the sides perpendicular. If the cut is too wide, glue isn't going to compensate; the joint will be weak. Get the fit right. The two most obvious power tools for cutting dados are the table saw and the router. But there are other options. You can do dados with a radial arm saw. If you are comfortable with this machine, you probably can recite the advantages. Fitted with a dado head, the radial arm saw hogs through dados quickly. The workpiece is face up, so you can see what you're doing. Layout marks are visible, and you can line up each cut quickly. When a stopped dado is needed, you can cut to a mark. The work isn't moved during the cut, so the piece is less likely to twist or shift out of position. This is especially helpful on angled cuts, whether a miter or a bevel (or both). I have cut dados on narrow workpieces using a sliding compound miter saw. Most 40 Popular Woodworking April 2003 |


