Popular Woodworking 2003-04 № 133, страница 56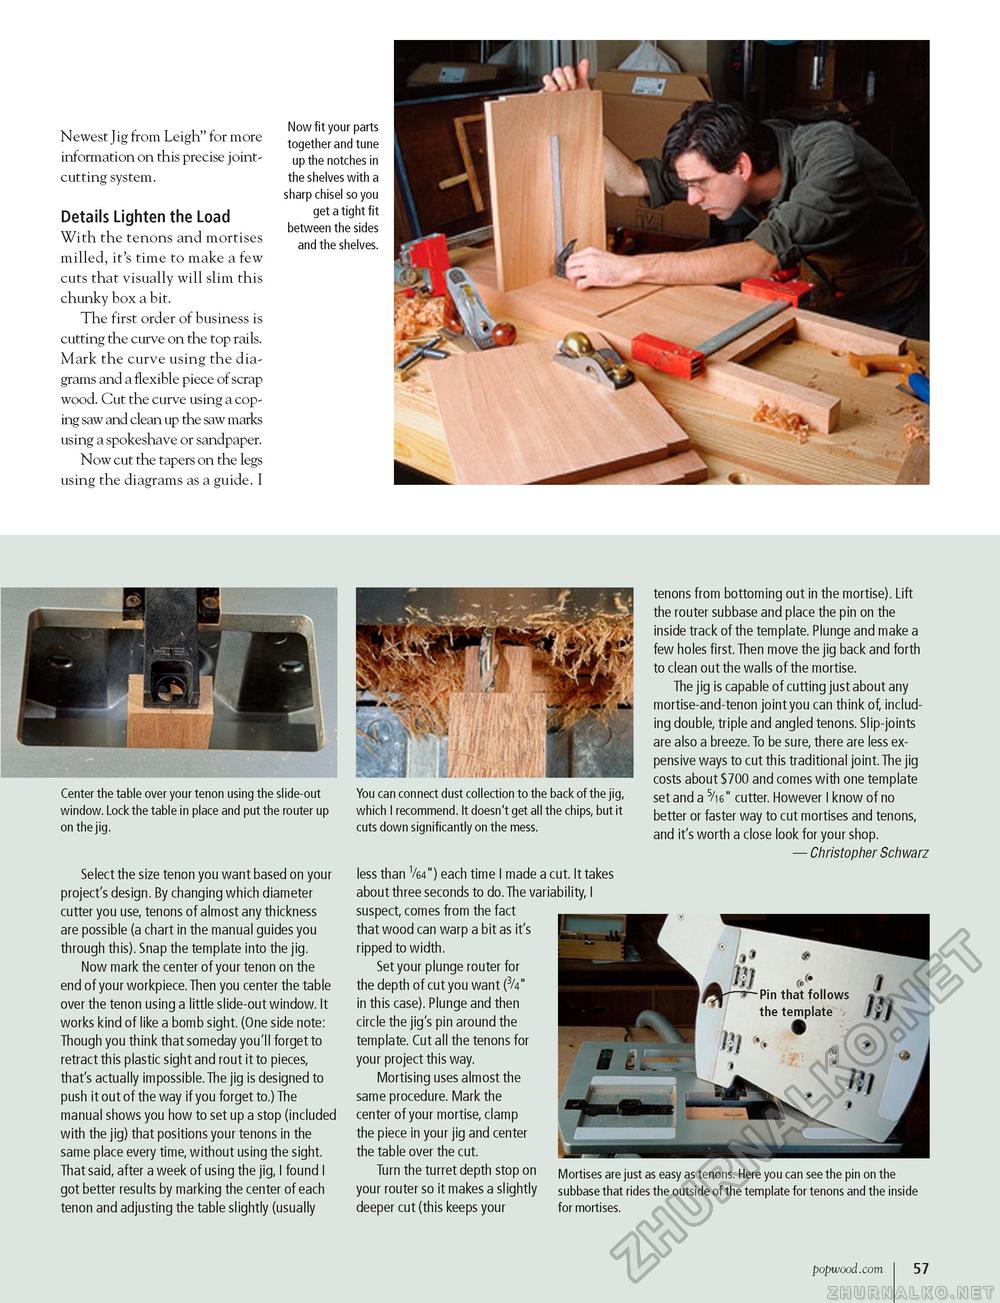
Newest Jig from Leigh" for more information on this precise joint-cutting system. Details Lighten the Load With the tenons and mortises milled, it's time to make a few cuts that visually will slim this chunky box a bit. The first order of business is cutting the curve on the top rails. Mark the curve using the diagrams and a flexible piece of scrap wood. Cut the curve using a coping saw and clean up the saw marks using a spokeshave or sandpaper. Now cut the tapers on the legs using the diagrams as a guide. I Now fit your parts together and tune up the notches in the shelves with a sharp chisel so you get a tight fit between the sides and the shelves. Center the table over your tenon using the slide-out window. Lock the table in place and put the router up on the jig. Select the size tenon you want based on your project's design. By changing which diameter cutter you use, tenons of almost any thickness are possible (a chart in the manual guides you through this). Snap the template into the jig. Now mark the center of your tenon on the end of your workpiece.Then you center the table over the tenon using a little slide-out window. It works kind of like a bomb sight. (One side note: Though you think that someday you'll forget to retract this plastic sight and rout it to pieces, that's actually impossible. The jig is designed to push it out of the way if you forget to.) The manual shows you how to set up a stop (included with the jig) that positions your tenons in the same place every time, without using the sight. That said, after a week of using the jig, I found I got better results by marking the center of each tenon and adjusting the table slightly (usually You can connect dust collection to the back of the jig, which I recommend. It doesn't get all the chips, but it cuts down significantly on the mess. less than V64") each time I made a cut. It takes about three seconds to do. The variability, I suspect, comes from the fact that wood can warp a bit as it's ripped to width. Set your plunge router for the depth of cut you want (3/4M in this case). Plunge and then circle the jig's pin around the template. Cut all the tenons for your project this way. Mortising uses almost the same procedure. Mark the center of your mortise, clamp the piece in your jig and center the table over the cut. Turn the turret depth stop on your router so it makes a slightly deeper cut (this keeps your tenons from bottoming out in the mortise). Lift the router subbase and place the pin on the inside track of the template. Plunge and make a few holes first. Then move the jig back and forth to clean out the walls of the mortise. The jig is capable of cutting just about any mortise-and-tenon joint you can think of, including double, triple and angled tenons. Slip-joints are also a breeze. To be sure, there are less expensive ways to cut this traditional joint. The jig costs about $700 and comes with one template set and a 5/16" cutter. However I know of no better or faster way to cut mortises and tenons, and it's worth a close look for your shop. — Christopher Schwarz Mortises are just as easy as tenons. Here you can see the pin on the subbase that rides the outside of the template for tenons and the inside for mortises. popwood.com 57 |


