Popular Woodworking 2003-04 № 133, страница 55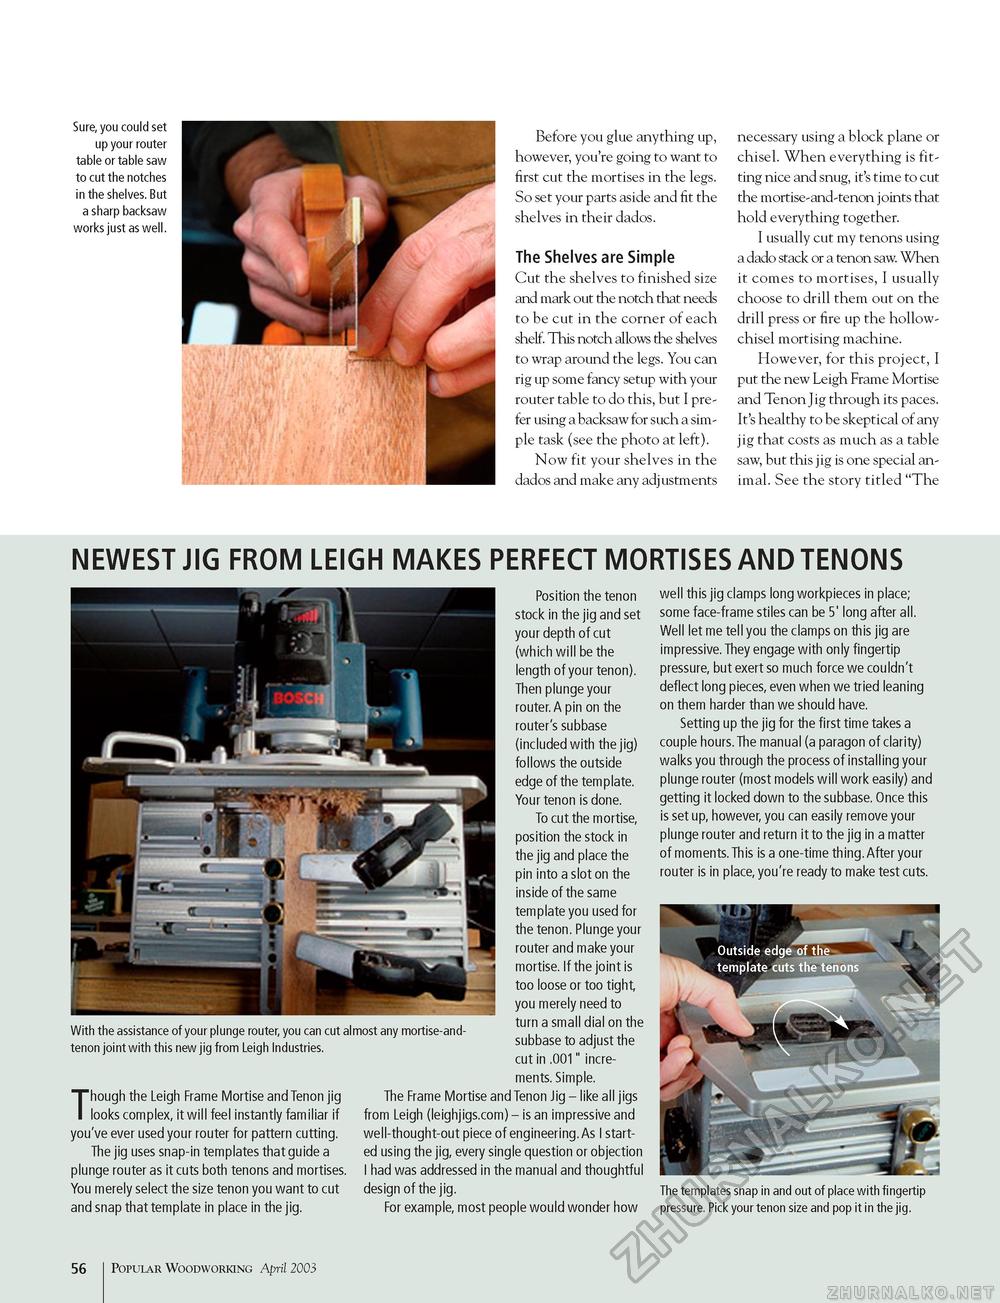
Sure, you could set up your router table or table saw to cut the notches in the shelves. But a sharp backsaw works just as well. Before you glue anything up, however, you're going to want to first cut the mortises in the legs. So set your parts aside and fit the shelves in their dados. The Shelves are Simple Cut the shelves to finished size and mark out the notch that needs to be cut in the corner of each shelf. This notch allows the shelves to wrap around the legs. You can rig up some fancy setup with your router table to do this, but I prefer using a backsaw for such a simple task (see the photo at left). Now fit your shelves in the dados and make any adjustments necessary using a block plane or chisel. When everything is fitting nice and snug, it's time to cut the mortise-and-tenon joints that hold everything together. I usually cut my tenons using a dado stack or a tenon saw. When it comes to mortises, I usually choose to drill them out on the drill press or fire up the hollow-chisel mortising machine. However, for this project, I put the new Leigh Frame Mortise and Tenon Jig through its paces. It's healthy to be skeptical of any jig that costs as much as a table saw, but this jig is one special animal. See the story titled "The NEWEST JIG FROM LEIGH MAKES PERFECT MORTISES AND TENONS With the assistance of your plunge router, you can cut almost any mortise-and-tenon joint with this new jig from Leigh Industries. Though the Leigh Frame Mortise and Tenon jig looks complex, it will feel instantly familiar if you've ever used your router for pattern cutting. The jig uses snap-in templates that guide a plunge router as it cuts both tenons and mortises. You merely select the size tenon you want to cut and snap that template in place in the jig. Position the tenon stock in the jig and set your depth of cut (which will be the length of your tenon). Then plunge your router. A pin on the router's subbase (included with the jig) follows the outside edge of the template. Your tenon is done. To cut the mortise, position the stock in the jig and place the pin into a slot on the inside of the same template you used for the tenon. Plunge your router and make your mortise. If the joint is too loose or too tight, you merely need to turn a small dial on the subbase to adjust the cut in .001" increments. Simple. The Frame Mortise and Tenon Jig - like all jigs from Leigh (leighjigs.com) - is an impressive and well-thought-out piece of engineering.As I started using the jig, every single question or objection I had was addressed in the manual and thoughtful design of the jig. For example, most people would wonder how well this jig clamps long workpieces in place; some face-frame stiles can be 5' long after all. Well let me tell you the clamps on this jig are impressive. They engage with only fingertip pressure, but exert so much force we couldn't deflect long pieces, even when we tried leaning on them harder than we should have. Setting up the jig for the first time takes a couple hours.The manual (a paragon of clarity) walks you through the process of installing your plunge router (most models will work easily) and getting it locked down to the subbase. Once this is set up, however, you can easily remove your plunge router and return it to the jig in a matter of moments.This is a one-time thing. After your router is in place, you're ready to make test cuts. The templates snap in and out of place with fingertip pressure. Pick your tenon size and pop it in the jig. 56 Popular Woodworking April 2003 |


