Popular Woodworking 2003-06 № 134, страница 52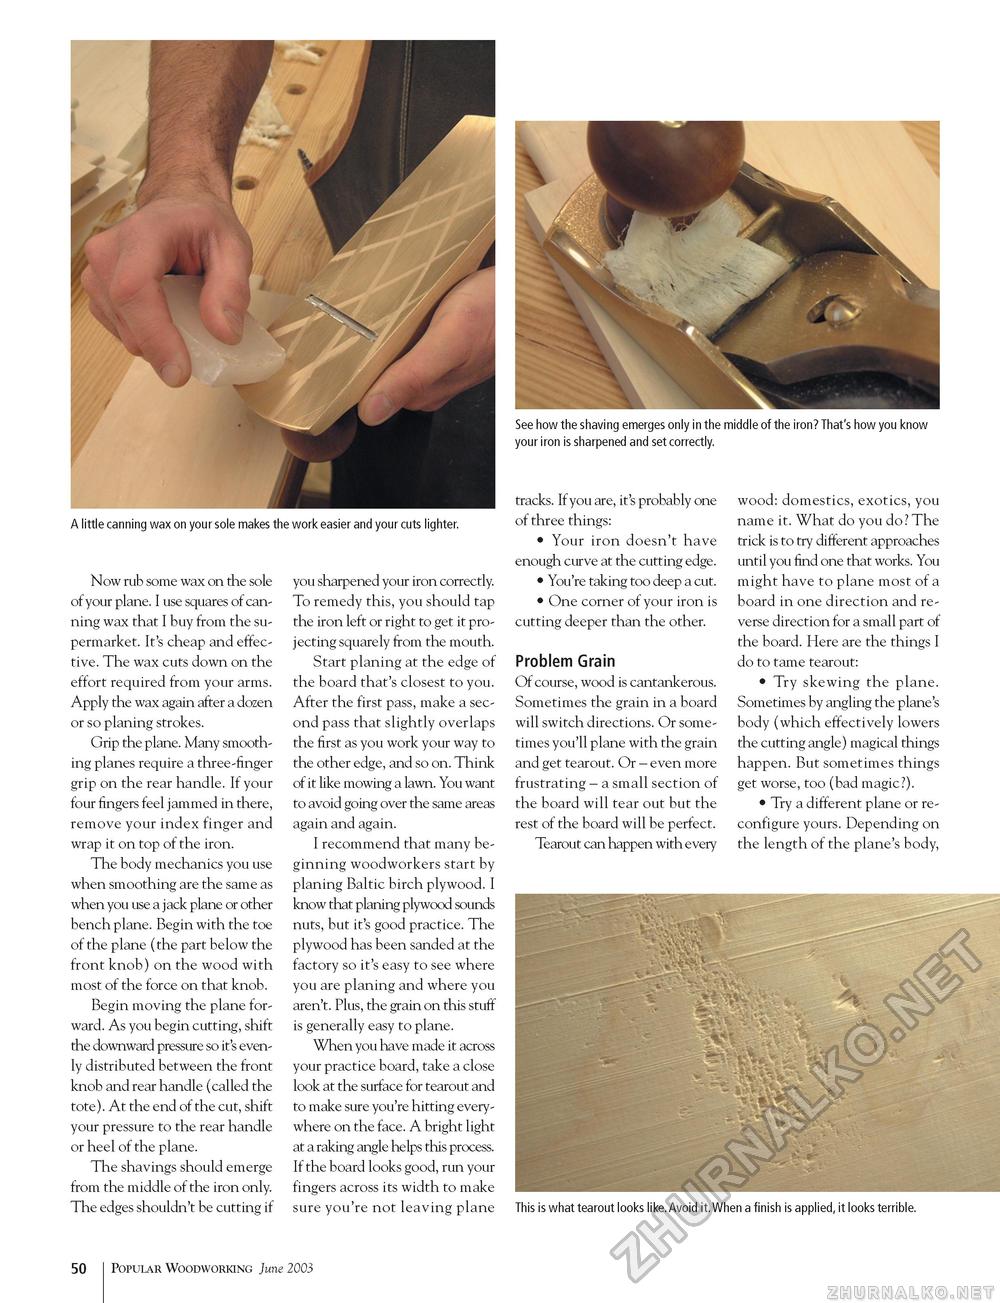
A little canning wax on your sole makes the work easier and your cuts lighter. Now rub some wax on the sole of your plane. I use squares of canning wax that I buy from the supermarket. It's cheap and effective. The wax cuts down on the effort required from your arms. Apply the wax again after a dozen or so planing strokes. Grip the plane. Many smoothing planes require a three-finger grip on the rear handle. If your four fingers feel jammed in there, remove your index finger and wrap it on top of the iron. The body mechanics you use when smoothing are the same as when you use a jack plane or other bench plane. Begin with the toe of the plane (the part below the front knob) on the wood with most of the force on that knob. Begin moving the plane forward. As you begin cutting, shift the downward pressure so it's evenly distributed between the front knob and rear handle (called the tote). At the end of the cut, shift your pressure to the rear handle or heel of the plane. The shavings should emerge from the middle of the iron only. The edges shouldn't be cutting if See how the shaving emerges only in the middle of the iron? That's how you know your iron is sharpened and set correctly. you sharpened your iron correctly. To remedy this, you should tap the iron left or right to get it projecting squarely from the mouth. Start planing at the edge of the board that's closest to you. After the first pass, make a second pass that slightly overlaps the first as you work your way to the other edge, and so on. Think of it like mowing a lawn. You want to avoid going over the same areas again and again. I recommend that many beginning woodworkers start by planing Baltic birch plywood. I know that planing plywood sounds nuts, but it's good practice. The plywood has been sanded at the factory so it's easy to see where you are planing and where you aren't. Plus, the grain on this stuff is generally easy to plane. When you have made it across your practice board, take a close look at the surface for tearout and to make sure you're hitting everywhere on the face. A bright light at a raking angle helps this process. If the board looks good, run your fingers across its width to make sure you're not leaving plane tracks. If you are, it's probably one of three things: • Your iron doesn't have enough curve at the cutting edge. • You're taking too deep a cut. • One corner of your iron is cutting deeper than the other. Problem Grain Of course, wood is cantankerous. Sometimes the grain in a board will switch directions. Or sometimes you'll plane with the grain and get tearout. Or - even more frustrating - a small section of the board will tear out but the rest of the board will be perfect. Tearout can happen with every wood: domestics, exotics, you name it. What do you do? The trick is to try different approaches until you find one that works. You might have to plane most of a board in one direction and reverse direction for a small part of the board. Here are the things I do to tame tearout: • Try skewing the plane. Sometimes by angling the plane's body (which effectively lowers the cutting angle) magical things happen. But sometimes things get worse, too (bad magic?). • Try a different plane or reconfigure yours. Depending on the length of the plane's body, This is what tearout looks like.Avoid it.When a finish is applied, it looks terrible. 50 Popular Woodworking June 2003 |


