Popular Woodworking 2003-08 № 135, страница 63
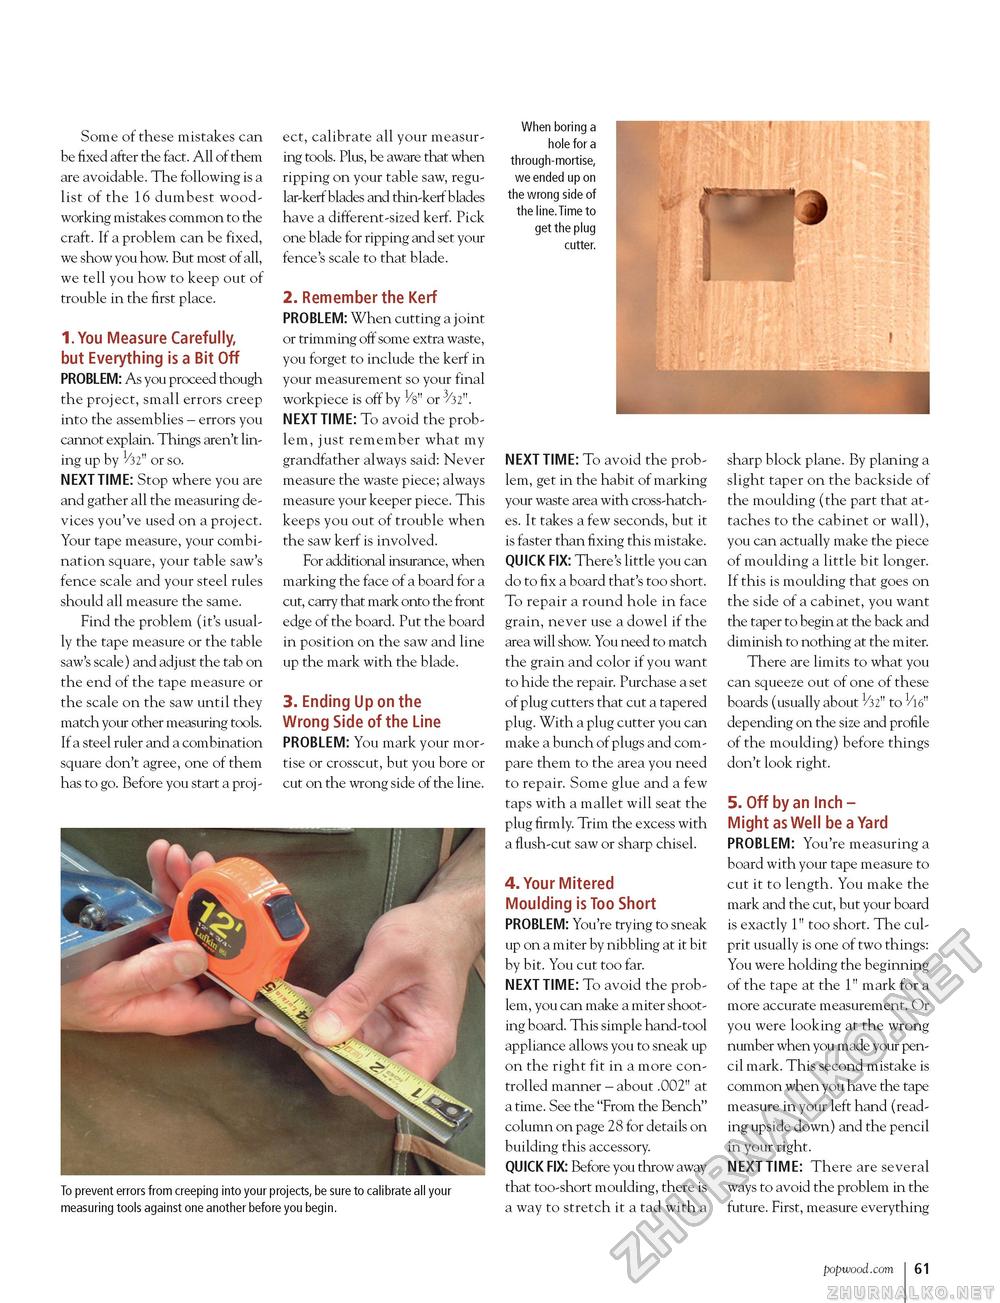
Some of these mistakes can be fixed after the fact. All of them are avoidable. The following is a list of the 16 dumbest woodworking mistakes common to the craft. If a problem can be fixed, we show you how. But most of all, we tell you how to keep out of trouble in the first place. I.You Measure Carefully, but Everything is a Bit Off PROBLEM: As you proceed though the project, small errors creep into the assemblies - errors you cannot explain. Things aren't lining up by 1/32" or so. NEXT TIME: Stop where you are and gather all the measuring devices you've used on a project. Your tape measure, your combination square, your table saw's fence scale and your steel rules should all measure the same. Find the problem (it's usually the tape measure or the table saw's scale) and adjust the tab on the end of the tape measure or the scale on the saw until they match your other measuring tools. If a steel ruler and a combination square don't agree, one of them has to go. Before you start a proj ect, calibrate all your measuring tools. Plus, be aware that when ripping on your table saw, regular-kerf blades and thin-kerf blades have a different-sized kerf. Pick one blade for ripping and set your fence's scale to that blade. 2. Remember the Kerf PROBLEM: When cutting a joint or trimming off some extra waste, you forget to include the kerf in your measurement so your final workpiece is off by 1/8" or NEXT TIME: To avoid the problem, just remember what my grandfather always said: Never measure the waste piece; always measure your keeper piece. This keeps you out of trouble when the saw kerf is involved. For additional insurance, when marking the face of a board for a cut, carry that mark onto the front edge of the board. Put the board in position on the saw and line up the mark with the blade. 3. Ending Up on the Wrong Side of the Line PROBLEM: You mark your mortise or crosscut, but you bore or cut on the wrong side of the line. When boring a hole for a through-mortise, we ended up on the wrong side of the line.Time to get the plug cutter. NEXT TIME: To avoid the problem, get in the habit of marking your waste area with cross-hatches. It takes a few seconds, but it is faster than fixing this mistake. QUICK FIX: There's little you can do to fix a board that's too short. To repair a round hole in face grain, never use a dowel if the area will show. You need to match the grain and color if you want to hide the repair. Purchase a set of plug cutters that cut a tapered plug. With a plug cutter you can make a bunch of plugs and compare them to the area you need to repair. Some glue and a few taps with a mallet will seat the plug firmly. Trim the excess with a flush-cut saw or sharp chisel. 4. Your Mitered Moulding is Too Short PROBLEM: You're trying to sneak up on a miter by nibbling at it bit by bit. You cut too far. NEXT TIME: To avoid the problem, you can make a miter shooting board. This simple hand-tool appliance allows you to sneak up on the right fit in a more controlled manner - about .002" at a time. See the "From the Bench" column on page 28 for details on building this accessory. QUICK FIX: Before you throw away that too-short moulding, there is a way to stretch it a tad with a sharp block plane. By planing a slight taper on the backside of the moulding (the part that attaches to the cabinet or wall), you can actually make the piece of moulding a little bit longer. If this is moulding that goes on the side of a cabinet, you want the taper to begin at the back and diminish to nothing at the miter. There are limits to what you can squeeze out of one of these boards (usually about 1/32" to 1/16" depending on the size and profile of the moulding) before things don't look right. 5. Off by an Inch -Might as Well be a Yard PROBLEM: You're measuring a board with your tape measure to cut it to length. You make the mark and the cut, but your board is exactly 1" too short. The culprit usually is one of two things: You were holding the beginning of the tape at the 1" mark for a more accurate measurement. Or you were looking at the wrong number when you made your pencil mark. This second mistake is common when you have the tape measure in your left hand (reading upside down) and the pencil in your right. NEXT TIME: There are several ways to avoid the problem in the future. First, measure everything www.popwood.com 61 |


