Popular Woodworking 2003-10 № 136, страница 68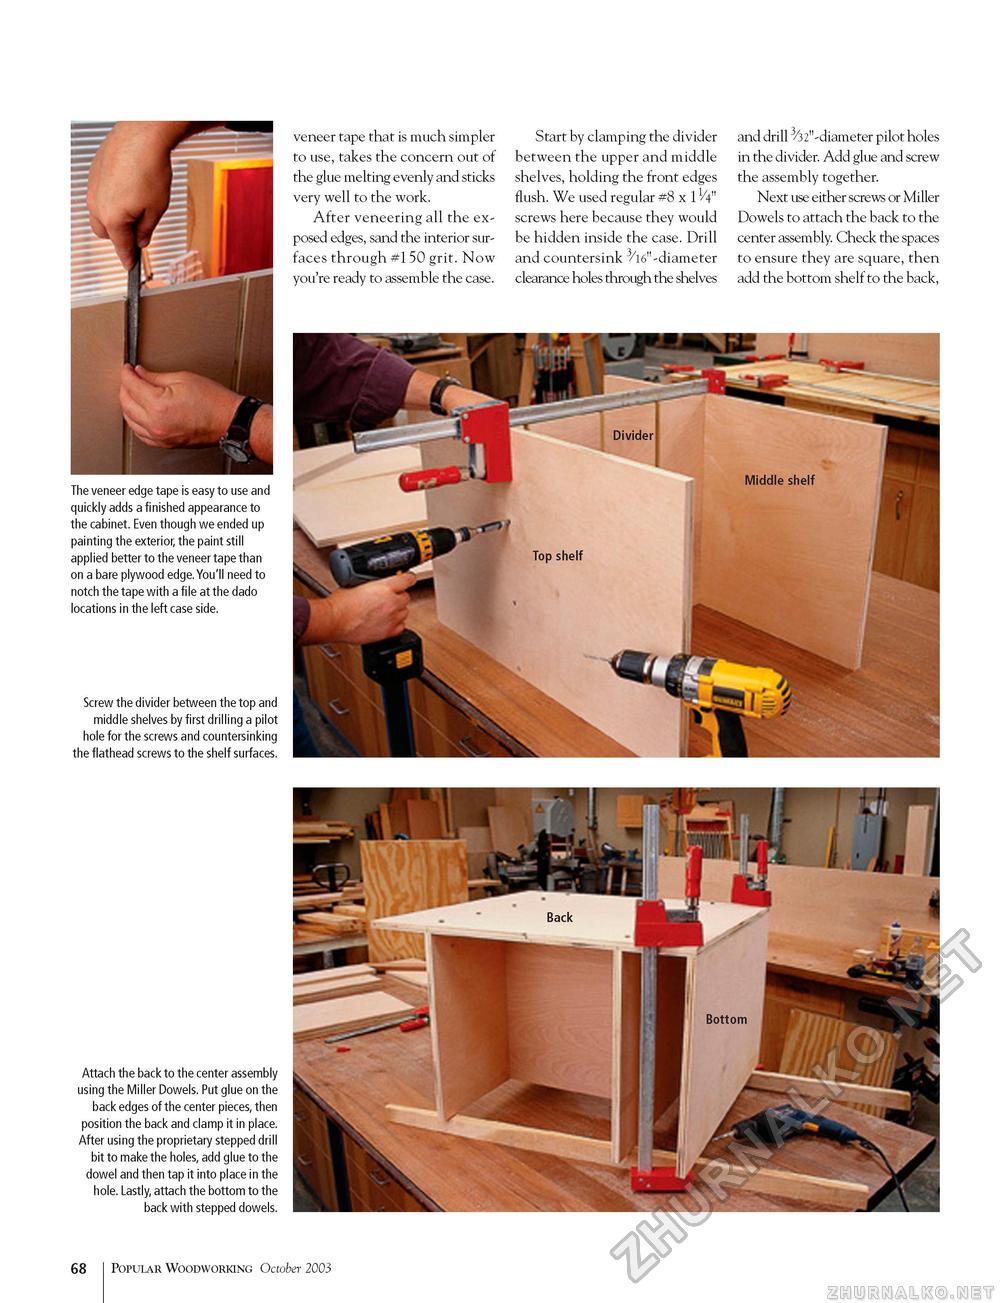
The veneer edge tape is easy to use and quickly adds a finished appearance to the cabinet. Even though we ended up painting the exterior, the paint still applied better to the veneer tape than on a bare plywood edge.You'll need to notch the tape with a file at the dado locations in the left case side. Screw the divider between the top and middle shelves by first drilling a pilot hole for the screws and countersinking the flathead screws to the shelf surfaces. Attach the back to the center assembly using the Miller Dowels. Put glue on the back edges of the center pieces, then position the back and clamp it in place. After using the proprietary stepped drill bit to make the holes, add glue to the dowel and then tap it into place in the hole. Lastly, attach the bottom to the back with stepped dowels. veneer tape that is much simpler to use, takes the concern out of the glue melting evenly and sticks very well to the work. After veneering all the exposed edges, sand the interior surfaces through #150 grit. Now you're ready to assemble the case. Start by clamping the divider between the upper and middle shelves, holding the front edges flush. We used regular #8 x screws here because they would be hidden inside the case. Drill and countersink 3/l6"-diameter clearance holes through the shelves and drill 3/32"-diameter pilot holes in the divider. Add glue and screw the assembly together. Next use either screws or Miller Dowels to attach the back to the center assembly. Check the spaces to ensure they are square, then add the bottom shelf to the back, 68 Popular Woodworking October 2003 |


