Popular Woodworking 2003-10 № 136, страница 69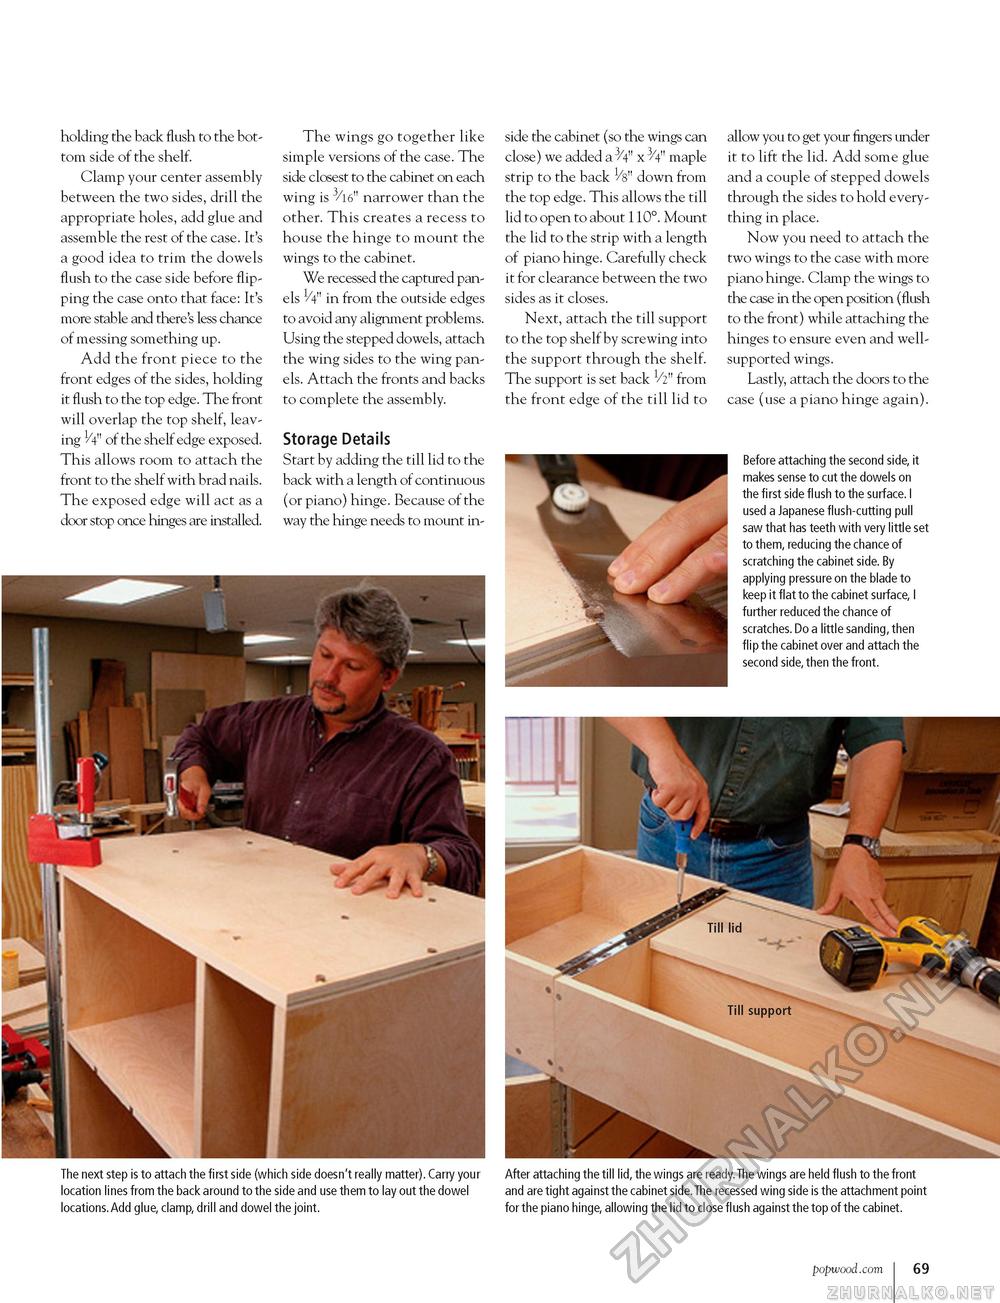
holding the back flush to the bottom side of the shelf. Clamp your center assembly between the two sides, drill the appropriate holes, add glue and assemble the rest of the case. It's a good idea to trim the dowels flush to the case side before flipping the case onto that face: It's more stable and there's less chance of messing something up. Add the front piece to the front edges of the sides, holding it flush to the top edge. The front will overlap the top shelf, leaving 1/4" of the shelf edge exposed. This allows room to attach the front to the shelf with brad nails. The exposed edge will act as a door stop once hinges are installed. The wings go together like simple versions of the case. The side closest to the cabinet on each wing is 3/16" narrower than the other. This creates a recess to house the hinge to mount the wings to the cabinet. We recessed the captured panels V4" in from the outside edges to avoid any alignment problems. Using the stepped dowels, attach the wing sides to the wing panels. Attach the fronts and backs to complete the assembly. Storage Details Start by adding the till lid to the back with a length of continuous (or piano) hinge. Because of the way the hinge needs to mount in side the cabinet (so the wings can close) we added a ^V" x ^V" maple strip to the back V8" down from the top edge. This allows the till lid to open to about 110°. Mount the lid to the strip with a length of piano hinge. Carefully check it for clearance between the two sides as it closes. Next, attach the till support to the top shelf by screwing into the support through the shelf. The support is set back V2" from the front edge of the till lid to allow you to get your fingers under it to lift the lid. Add some glue and a couple of stepped dowels through the sides to hold everything in place. Now you need to attach the two wings to the case with more piano hinge. Clamp the wings to the case in the open position (flush to the front) while attaching the hinges to ensure even and well-supported wings. Lastly, attach the doors to the case (use a piano hinge again). Before attaching the second side, it makes sense to cut the dowels on the first side flush to the surface. I used a Japanese flush-cutting pull saw that has teeth with very little set to them, reducing the chance of scratching the cabinet side. By applying pressure on the blade to keep it flat to the cabinet surface, I further reduced the chance of scratches. Do a little sanding, then flip the cabinet over and attach the second side, then the front. The next step is to attach the first side (which side doesn't really matter). Carry your location lines from the back around to the side and use them to lay out the dowel locations.Add glue, clamp, drill and dowel the joint. After attaching the till lid, the wings are ready. The wings are held flush to the front and are tight against the cabinet side.The recessed wing side is the attachment point for the piano hinge, allowing the lid to close flush against the top of the cabinet. popwood.com 69 |


