Popular Woodworking 2003-11 № 137, страница 70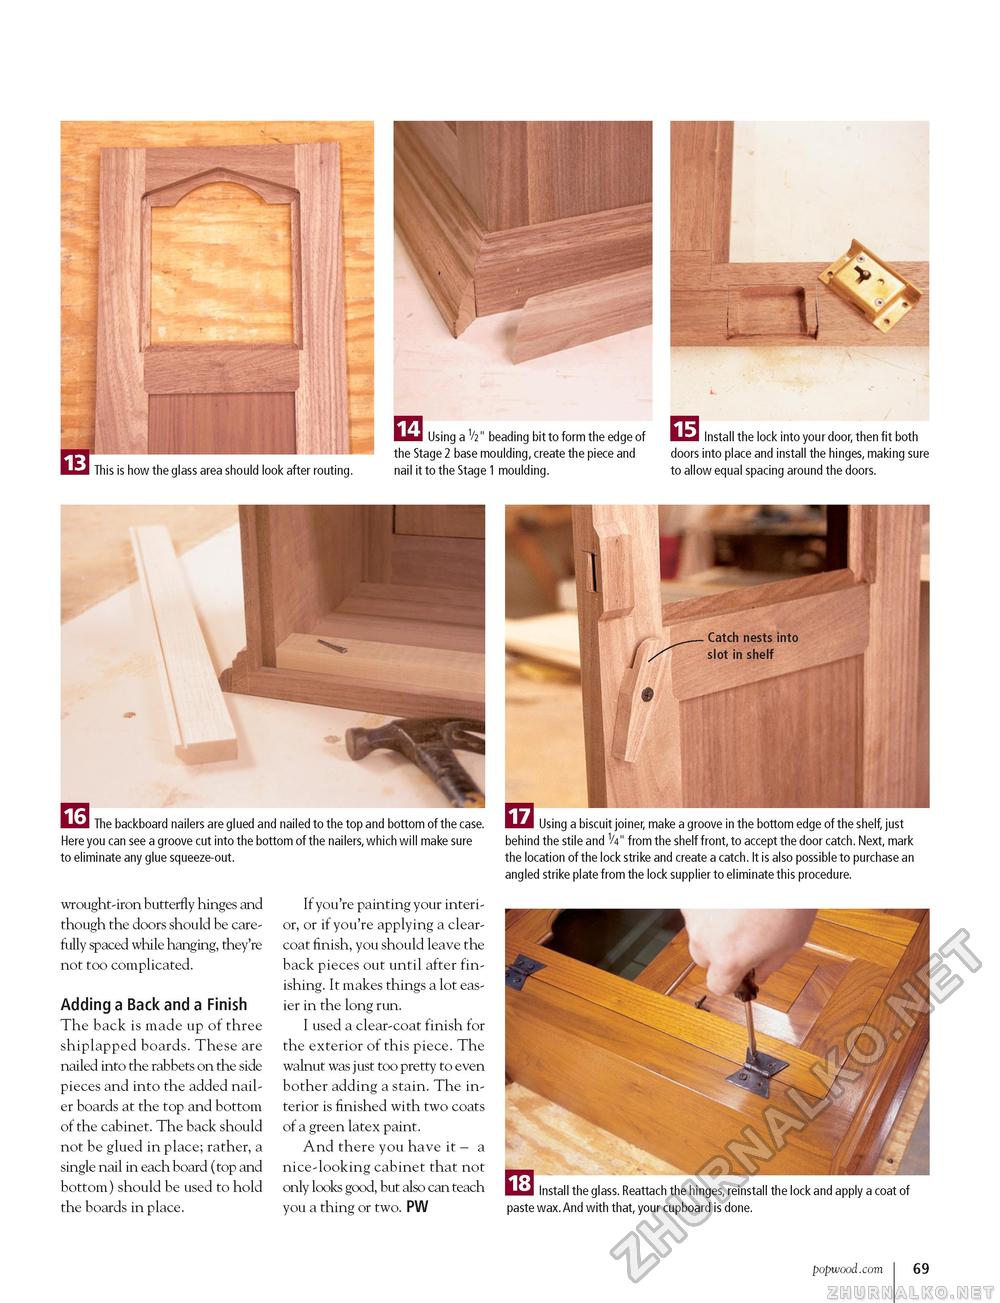
I This is how the glass area should look after routing. Using a V2" beading bit to form the edge of the Stage 2 base moulding, create the piece and nail it to the Stage 1 moulding. Install the lock into your door, then fit both doors into place and install the hinges, making sure to allow equal spacing around the doors. E3 I The backboard nailers are glued and nailed to the top and bottom of the case. Here you can see a groove cut into the bottom of the nailers,which will make sure to eliminate any glue squeeze-out. Using a biscuit joiner, make a groove in the bottom edge of the shelf, just behind the stile and V4" from the shelf front, to accept the door catch. Next, mark the location of the lock strike and create a catch. It is also possible to purchase an angled strike plate from the lock supplier to eliminate this procedure. wrought-iron butterfly hinges and though the doors should be carefully spaced while hanging, they're not too complicated. Adding a Back and a Finish The back is made up of three shiplapped boards. These are nailed into the rabbets on the side pieces and into the added nailer boards at the top and bottom of the cabinet. The back should not be glued in place; rather, a single nail in each board (top and bottom) should be used to hold the boards in place. If you're painting your interior, or if you're applying a clear-coat finish, you should leave the back pieces out until after finishing. It makes things a lot easier in the long run. I used a clear-coat finish for the exterior of this piece. The walnut was just too pretty to even bother adding a stain. The interior is finished with two coats of a green latex paint. And there you have it - a nice-looking cabinet that not only looks good, but also can teach you a thing or two. PW 181 Install the glass. Reattach the hinges, reinstall the lock and apply a coat of paste wax. And with that, your cupboard is done. popwood.com 69 |


