Popular Woodworking 2003-11 № 137, страница 69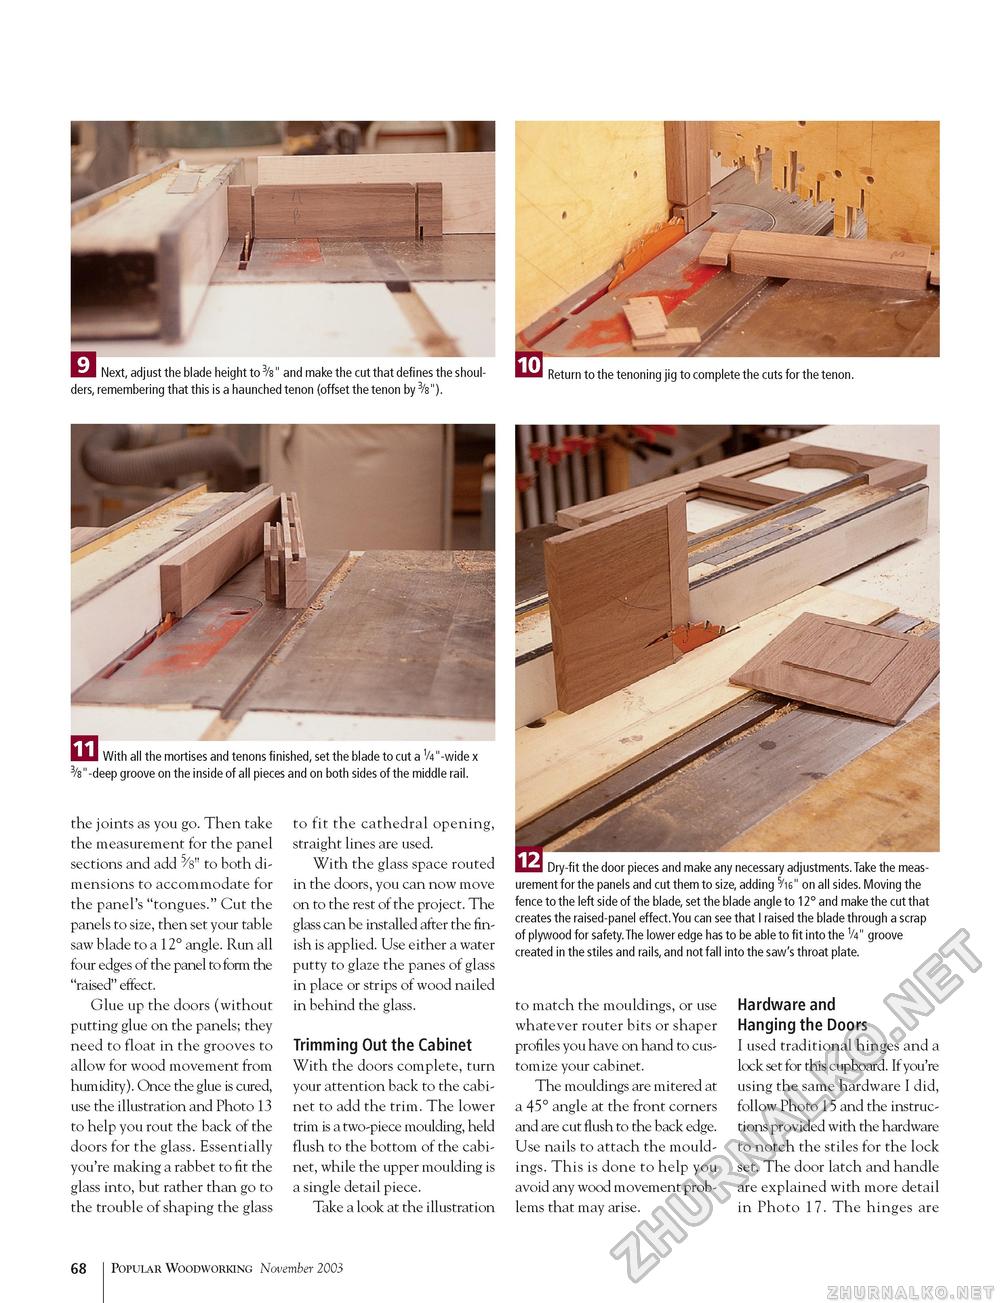
ders, remembering that this is a haunched tenon (offset the tenon by 3/s"). I With all the mortises and tenons finished, set the blade to cut a VV'-wide x 3/8"-deep groove on the inside of all pieces and on both sides of the middle rail. the joints as you go. Then take the measurement for the panel sections and add 5/8" to both dimensions to accommodate for the panel's "tongues." Cut the panels to size, then set your table saw blade to a 12° angle. Run all four edges of the panel to form the "raised" effect. Glue up the doors (without putting glue on the panels; they need to float in the grooves to allow for wood movement from humidity). Once the glue is cured, use the illustration and Photo 13 to help you rout the back of the doors for the glass. Essentially you're making a rabbet to fit the glass into, but rather than go to the trouble of shaping the glass to fit the cathedral opening, straight lines are used. With the glass space routed in the doors, you can now move on to the rest of the project. The glass can be installed after the finish is applied. Use either a water putty to glaze the panes of glass in place or strips of wood nailed in behind the glass. Trimming Out the Cabinet With the doors complete, turn your attention back to the cabinet to add the trim. The lower trim is a two-piece moulding, held flush to the bottom of the cabinet, while the upper moulding is a single detail piece. Take a look at the illustration Dry-fit the door pieces and make any necessary adjustments. Take the measurement for the panels and cut them to size, adding 5/i6" on all sides. Moving the fence to the left side of the blade, set the blade angle to 12° and make the cut that creates the raised-panel effect.You can see that I raised the blade through a scrap of plywood for safety.The lower edge has to be able to fit into the V4" groove created in the stiles and rails, and not fall into the saw's throat plate. to match the mouldings, or use whatever router bits or shaper profiles you have on hand to customize your cabinet. The mouldings are mitered at a 45° angle at the front corners and are cut flush to the back edge. Use nails to attach the mouldings. This is done to help you avoid any wood movement problems that may arise. Hardware and Hanging the Doors I used traditional hinges and a lock set for this cupboard. If you're using the same hardware I did, follow Photo 15 and the instructions provided with the hardware to notch the stiles for the lock set. The door latch and handle are explained with more detail in Photo 17. The hinges are 68 Popular Woodworking November 2003 |


