Popular Woodworking 2003-11 № 137, страница 66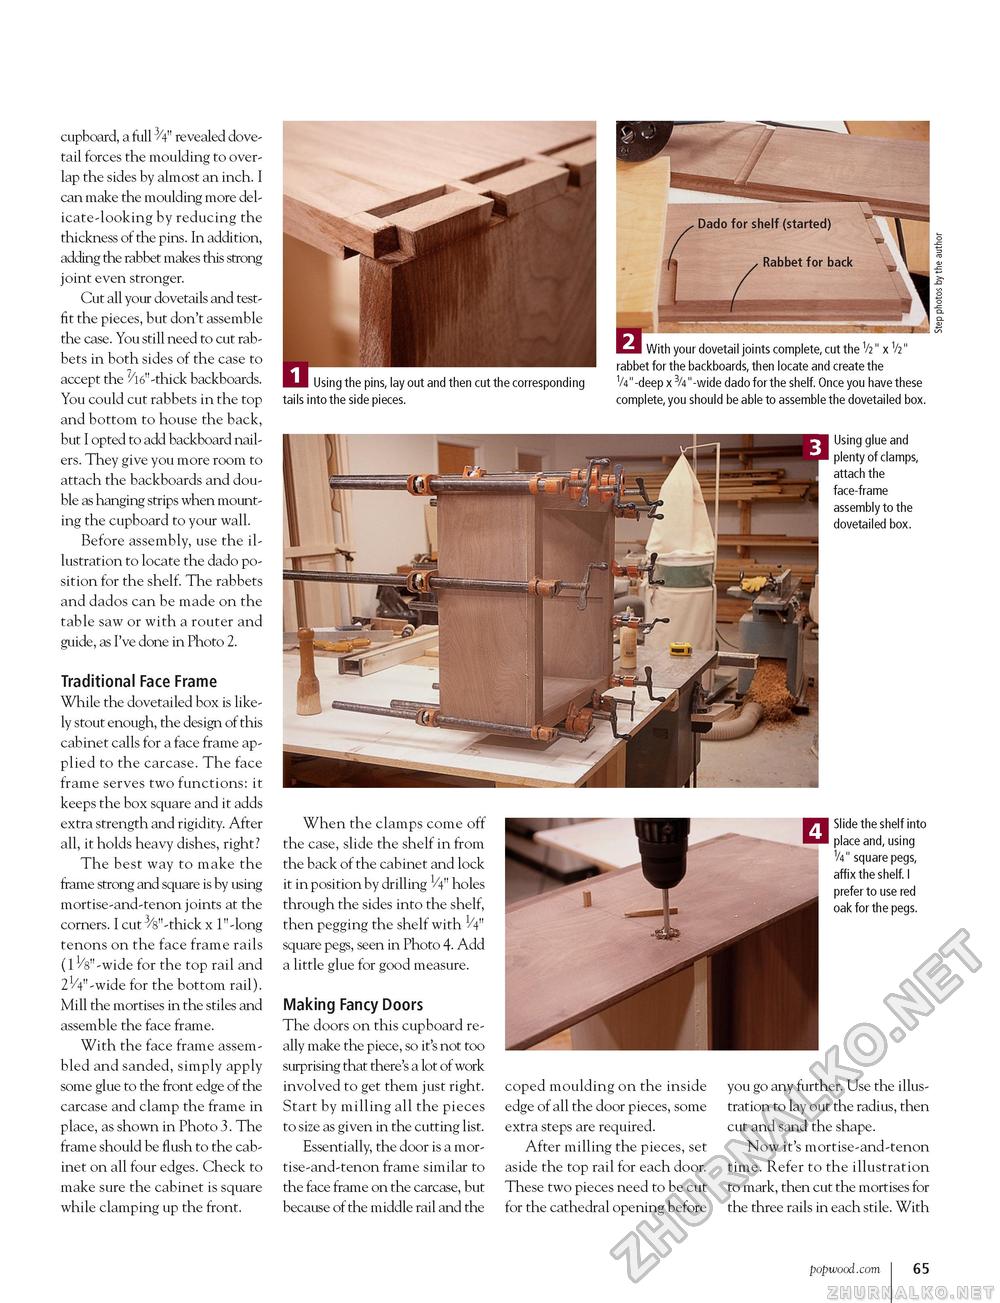
cupboard, a full 3/4" revealed dovetail forces the moulding to overlap the sides by almost an inch. I can make the moulding more delicate-looking by reducing the thickness of the pins. In addition, adding the rabbet makes this strong joint even stronger. Cut all your dovetails and test-fit the pieces, but don't assemble the case. You still need to cut rabbets in both sides of the case to accept the 7/l6"-thick backboards. You could cut rabbets in the top and bottom to house the back, but I opted to add backboard nailers. They give you more room to attach the backboards and double as hanging strips when mounting the cupboard to your wall. Before assembly, use the illustration to locate the dado position for the shelf. The rabbets and dados can be made on the table saw or with a router and guide, as I've done in Photo 2. Traditional Face Frame While the dovetailed box is likely stout enough, the design of this cabinet calls for a face frame applied to the carcase. The face frame serves two functions: it keeps the box square and it adds extra strength and rigidity. After all, it holds heavy dishes, right? The best way to make the frame strong and square is by using mortise-and-tenon joints at the corners. I cut 3/8"-thick x 1"-long tenons on the face frame rails (11/8"-wide for the top rail and 21/4" -wide for the bottom rail). Mill the mortises in the stiles and assemble the face frame. With the face frame assembled and sanded, simply apply some glue to the front edge of the carcase and clamp the frame in place, as shown in Photo 3. The frame should be flush to the cabinet on all four edges. Check to make sure the cabinet is square while clamping up the front. Using the pins, lay out and then cut the corresponding tails into the side pieces. With your dovetail joints complete, cut the V2" x V2" rabbet for the backboards, then locate and create the 'Af-deep x 3/4"-wide dado for the shelf. Once you have these complete, you should be able to assemble the dovetailed box. Using glue and plenty of clamps, attach the face-frame assembly to the dovetailed box. When the clamps come off the case, slide the shelf in from the back of the cabinet and lock it in position by drilling 1/4" holes through the sides into the shelf, then pegging the shelf with 1/4n square pegs, seen in Photo 4. Add a little glue for good measure. Making Fancy Doors The doors on this cupboard really make the piece, so it's not too surprising that there's a lot of work involved to get them just right. Start by milling all the pieces to size as given in the cutting list. Essentially, the door is a mor-tise-and-tenon frame similar to the face frame on the carcase, but because of the middle rail and the Slide the shelf into place and, using V4" square pegs, affix the shelf. I prefer to use red oak for the pegs. coped moulding on the inside edge of all the door pieces, some extra steps are required. After milling the pieces, set aside the top rail for each door. These two pieces need to be cut for the cathedral opening before you go any further. Use the illustration to lay out the radius, then cut and sand the shape. Now it's mortise-and-tenon time. Refer to the illustration to mark, then cut the mortises for the three rails in each stile. With popwood.com 65 |


