Popular Woodworking 2003-11 № 137, страница 63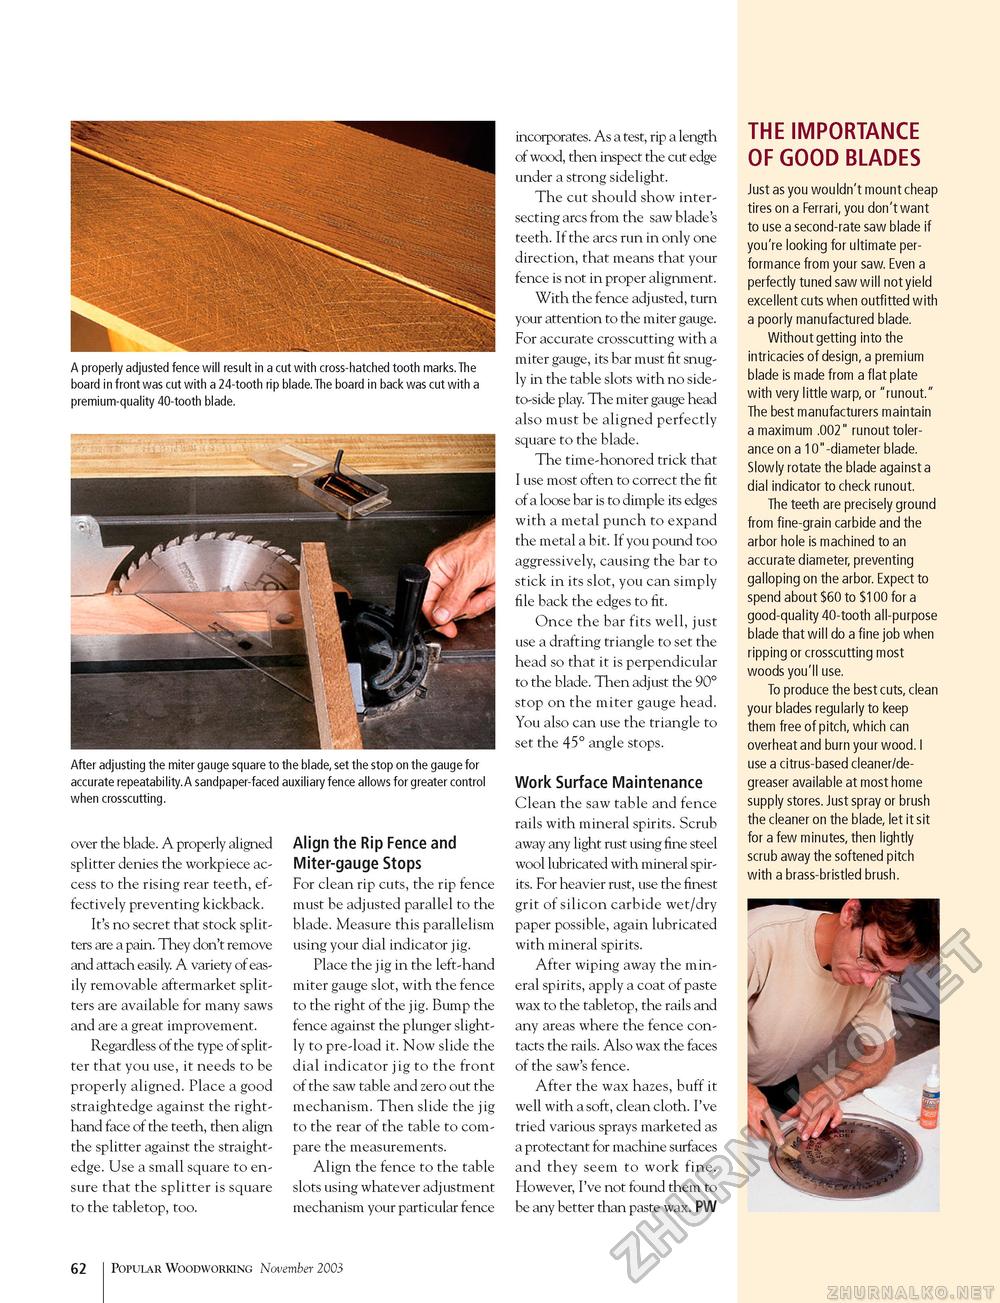
A properly adjusted fence will result in a cut with cross-hatched tooth marks. The board in front was cut with a 24-tooth rip blade.The board in back was cut with a premium-quality 40-tooth blade. After adjusting the miter gauge square to the blade, set the stop on the gauge for accurate repeatability.A sandpaper-faced auxiliary fence allows for greater control when crosscutting. over the blade. A properly aligned splitter denies the workpiece access to the rising rear teeth, effectively preventing kickback. It's no secret that stock splitters are a pain. They don't remove and attach easily. A variety of easily removable aftermarket splitters are available for many saws and are a great improvement. Regardless of the type of splitter that you use, it needs to be properly aligned. Place a good straightedge against the right-hand face of the teeth, then align the splitter against the straightedge. Use a small square to ensure that the splitter is square to the tabletop, too. Align the Rip Fence and Miter-gauge Stops For clean rip cuts, the rip fence must be adjusted parallel to the blade. Measure this parallelism using your dial indicator jig. Place the jig in the left-hand miter gauge slot, with the fence to the right of the jig. Bump the fence against the plunger slightly to pre-load it. Now slide the dial indicator jig to the front of the saw table and zero out the mechanism. Then slide the jig to the rear of the table to compare the measurements. Align the fence to the table slots using whatever adjustment mechanism your particular fence incorporates. As a test, rip a length of wood, then inspect the cut edge under a strong sidelight. The cut should show intersecting arcs from the saw blade's teeth. If the arcs run in only one direction, that means that your fence is not in proper alignment. With the fence adjusted, turn your attention to the miter gauge. For accurate crosscutting with a miter gauge, its bar must fit snugly in the table slots with no side-to-side play. The miter gauge head also must be aligned perfectly square to the blade. The time-honored trick that I use most often to correct the fit of a loose bar is to dimple its edges with a metal punch to expand the metal a bit. If you pound too aggressively, causing the bar to stick in its slot, you can simply file back the edges to fit. Once the bar fits well, just use a drafting triangle to set the head so that it is perpendicular to the blade. Then adjust the 90° stop on the miter gauge head. You also can use the triangle to set the 45° angle stops. Work Surface Maintenance Clean the saw table and fence rails with mineral spirits. Scrub away any light rust using fine steel wool lubricated with mineral spirits. For heavier rust, use the finest grit of silicon carbide wet/dry paper possible, again lubricated with mineral spirits. After wiping away the mineral spirits, apply a coat of paste wax to the tabletop, the rails and any areas where the fence contacts the rails. Also wax the faces of the saw's fence. After the wax hazes, buff it well with a soft, clean cloth. I've tried various sprays marketed as a protectant for machine surfaces and they seem to work fine. However, I've not found them to be any better than paste wax. PW THE IMPORTANCE OF GOOD BLADES Just as you wouldn't mount cheap tires on a Ferrari, you don't want to use a second-rate saw blade if you're looking for ultimate performance from your saw. Even a perfectly tuned saw will not yield excellent cuts when outfitted with a poorly manufactured blade. Without getting into the intricacies of design, a premium blade is made from a flat plate with very little warp, or "runout." The best manufacturers maintain a maximum .002" runout tolerance on a 10"-diameter blade. Slowly rotate the blade against a dial indicator to check runout. The teeth are precisely ground from fine-grain carbide and the arbor hole is machined to an accurate diameter, preventing galloping on the arbor. Expect to spend about $60 to $100 for a good-quality 40-tooth all-purpose blade that will do a fine job when ripping or crosscutting most woods you'll use. To produce the best cuts, clean your blades regularly to keep them free of pitch, which can overheat and burn your wood. I use a citrus-based cleaner/de-greaser available at most home supply stores. Just spray or brush the cleaner on the blade, let it sit for a few minutes, then lightly scrub away the softened pitch with a brass-bristled brush. 62 Popular Woodworking November 2003 |


