Popular Woodworking 2003-12 № 138, страница 77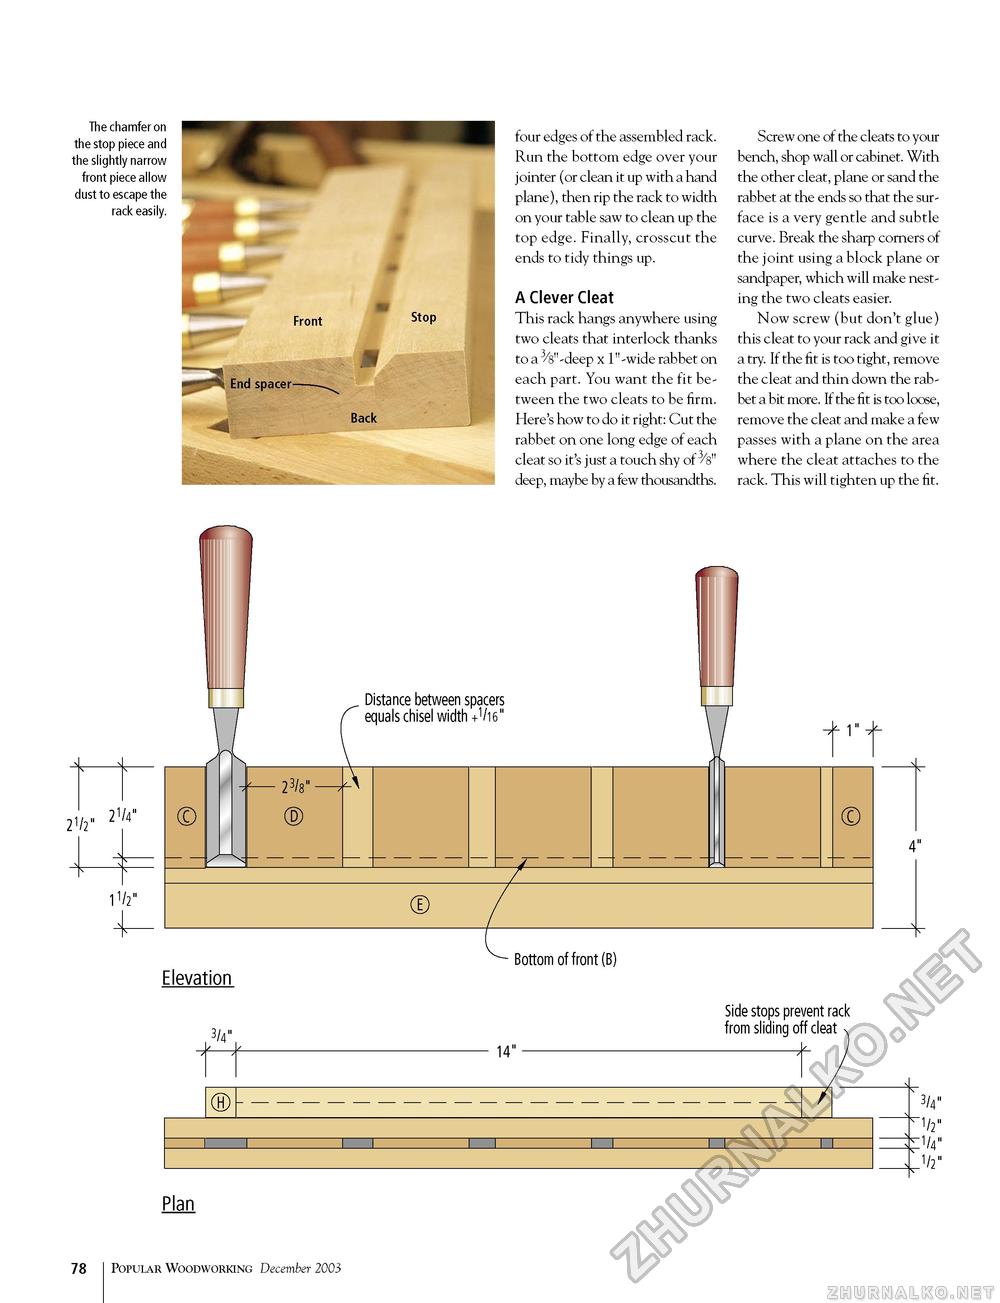
The chamfer on the stop piece and the slightly narrow front piece allow dust to escape the rack easily. four edges of the assembled rack. Run the bottom edge over your jointer (or clean it up with a hand plane), then rip the rack to width on your table saw to clean up the top edge. Finally, crosscut the ends to tidy things up. A Clever Cleat This rack hangs anywhere using two cleats that interlock thanks to a 3/8"-deep x 1"-wide rabbet on each part. You want the fit between the two cleats to be firm. Here's how to do it right: Cut the rabbet on one long edge of each cleat so it's just a touch shy of 3/s" deep, maybe by a few thousandths. Screw one of the cleats to your bench, shop wall or cabinet. With the other cleat, plane or sand the rabbet at the ends so that the surface is a very gentle and subtle curve. Break the sharp corners of the joint using a block plane or sandpaper, which will make nesting the two cleats easier. Now screw (but don't glue) this cleat to your rack and give it a try. If the fit is too tight, remove the cleat and thin down the rabbet a bit more. If the fit is too loose, remove the cleat and make a few passes with a plane on the area where the cleat attaches to the rack. This will tighten up the fit. / 21/2 . 21/4" 11/2" © Elevation 3/4" 23/8" ® Distance between spacers equals chisel width +V16" © Bottom of front (B) 14" 1" C Side stops prevent rack from sliding off cleat 4" 3/4" "V t1/4" J/2" Plan 108 Popular Woodworking December 2003 |


