Popular Woodworking 2003-12 № 138, страница 76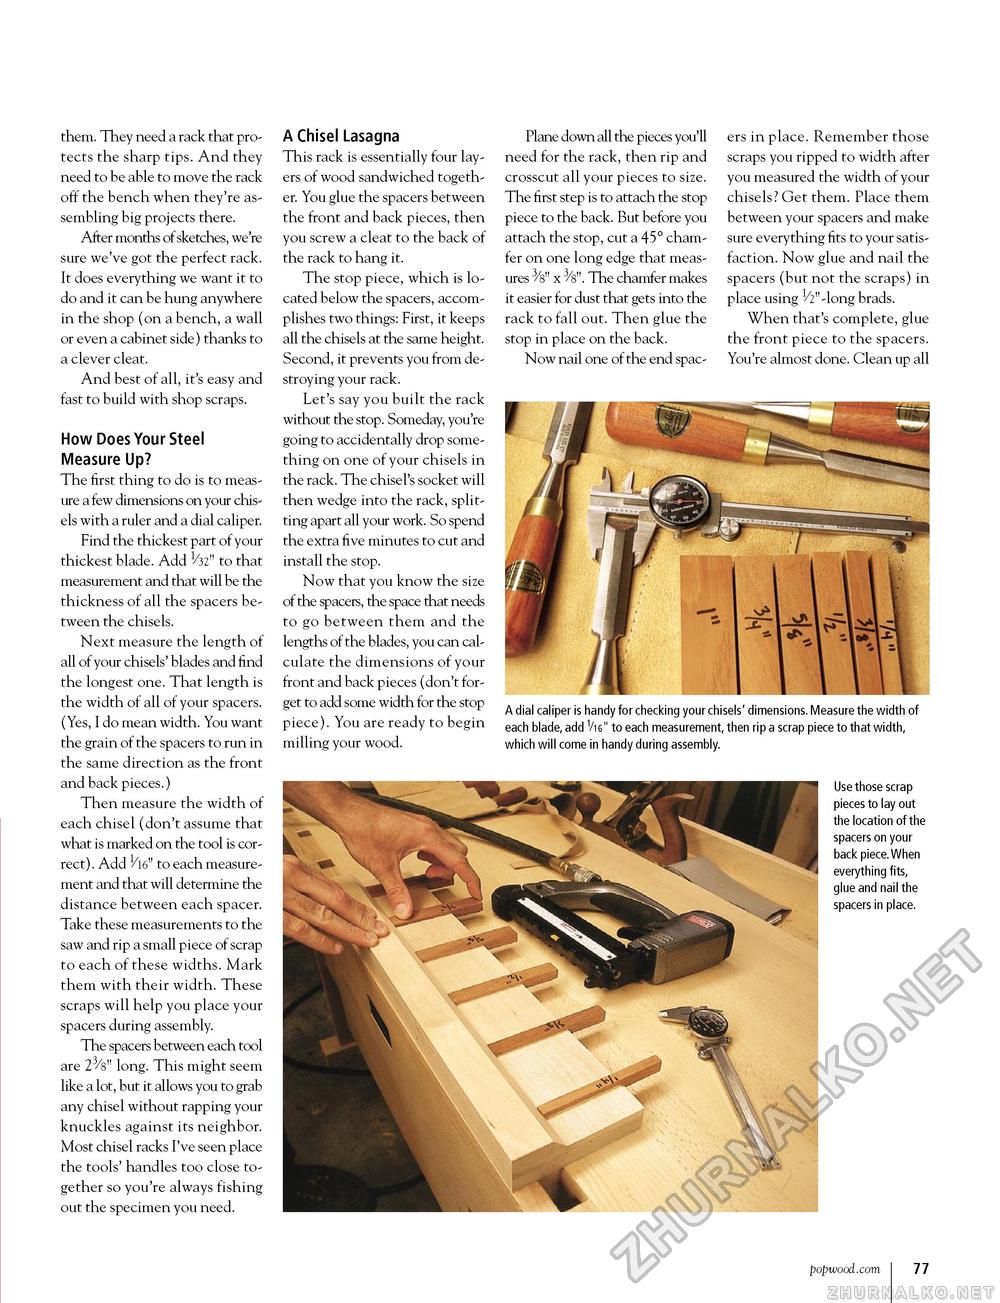
them. They need a rack that protects the sharp tips. And they need to be able to move the rack off the bench when they're assembling big projects there. After months of sketches, we're sure we've got the perfect rack. It does everything we want it to do and it can be hung anywhere in the shop (on a bench, a wall or even a cabinet side) thanks to a clever cleat. And best of all, it's easy and fast to build with shop scraps. How Does Your Steel Measure Up? The first thing to do is to measure a few dimensions on your chisels with a ruler and a dial caliper. Find the thickest part of your thickest blade. Add 1/32" to that measurement and that will be the thickness of all the spacers between the chisels. Next measure the length of all of your chisels' blades and find the longest one. That length is the width of all of your spacers. (Yes, I do mean width. You want the grain of the spacers to run in the same direction as the front and back pieces.) Then measure the width of each chisel (don't assume that what is marked on the tool is correct). Add 1/16n to each measurement and that will determine the distance between each spacer. Take these measurements to the saw and rip a small piece of scrap to each of these widths. Mark them with their width. These scraps will help you place your spacers during assembly. The spacers between each tool are 23/8" long. This might seem like a lot, but it allows you to grab any chisel without rapping your knuckles against its neighbor. Most chisel racks I've seen place the tools' handles too close together so you're always fishing out the specimen you need. A Chisel Lasagna This rack is essentially four layers of wood sandwiched together. You glue the spacers between the front and back pieces, then you screw a cleat to the back of the rack to hang it. The stop piece, which is located below the spacers, accomplishes two things: First, it keeps all the chisels at the same height. Second, it prevents you from destroying your rack. Let's say you built the rack without the stop. Someday, you're going to accidentally drop something on one of your chisels in the rack. The chisel's socket will then wedge into the rack, splitting apart all your work. So spend the extra five minutes to cut and install the stop. Now that you know the size of the spacers, the space that needs to go between them and the lengths of the blades, you can calculate the dimensions of your front and back pieces (don't forget to add some width for the stop piece). You are ready to begin milling your wood. Plane down all the pieces you'll need for the rack, then rip and crosscut all your pieces to size. The first step is to attach the stop piece to the back. But before you attach the stop, cut a 45° chamfer on one long edge that measures 3/8" x 3/8". The chamfer makes it easier for dust that gets into the rack to fall out. Then glue the stop in place on the back. Now nail one of the end spac- f L m ers in place. Remember those scraps you ripped to width after you measured the width of your chisels? Get them. Place them between your spacers and make sure everything fits to your satisfaction. Now glue and nail the spacers (but not the scraps) in place using 1/2"-long brads. When that's complete, glue the front piece to the spacers. You're almost done. Clean up all A dial caliper is handy for checking your chisels' dimensions. Measure the width of each blade, add 1/16" to each measurement, then rip a scrap piece to that width, which will come in handy during assembly. Use those scrap pieces to lay out the location of the spacers on your back piece. When everything fits, glue and nail the spacers in place. popwood.com 109 |


