Popular Woodworking 2004-02 № 139, страница 96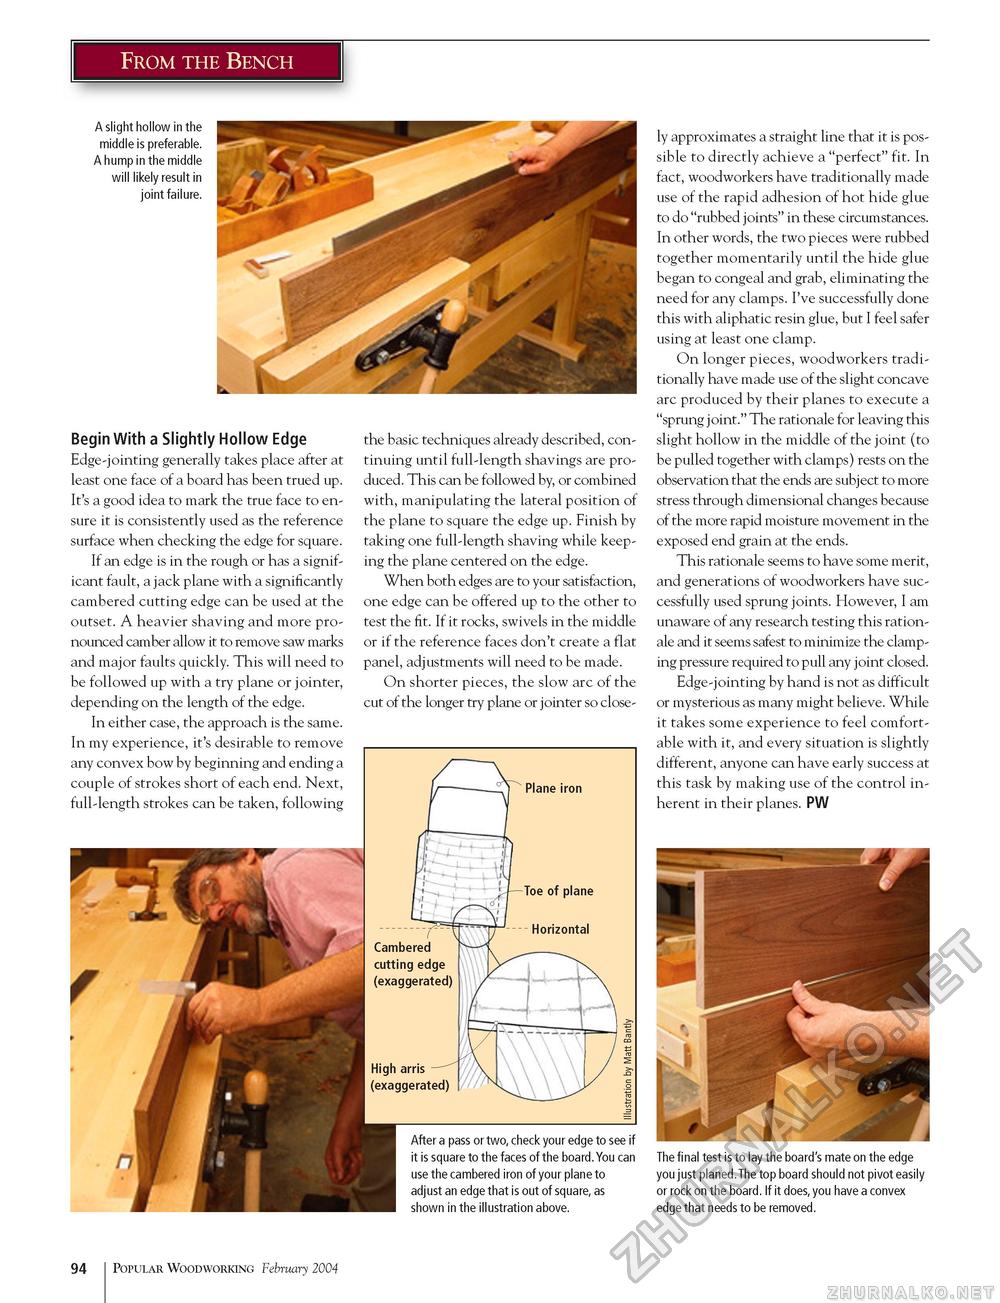
From the Bench A slight hollow in the middle is preferable. A hump in the middle will likely result in joint failure. Begin With a Slightly Hollow Edge Edge-jointing generally takes place after at least one face of a board has been trued up. It's a good idea to mark the true face to ensure it is consistently used as the reference surface when checking the edge for square. If an edge is in the rough or has a significant fault, a jack plane with a significantly cambered cutting edge can be used at the outset. A heavier shaving and more pronounced camber allow it to remove saw marks and major faults quickly. This will need to be followed up with a try plane or jointer, depending on the length of the edge. In either case, the approach is the same. In my experience, it's desirable to remove any convex bow by beginning and ending a couple of strokes short of each end. Next, full-length strokes can be taken, following the basic techniques already described, continuing until full-length shavings are produced. This can be followed by, or combined with, manipulating the lateral position of the plane to square the edge up. Finish by taking one full-length shaving while keeping the plane centered on the edge. When both edges are to your satisfaction, one edge can be offered up to the other to test the fit. If it rocks, swivels in the middle or if the reference faces don't create a flat panel, adjustments will need to be made. On shorter pieces, the slow arc of the cut of the longer try plane or jointer so close- After a pass or two, check your edge to see if it is square to the faces of the board.You can use the cambered iron of your plane to adjust an edge that is out of square, as shown in the illustration above. ly approximates a straight line that it is possible to directly achieve a "perfect" fit. In fact, woodworkers have traditionally made use of the rapid adhesion of hot hide glue to do "rubbed joints" in these circumstances. In other words, the two pieces were rubbed together momentarily until the hide glue began to congeal and grab, eliminating the need for any clamps. I've successfully done this with aliphatic resin glue, but I feel safer using at least one clamp. On longer pieces, woodworkers traditionally have made use of the slight concave arc produced by their planes to execute a "sprung joint." The rationale for leaving this slight hollow in the middle of the joint (to be pulled together with clamps) rests on the observation that the ends are subject to more stress through dimensional changes because of the more rapid moisture movement in the exposed end grain at the ends. This rationale seems to have some merit, and generations of woodworkers have successfully used sprung joints. However, I am unaware of any research testing this rationale and it seems safest to minimize the clamping pressure required to pull any joint closed. Edge-jointing by hand is not as difficult or mysterious as many might believe. While it takes some experience to feel comfortable with it, and every situation is slightly different, anyone can have early success at this task by making use of the control inherent in their planes. PW The final test is to lay the board's mate on the edge you just planed.The top board should not pivot easily or rock on the board. If it does,you have a convex edge that needs to be removed. 94 Popular Woodworking February 2004 |


