Popular Woodworking 2004-02 № 139, страница 95
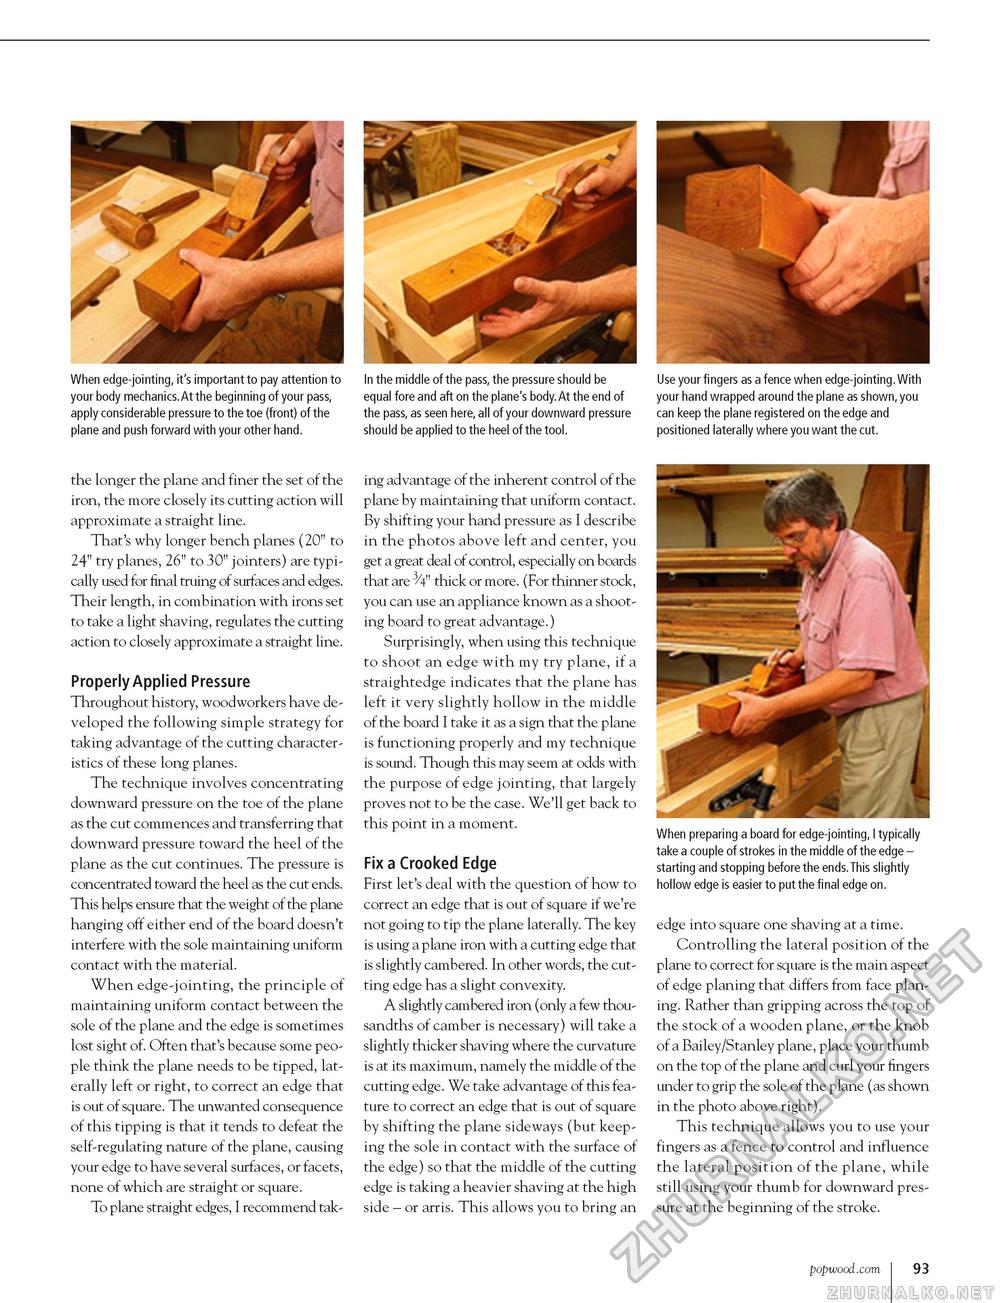
When edge-jointing, it's important to pay attention to your body mechanics.At the beginning of your pass, apply considerable pressure to the toe (front) of the plane and push forward with your other hand. In the middle of the pass, the pressure should be equal fore and aft on the plane's body.At the end of the pass, as seen here, all of your downward pressure should be applied to the heel of the tool. Use your fingers as a fence when edge-jointing.With your hand wrapped around the plane as shown, you can keep the plane registered on the edge and positioned laterally where you want the cut. the longer the plane and finer the set of the iron, the more closely its cutting action will approximate a straight line. That's why longer bench planes (20" to 24" try planes, 26" to 30" jointers) are typically used for final truing of surfaces and edges. Their length, in combination with irons set to take a light shaving, regulates the cutting action to closely approximate a straight line. Properly Applied Pressure Throughout history, woodworkers have developed the following simple strategy for taking advantage of the cutting characteristics of these long planes. The technique involves concentrating downward pressure on the toe of the plane as the cut commences and transferring that downward pressure toward the heel of the plane as the cut continues. The pressure is concentrated toward the heel as the cut ends. This helps ensure that the weight of the plane hanging off either end of the board doesn't interfere with the sole maintaining uniform contact with the material. When edge-jointing, the principle of maintaining uniform contact between the sole of the plane and the edge is sometimes lost sight of. Often that's because some people think the plane needs to be tipped, laterally left or right, to correct an edge that is out of square. The unwanted consequence of this tipping is that it tends to defeat the self-regulating nature of the plane, causing your edge to have several surfaces, or facets, none of which are straight or square. To plane straight edges, I recommend tak- ing advantage of the inherent control of the plane by maintaining that uniform contact. By shifting your hand pressure as I describe in the photos above left and center, you get a great deal of control, especially on boards that are 3/4" thick or more. (For thinner stock, you can use an appliance known as a shooting board to great advantage.) Surprisingly, when using this technique to shoot an edge with my try plane, if a straightedge indicates that the plane has left it very slightly hollow in the middle of the board I take it as a sign that the plane is functioning properly and my technique is sound. Though this may seem at odds with the purpose of edge jointing, that largely proves not to be the case. We'll get back to this point in a moment. Fix a Crooked Edge First let's deal with the question of how to correct an edge that is out of square if we're not going to tip the plane laterally. The key is using a plane iron with a cutting edge that is slightly cambered. In other words, the cutting edge has a slight convexity. A slightly cambered iron (only a few thousandths of camber is necessary) will take a slightly thicker shaving where the curvature is at its maximum, namely the middle of the cutting edge. We take advantage of this feature to correct an edge that is out of square by shifting the plane sideways (but keeping the sole in contact with the surface of the edge) so that the middle of the cutting edge is taking a heavier shaving at the high side - or arris. This allows you to bring an When preparing a board for edge-jointing, I typically take a couple of strokes in the middle of the edge -starting and stopping before the ends.This slightly hollow edge is easier to put the final edge on. edge into square one shaving at a time. Controlling the lateral position of the plane to correct for square is the main aspect of edge planing that differs from face planing. Rather than gripping across the top of the stock of a wooden plane, or the knob of a Bailey/Stanley plane, place your thumb on the top of the plane and curl your fingers under to grip the sole of the plane (as shown in the photo above right). This technique allows you to use your fingers as a fence to control and influence the lateral position of the plane, while still using your thumb for downward pressure at the beginning of the stroke. popwood.com 93 |


