Popular Woodworking 2004-08 № 142, страница 28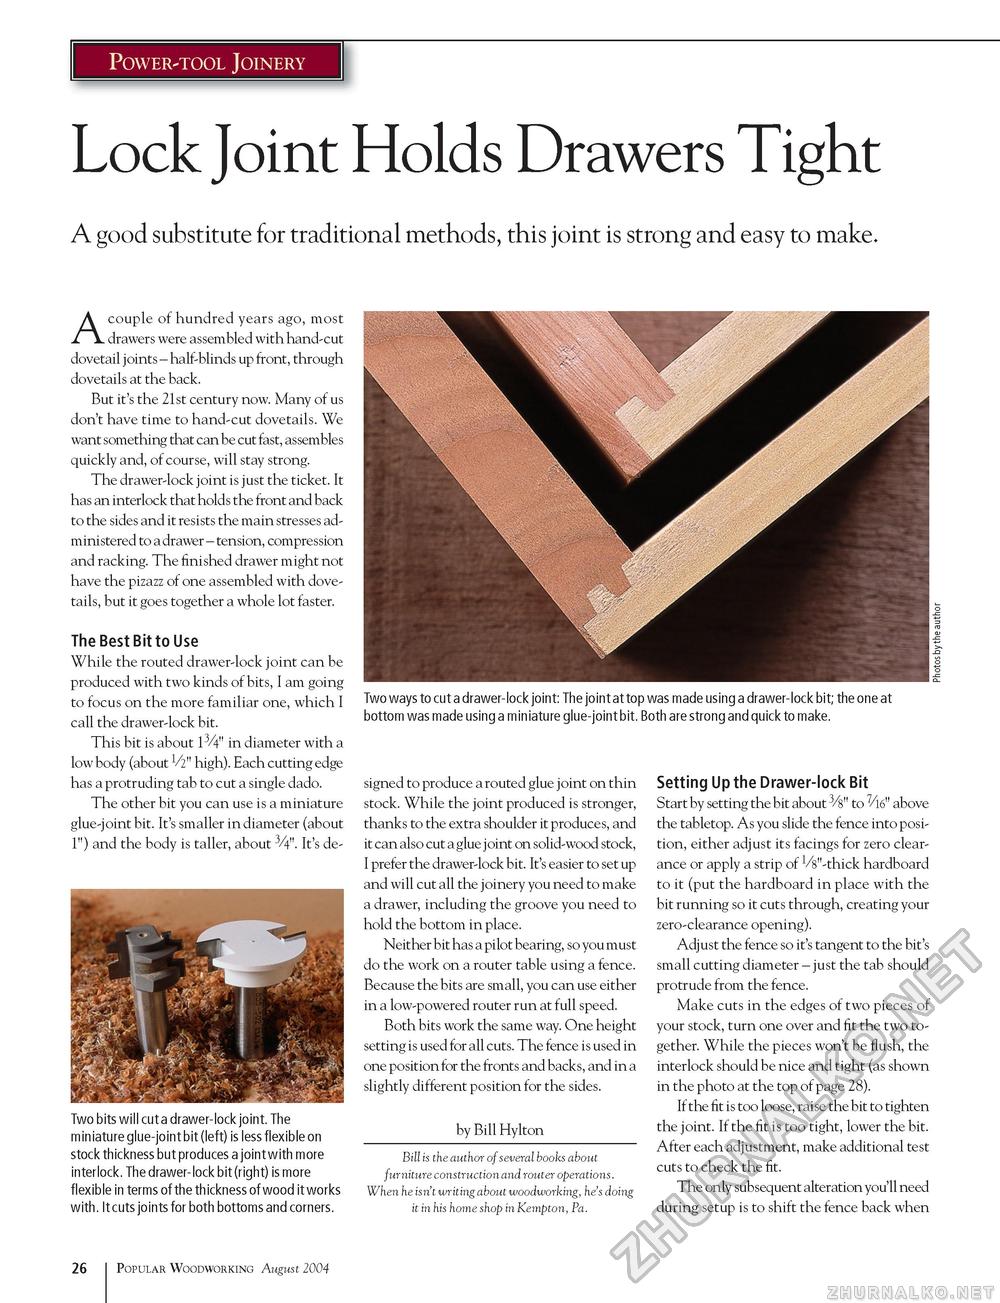
Power-tool Joinery Lock Joint Holds Drawers TightA good substitute for traditional methods, this joint is strong and easy to make. A couple of hundred years ago, most drawers were assembled with hand-cut dovetail joints - half-blinds up front, through dovetails at the back. But it's the 21st century now. Many of us don't have time to hand-cut dovetails. We want something that can be cut fast, assembles quickly and, of course, will stay strong. The drawer-lock joint is just the ticket. It has an interlock that holds the front and back to the sides and it resists the main stresses administered to a drawer - tension, compression and racking. The finished drawer might not have the pizazz of one assembled with dovetails, but it goes together a whole lot faster. The Best Bit to Use While the routed drawer-lock joint can be produced with two kinds of bits, I am going to focus on the more familiar one, which I call the drawer-lock bit. This bit is about 13/4" in diameter with a low body (about V2" high). Each cutting edge has a protruding tab to cut a single dado. The other bit you can use is a miniature glue-joint bit. It's smaller in diameter (about 1") and the body is taller, about 34". It's de-
Two bits will cut a drawer-lock joint. The miniature glue-joint bit (left) is less flexible on stock thickness but produces a joint with more interlock. The drawer-lock bit (right) is more flexible in terms of the thickness of wood it works with. It cuts joints for both bottoms and corners. Two ways to cut a drawer-lock joint: The joint at top was made using a drawer-lock bit; the one at bottom was made using a miniature glue-joint bit. Both are strong and quick to make. signed to produce a routed glue joint on thin stock. While the joint produced is stronger, thanks to the extra shoulder it produces, and it can also cut a glue j oint on solid-wood stock, I prefer the drawer-lock bit. It's easier to set up and will cut all the joinery you need to make a drawer, including the groove you need to hold the bottom in place. Neither bit has a pilot bearing, so you must do the work on a router table using a fence. Because the bits are small, you can use either in a low-powered router run at full speed. Both bits work the same way. One height setting is used for all cuts. The fence is used in one position for the fronts and backs, and in a slightly different position for the sides. by Bill Hylton Bill is the author of several books about furniture construction and router operations. When he isn't writing about woodworking, he's doing it in his home shop in Kempton, Pa. Setting Up the Drawer-lock Bit Start by setting the bit about 3/s" to 7/l6" above the tabletop. As you slide the fence into position, either adjust its facings for zero clearance or apply a strip of ^"-thick hardboard to it (put the hardboard in place with the bit running so it cuts through, creating your zero-clearance opening). Adjust the fence so it's tangent to the bit's small cutting diameter - just the tab should protrude from the fence. Make cuts in the edges of two pieces of your stock, turn one over and fit the two together. While the pieces won't be flush, the interlock should be nice and tight (as shown in the photo at the top of page 28). If the fit is too loose, raise the bit to tighten the joint. If the fit is too tight, lower the bit. After each adjustment, make additional test cuts to check the fit. The only subsequent alteration you'll need during setup is to shift the fence back when 26 Popular Woodworking August 2004 |


