Popular Woodworking 2004-08 № 142, страница 29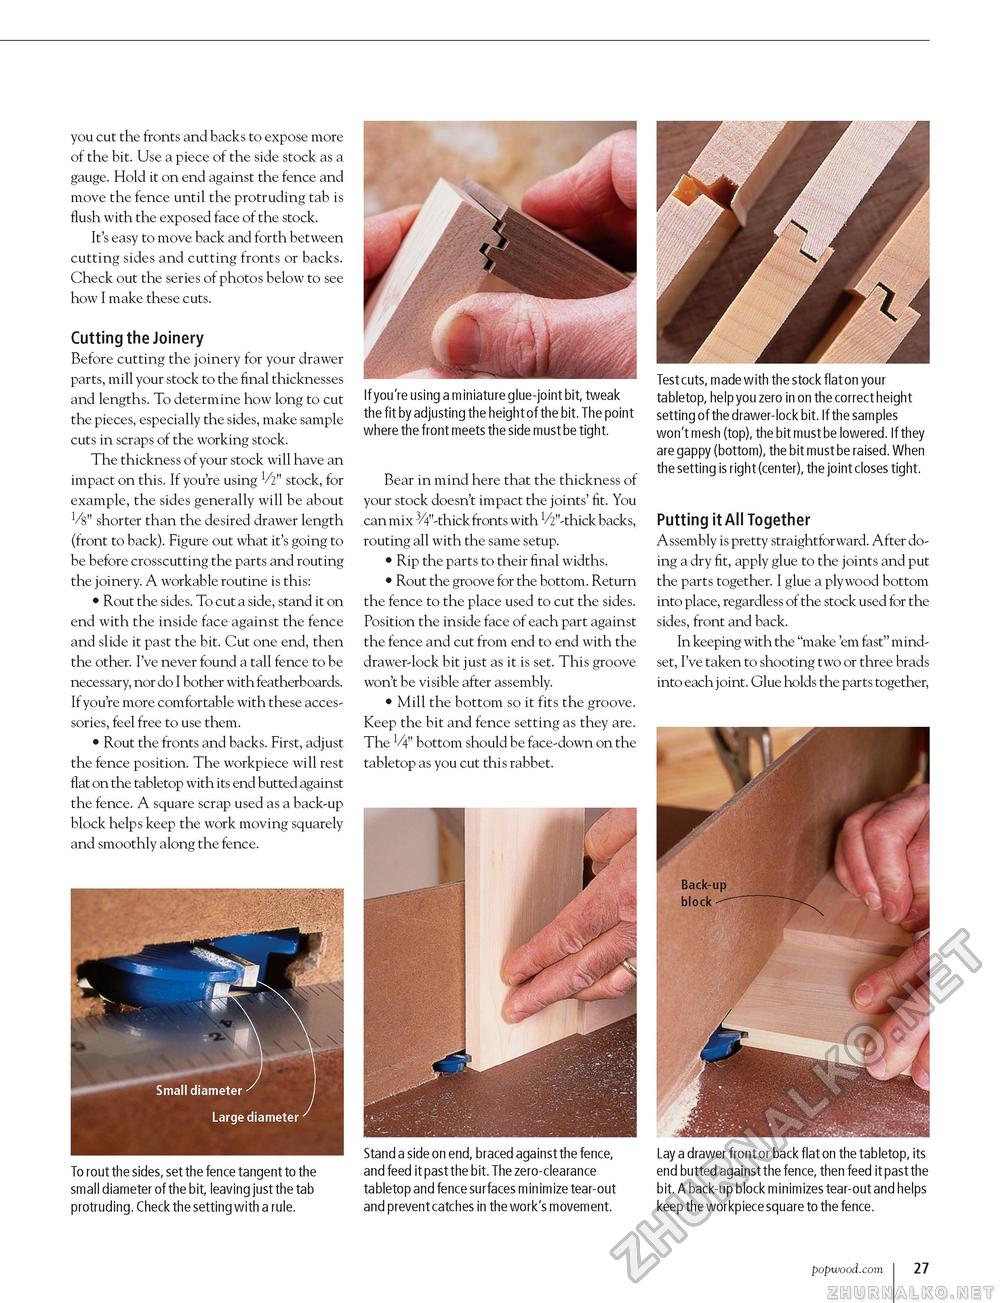
you cut the fronts and backs to expose more of the bit. Use a piece of the side stock as a gauge. Hold it on end against the fence and move the fence until the protruding tab is flush with the exposed face of the stock. It's easy to move back and forth between cutting sides and cutting fronts or backs. Check out the series of photos below to see how I make these cuts. Cutting the Joinery Before cutting the joinery for your drawer parts, mill your stock to the final thicknesses and lengths. To determine how long to cut the pieces, especially the sides, make sample cuts in scraps of the working stock. The thickness of your stock will have an impact on this. If you're using V2" stock, for example, the sides generally will be about Mi" shorter than the desired drawer length (front to back). Figure out what it's going to be before crosscutting the parts and routing the joinery. A workable routine is this: • Rout the sides. To cut a side, stand it on end with the inside face against the fence and slide it past the bit. Cut one end, then the other. I've never found a tall fence to be necessary, nor do I bother with featherboards. If you're more comfortable with these accessories, feel free to use them. • Rout the fronts and backs. First, adjust the fence position. The workpiece will rest flat on the tabletop with its end butted against the fence. A square scrap used as a back-up block helps keep the work moving squarely and smoothly along the fence. To rout the sides, set the fence tangent to the small diameter of the bit, leaving just the tab protruding. Check the setting with a rule. If you're using a miniature glue-joint bit, tweak the fit by adjusting the height of the bit. The point where the front meets the side must be tight. Bear in mind here that the thickness of your stock doesn't impact the joints' fit. You can mix 34"-thick fronts with V2"-thick backs, routing all with the same setup. • Rip the parts to their final widths. • Rout the groove for the bottom. Return the fence to the place used to cut the sides. Position the inside face of each part against the fence and cut from end to end with the drawer-lock bit just as it is set. This groove won't be visible after assembly. • Mill the bottom so it fits the groove. Keep the bit and fence setting as they are. The V4" bottom should be face-down on the tabletop as you cut this rabbet. Stand a side on end, braced against the fence, and feed it past the bit. The zero-clearance tabletop and fence surfaces minimize tear-out and prevent catches in the work's movement. Test cuts, made with the stock flat on your tabletop, help you zero in on the correct height setting of the drawer-lock bit. If the samples won't mesh (top), the bit must be lowered. If they are gappy (bottom), the bit must be raised. When the setting is right (center), the joint closes tight. Putting it All Together Assembly is pretty straightforward. After doing a dry fit, apply glue to the joints and put the parts together. I glue a plywood bottom into place, regardless of the stock used for the sides, front and back. In keeping with the "make 'em fast" mindset, I've taken to shooting two or three brads into each joint. Glue holds the parts together, Lay a drawer front or back flat on the tabletop, its end butted against the fence, then feed it past the bit. A back-up block minimizes tear-out and helps keep the workpiece square to the fence. popwood.com 27 |


