Popular Woodworking 2004-08 № 142, страница 42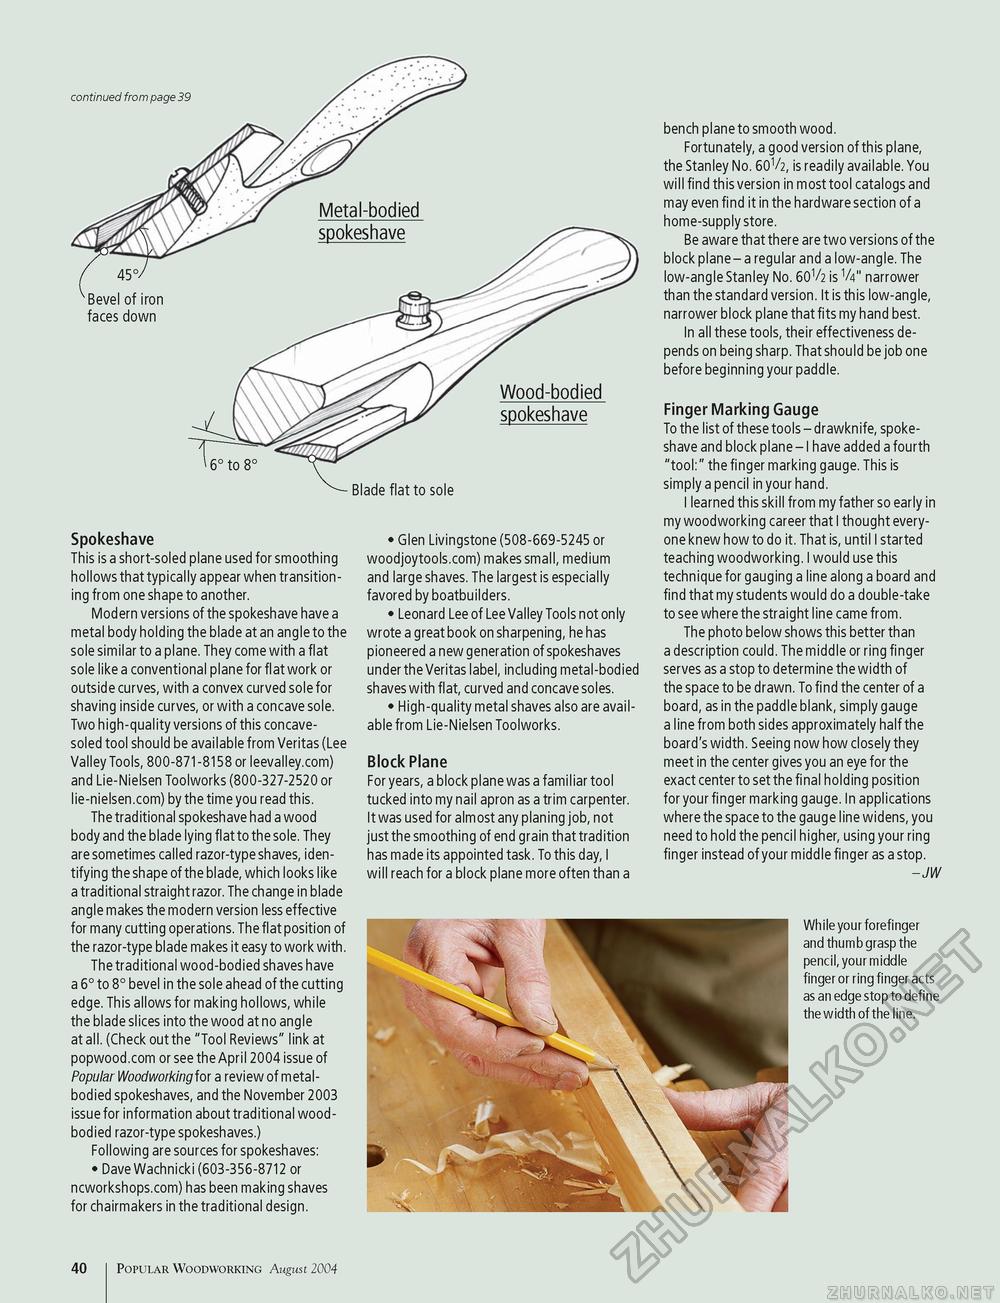
continued from page 39 spokeshave Blade flat to sole Spokeshave This is a short-soled plane used for smoothing hollows that typically appear when transitioning from one shape to another. Modern versions of the spokeshave have a metal body holding the blade at an angle to the sole similar to a plane. They come with a flat sole like a conventional plane for flat work or outside curves, with a convex curved sole for shaving inside curves, or with a concave sole. Two high-quality versions of this concave-soled tool should be available from Veritas (Lee Valley Tools, 800-871-8158 or leevalley.com) and Lie-Nielsen Toolworks (800-327-2520 or lie-nielsen.com) by the time you read this. The traditional spokeshave had a wood body and the blade lying flat to the sole. They are sometimes called razor-type shaves, identifying the shape of the blade, which looks like a traditional straight razor. The change in blade angle makes the modern version less effective for many cutting operations. The flat position of the razor-type blade makes it easy to work with. The traditional wood-bodied shaves have a 6° to 8° bevel in the sole ahead of the cutting edge. This allows for making hollows, while the blade slices into the wood at no angle at all. (Check out the "Tool Reviews" link at popwood.com or see the April 2004 issue of Popular Woodworking for a review of metal-bodied spokeshaves, and the November 2003 issue for information about traditional wood-bodied razor-type spokeshaves.) Following are sources for spokeshaves: • Dave Wachnicki (603-356-8712 or ncworkshops.com) has been making shaves for chairmakers in the traditional design. • Glen Livingstone (508-669-5245 or woodjoytools.com) makes small, medium and large shaves. The largest is especially favored by boatbuilders. • Leonard Lee of Lee Valley Tools not only wrote a great book on sharpening, he has pioneered a new generation of spokeshaves under the Veritas label, including metal-bodied shaves with flat, curved and concave soles. • High-quality metal shaves also are available from Lie-Nielsen Toolworks. Block Plane For years, a block plane was a familiar tool tucked into my nail apron as a trim carpenter. It was used for almost any planing job, not just the smoothing of end grain that tradition has made its appointed task. To this day, I will reach for a block plane more often than a bench plane to smooth wood. Fortunately, a good version of this plane, the Stanley No. 60V2, is readily available. You will find this version in most tool catalogs and may even find it in the hardware section of a home-supply store. Be aware that there are two versions of the block plane - a regular and a low-angle. The low-angle Stanley No. 60V2 is V4" narrower than the standard version. It is this low-angle, narrower block plane that fits my hand best. In all these tools, their effectiveness depends on being sharp. That should be job one before beginning your paddle. Finger Marking Gauge To the list of these tools - drawknife, spokeshave and block plane - I have added a fourth "tool:" the finger marking gauge. This is simply a pencil in your hand. I learned this skill from my father so early in my woodworking career that I thought everyone knew how to do it. That is, until I started teaching woodworking. I would use this technique for gauging a line along a board and find that my students would do a double-take to see where the straight line came from. The photo below shows this better than a description could. The middle or ring finger serves as a stop to determine the width of the space to be drawn. To find the center of a board, as in the paddle blank, simply gauge a line from both sides approximately half the board's width. Seeing now how closely they meet in the center gives you an eye for the exact center to set the final holding position for your finger marking gauge. In applications where the space to the gauge line widens, you need to hold the pencil higher, using your ring finger instead of your middle finger as a stop. - JW While your forefinger and thumb grasp the pencil, your middle finger or ring finger acts as an edge stop to define the width of the line. 40 Popular Woodworking August 2004 |


