Popular Woodworking 2004-10 № 143, страница 53
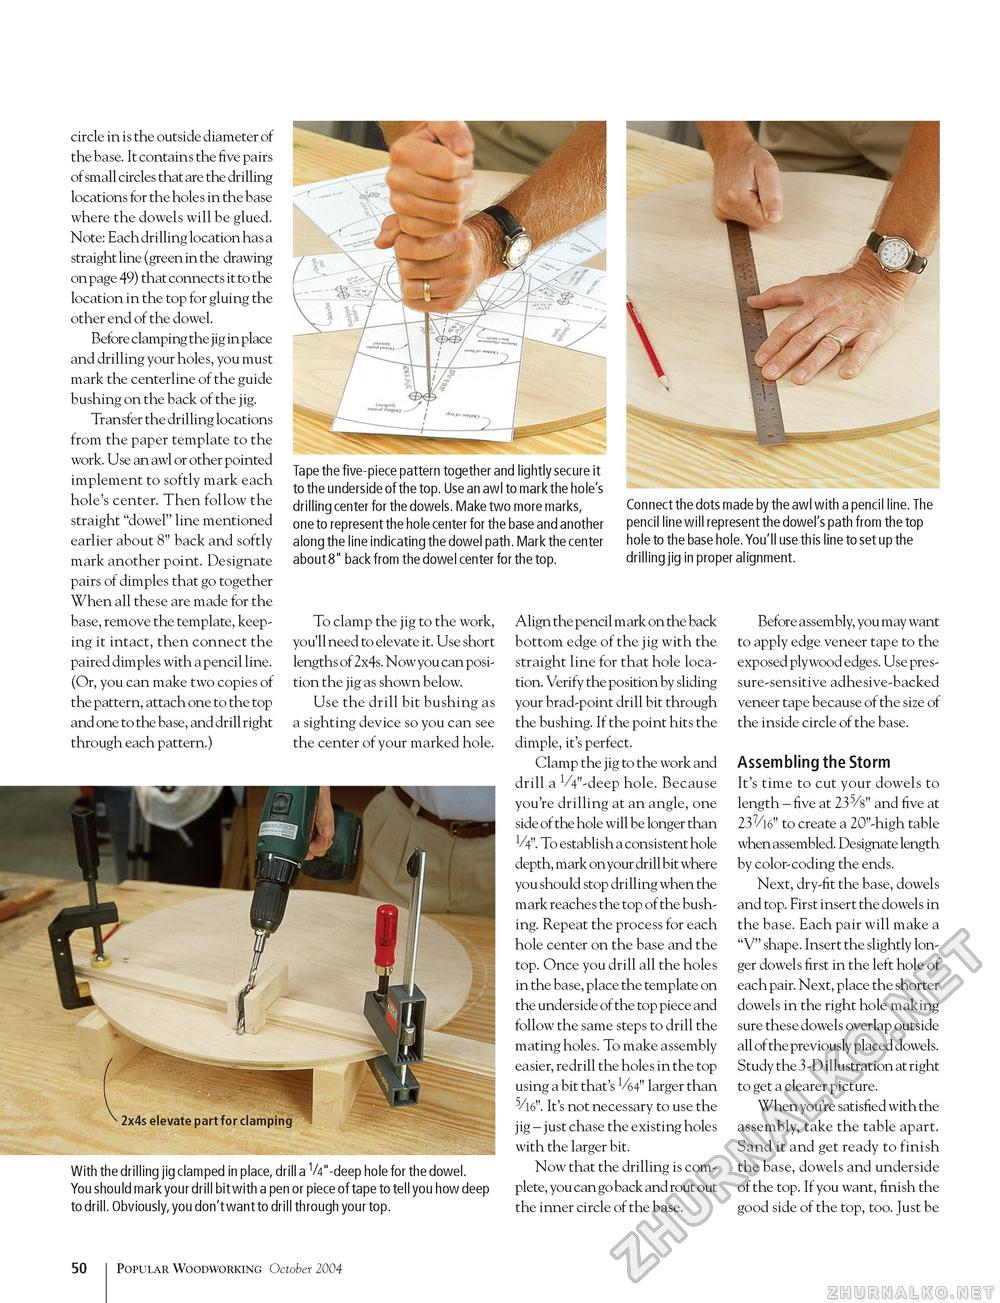
circle in is the outside diameter of the base. It contains the five pairs of small circles that are the drilling locations for the holes in the base where the dowels will be glued. Note: Each drilling location has a straight line (green in the drawing on page 49) that connects it to the location in the top for gluing the other end of the dowel. Before clamping the jig in place and drilling your holes, you must mark the centerline of the guide bushing on the back of the jig. Transfer the drilling locations from the paper template to the work. Use an awl or other pointed implement to softly mark each hole's center. Then follow the straight "dowel" line mentioned earlier about 8" back and softly mark another point. Designate pairs of dimples that go together When all these are made for the base, remove the template, keeping it intact, then connect the paired dimples with a pencil line. (Or, you can make two copies of the pattern, attach one to the top and one to the base, and drill right through each pattern.) Tape the five-piece pattern together and lightly secure it to the underside of the top. Use an awl to mark the hole's drilling center for the dowels. Make two more marks, one to represent the hole center for the base and another along the line indicating the dowel path. Mark the center about 8" back from the dowel center for the top. Connect the dots made by the awl with a pencil line. The pencil line will represent the dowel's path from the top hole to the base hole. You'll use this line to set up the drilling jig in proper alignment. To clamp the jig to the work, you'll need to elevate it. Use short lengths of 2x4s. Now you can position the jig as shown below. Use the drill bit bushing as a sighting device so you can see the center of your marked hole. - 2x4s elevate part for clamping With the drilling jig clamped in place, drill a V4"-deep hole for the dowel. You should mark your drill bit with a pen or piece of tape to tell you how deep to drill. Obviously, you don't want to drill through your top. Align the pencil mark on the back bottom edge of the jig with the straight line for that hole location. Verify the position by sliding your brad-point drill bit through the bushing. If the point hits the dimple, it's perfect. Clamp the jig to the work and drill a VV-deep hole. Because you're drilling at an angle, one side of the hole will be longer than V4". To establish a consistent hole depth, mark on your drill bit where you should stop drilling when the mark reaches the top of the bushing. Repeat the process for each hole center on the base and the top. Once you drill all the holes in the base, place the template on the underside of the top piece and follow the same steps to drill the mating holes. To make assembly easier, redrill the holes in the top using a bit that's 1/64" larger than It's not necessary to use the jig - just chase the existing holes with the larger bit. Now that the drilling is complete, you can go back and rout out the inner circle of the base. Before assembly, you may want to apply edge veneer tape to the exposed plywood edges. Use pressure-sensitive adhesive-backed veneer tape because of the size of the inside circle of the base. Assembling the Storm It's time to cut your dowels to length - five at 235/8" and five at 237/16" to create a 20"-high table when assembled. Designate length by color-coding the ends. Next, dry-fit the base, dowels and top. First insert the dowels in the base. Each pair will make a "V" shape. Insert the slightly longer dowels first in the left hole of each pair. Next, place the shorter dowels in the right hole making sure these dowels overlap outside all of the previously placed dowels. Study the 3 -D illustration at right to get a clearer picture. When you're satisfied with the assembly, take the table apart. Sand it and get ready to finish the base, dowels and underside of the top. If you want, finish the good side of the top, too. Just be 50 Popular Woodworking October 2004 |


