Popular Woodworking 2004-11 № 144, страница 38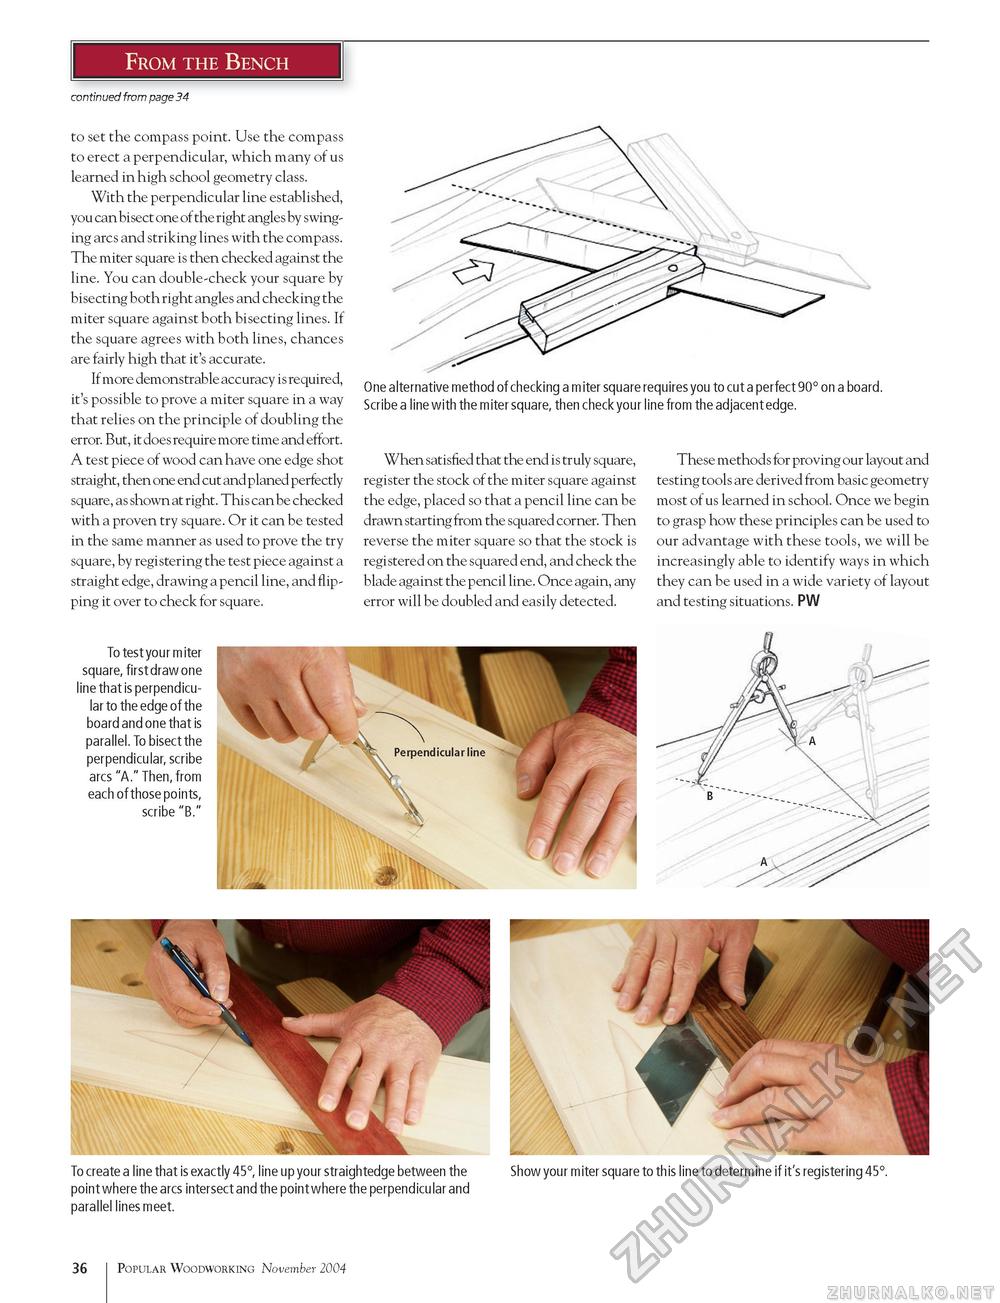
From the Bench continued from page 34 to set the compass point. Use the compass to erect a perpendicular, which many of us learned in high school geometry class. With the perpendicular line established, you can bisect one of the right angles by swinging arcs and striking lines with the compass. The miter square is then checked against the line. You can double-check your square by bisecting both right angles and checking the miter square against both bisecting lines. If the square agrees with both lines, chances are fairly high that it's accurate. If more demonstrable accuracy isrequired, it's possible to prove a miter square in a way that relies on the principle of doubling the error. But, it does require more time and effort. A test piece of wood can have one edge shot straight, then one end cut and planed perfectly square, as shown at right. This can be checked with a proven try square. Or it can be tested in the same manner as used to prove the try square, by registering the test piece against a straight edge, drawing a pencil line, and flipping it over to check for square. One alternative method of checking a m iter square requires you to cut a perfect 90° on a board. Scribe a line with the miter square, then check your line from the adjacent edge. When satisfied that the end is truly square, register the stock of the miter square against the edge, placed so that a pencil line can be drawn starting from the squared corner. Then reverse the miter square so that the stock is registered on the squared end, and check the blade against the pencil line. Once again, any error will be doubled and easily detected. These methods for proving our layout and testing tools are derived from basic geometry most of us learned in school. Once we begin to grasp how these principles can be used to our advantage with these tools, we will be increasingly able to identify ways in which they can be used in a wide variety of layout and testing situations. PW To test your miter square, first draw one ine that is perpendicular to the edge of the board and one that is parallel. To bisect the perpendicular, scribe arcs "A." Then, from each of those points, scribe "B." To create a line that is exactly 45°, line up your straightedge between the Show your miter square to this line to determine if it's registering 45°. point where the arcs intersect and the point where the perpendicular and parallel lines meet. 36 Popular Woodworking November 2004 |


