Popular Woodworking 2004-12 № 145, страница 52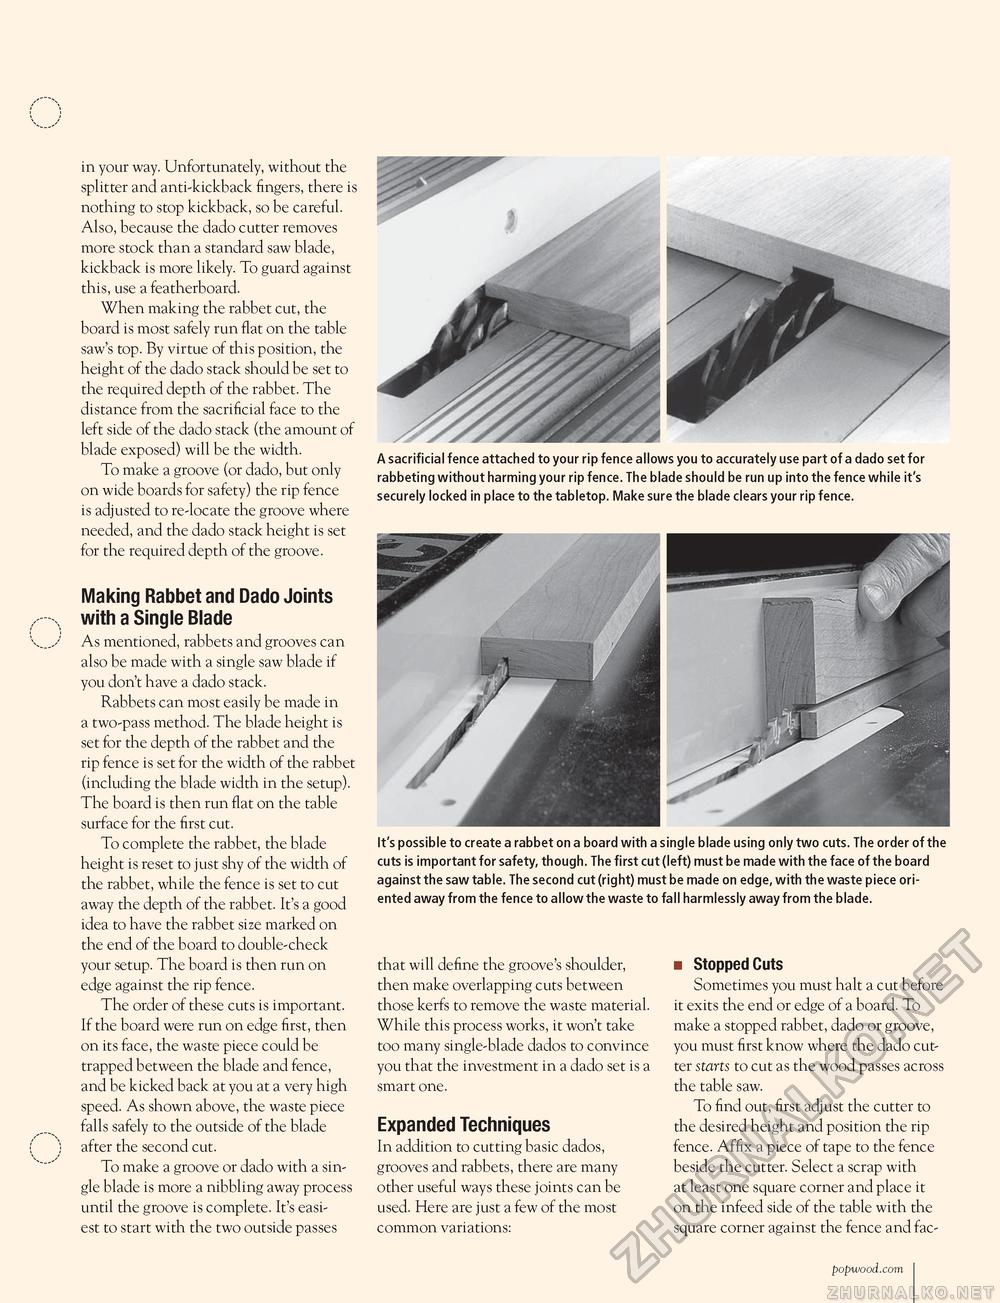
in your way. Unfortunately, without the splitter and anti-kickback fingers, there is nothing to stop kickback, so be careful. Also, because the dado cutter removes more stock than a standard saw blade, kickback is more likely. To guard against this, use a featherboard. When making the rabbet cut, the board is most safely run flat on the table saw's top. By virtue of this position, the height of the dado stack should be set to the required depth of the rabbet. The distance from the sacrificial face to the left side of the dado stack (the amount of blade exposed) will be the width. To make a groove (or dado, but only on wide boards for safety) the rip fence is adjusted to re-locate the groove where needed, and the dado stack height is set for the required depth of the groove. Making Rabbet and Dado Joints with a Single Blade As mentioned, rabbets and grooves can also be made with a single saw blade if you don't have a dado stack. Rabbets can most easily be made in a two-pass method. The blade height is set for the depth of the rabbet and the rip fence is set for the width of the rabbet (including the blade width in the setup). The board is then run flat on the table surface for the first cut. To complete the rabbet, the blade height is reset to just shy of the width of the rabbet, while the fence is set to cut away the depth of the rabbet. It's a good idea to have the rabbet size marked on the end of the board to double-check your setup. The board is then run on edge against the rip fence. The order of these cuts is important. If the board were run on edge first, then on its face, the waste piece could be trapped between the blade and fence, and be kicked back at you at a very high speed. As shown above, the waste piece falls safely to the outside of the blade after the second cut. To make a groove or dado with a single blade is more a nibbling away process until the groove is complete. It's easiest to start with the two outside passes A sacrificial fence attached to your rip fence allows you to accurately use part of a dado set for rabbeting without harming your rip fence. The blade should be run up into the fence while it's securely locked in place to the tabletop. Make sure the blade clears your rip fence. It's possible to create a rabbet on a board with a single blade using only two cuts. The order of the cuts is important for safety, though. The first cut (left) must be made with the face of the board against the saw table. The second cut (right) must be made on edge, with the waste piece oriented away from the fence to allow the waste to fall harmlessly away from the blade. that will define the groove's shoulder, then make overlapping cuts between those kerfs to remove the waste material. While this process works, it won't take too many single-blade dados to convince you that the investment in a dado set is a smart one. Expanded Techniques In addition to cutting basic dados, grooves and rabbets, there are many other useful ways these joints can be used. Here are just a few of the most common variations: ■ Stopped Cuts Sometimes you must halt a cut before it exits the end or edge of a board. To make a stopped rabbet, dado or groove, you must first know where the dado cutter starts to cut as the wood passes across the table saw. To find out, first adjust the cutter to the desired height and position the rip fence. Affix a piece of tape to the fence beside the cutter. Select a scrap with at least one square corner and place it on the infeed side of the table with the square corner against the fence and fac- popwood.com 101 |


