Popular Woodworking 2005-02 № 146, страница 62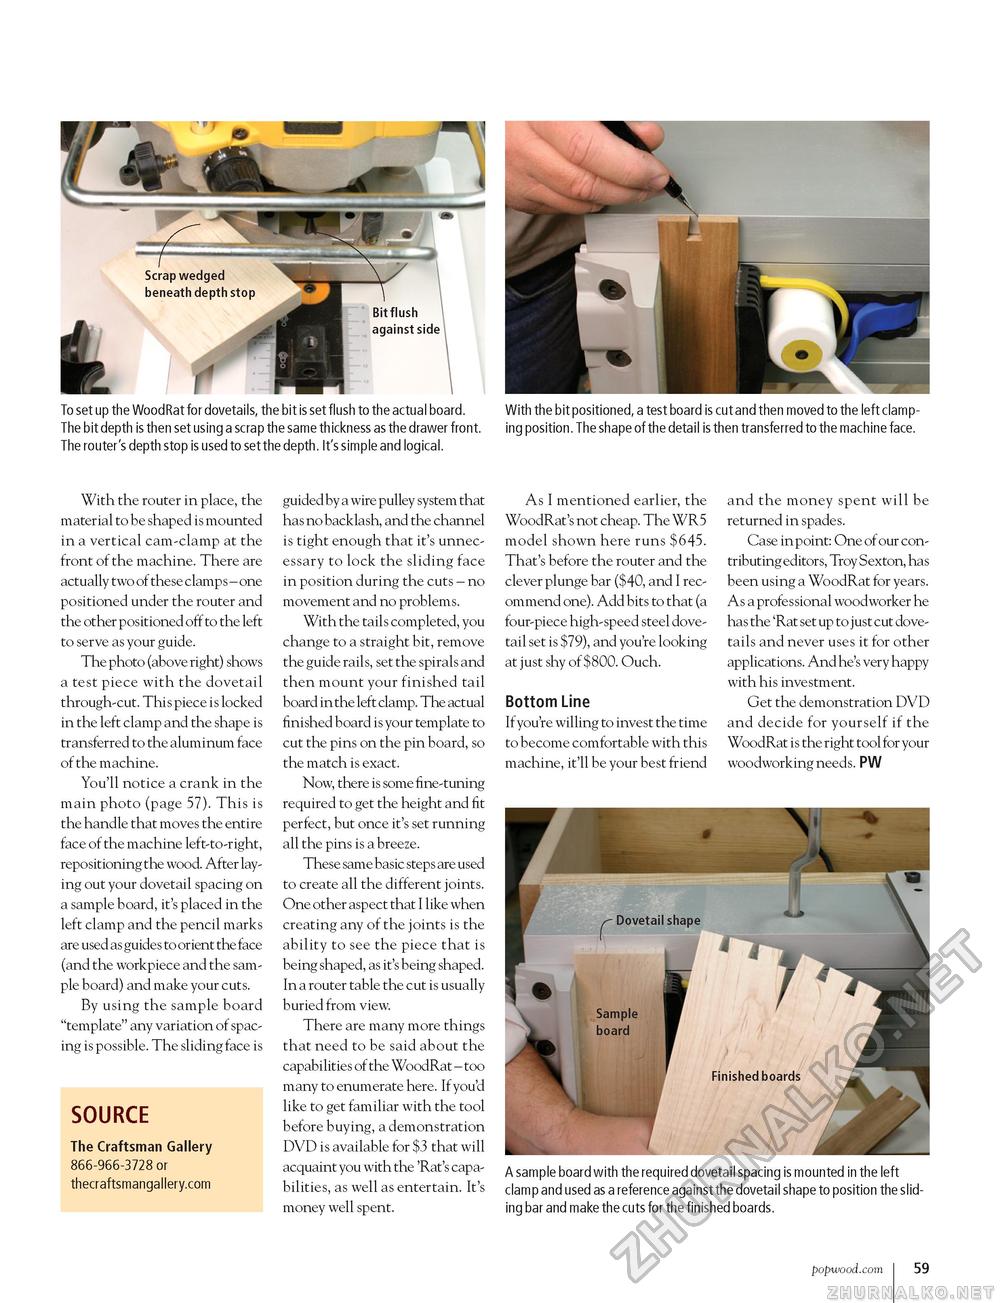
To set up the WoodRat for dovetails, the bit is set flush to the actual board. The bit depth is then set using a scrap the same thickness as the drawer front. The router's depth stop is used to set the depth. It's simple and logical. With the bit positioned, a test board is cut and then moved to the left clamping position. The shape of the detail is then transferred to the machine face. With the router in place, the material to be shaped is mounted in a vertical cam-clamp at the front of the machine. There are actually two of these clamp s - one positioned under the router and the other positioned off to the left to serve as your guide. The photo (above right) shows a test piece with the dovetail through-cut. This piece is locked in the left clamp and the shape is transferred to the aluminum face of the machine. You'll notice a crank in the main photo (page 57). This is the handle that moves the entire face of the machine left-to-right, repositioning the wood. After laying out your dovetail spacing on a sample board, it's placed in the left clamp and the pencil marks are used as guides to orient the face (and the workpiece and the sample board) and make your cuts. By using the sample board "template" any variation of spacing is possible. The sliding face is SOURCE The Craftsman Gallery 866-966-3728 or thecraftsmangallery.com guided by a wire pulley system that has no backlash, and the channel is tight enough that it's unnecessary to lock the sliding face in position during the cuts - no movement and no problems. With the tails completed, you change to a straight bit, remove the guide rails, set the spirals and then mount your finished tail board in the left clamp. The actual finished board is your template to cut the pins on the pin board, so the match is exact. Now, there is some fine-tuning required to get the height and fit perfect, but once it's set running all the pins is a breeze. These same basic steps are used to create all the different joints. One other aspect that I like when creating any of the joints is the ability to see the piece that is being shaped, as it's being shaped. In a router table the cut is usually buried from view. There are many more things that need to be said about the capabilities of the WoodRat - too many to enumerate here. If you'd like to get familiar with the tool before buying, a demonstration DVD is available for $3 that will acquaint you with the 'Rat's capabilities, as well as entertain. It's money well spent. As I mentioned earlier, the WoodRat's not cheap. The WR5 model shown here runs $645. That's before the router and the clever plunge bar ($40, and I recommend one). Add bits to that (a four-piece high-speed steel dovetail set is $79), and you're looking at just shy of $800. Ouch. Bottom Line If you're willing to invest the time to become comfortable with this machine, it'll be your best friend and the money spent will be returned in spades. Case in point: One of our contributing editors, Troy Sexton, has been using a WoodRat for years. As a profe s sional woodworker he has the 'Rat set up to just cut dovetails and never uses it for other applications. And he's very happy with his investment. Get the demonstration DVD and decide for yourself if the WoodRat is the right tool for your woodworking needs. PW A sample board with the required dovetail spacing is mounted in the left clamp and used as a reference against the dovetail shape to position the sliding bar and make the cuts for the finished boards. popwood.com 59 |


