Popular Woodworking 2005-02 № 146, страница 65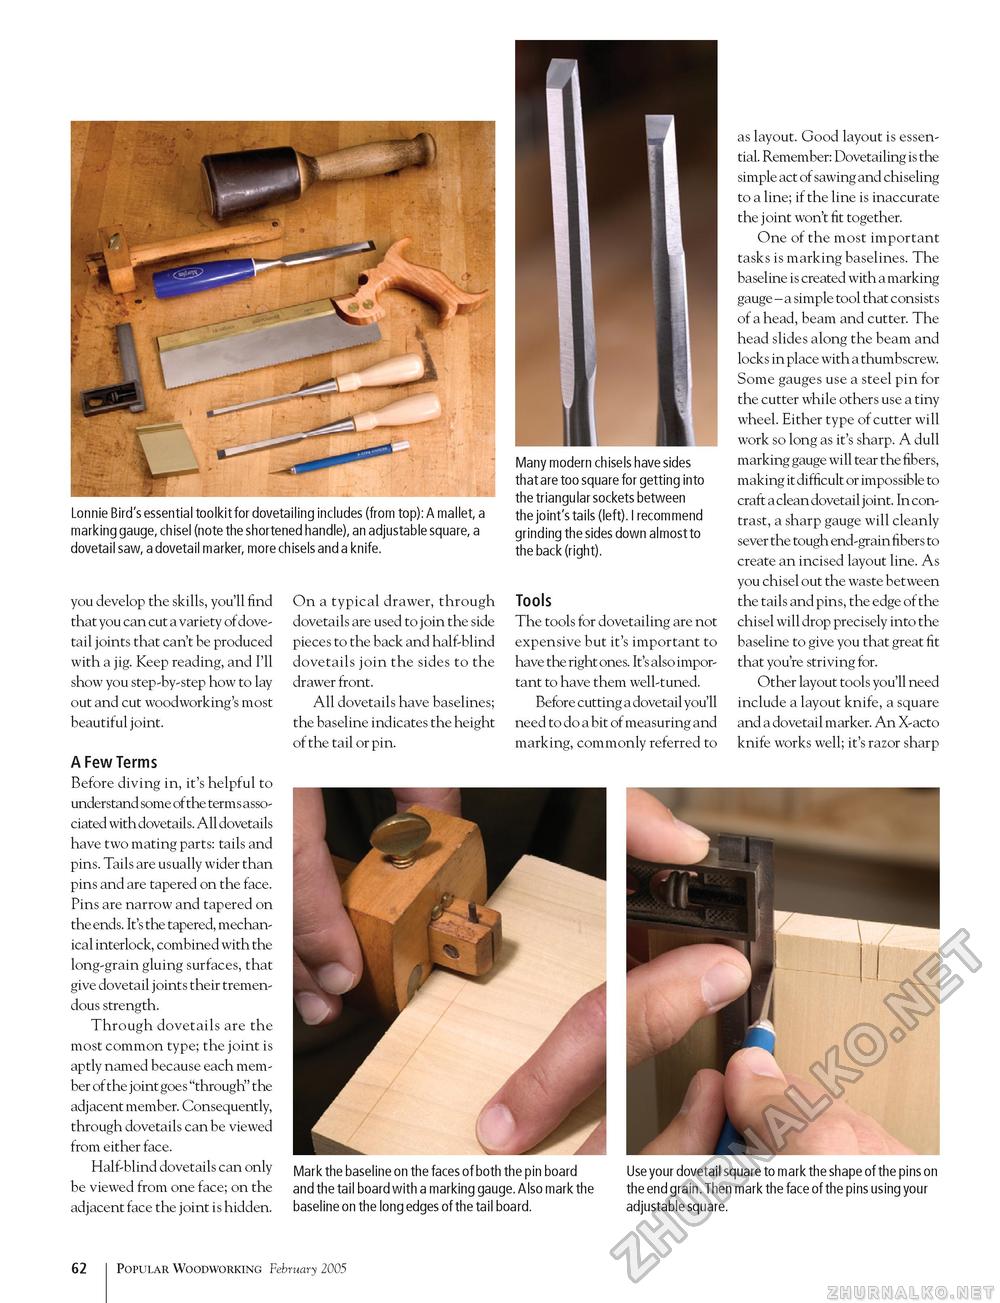
Lonnie Bird's essential toolkit for dovetailing includes (from top): A mallet, a marking gauge, chisel (note the shortened handle), an adjustable square, a dovetail saw, a dovetail marker, more chisels and a knife. you develop the skills, you'll find that you can cut a variety of dovetail joints that can't be produced with a jig. Keep reading, and I'll show you step-by-step how to lay out and cut woodworking's most beautiful joint. A Few Terms Before diving in, it's helpful to understand some of the terms associated with dovetails. All dovetails have two mating parts: tails and pins. Tails are usually wider than pins and are tapered on the face. Pins are narrow and tapered on the ends. It's the tapered, mechanical interlock, combined with the long-grain gluing surfaces, that give dovetail joints their tremendous strength. Through dovetails are the most common type; the joint is aptly named because each member of the joint goes "through" the adjacent member. Consequently, through dovetails can be viewed from either face. Half-blind dovetails can only be viewed from one face; on the adjacent face the joint is hidden. On a typical drawer, through dovetails are used to join the side pieces to the back and half-blind dovetails join the sides to the drawer front. All dovetails have baselines; the baseline indicates the height of the tail or pin. Many modern chisels have sides that are too square for getting into the triangu lar sockets between the joint's tails (left). I recommend grinding the sides down almost to the back (right). Tools The tools for dovetailing are not expensive but it's important to have the right ones. It's also important to have them well-tuned. Before cutting a dovetail you'll need to do a bit of measuring and marking, commonly referred to as layout. Good layout is essential. Remember: Dovetailing is the simple act of sawing and chiseling to a line; if the line is inaccurate the joint won't fit together. One of the most important tasks is marking baselines. The baseline is created with a marking gauge - a simple tool that consists of a head, beam and cutter. The head slides along the beam and locks in place with a thumbscrew. Some gauges use a steel pin for the cutter while others use a tiny wheel. Either type of cutter will work so long as it's sharp. A dull marking gauge will tear the fibers, making it difficult or impossible to craft a clean dovetail joint. In contrast, a sharp gauge will cleanly sever the tough end-grain fibers to create an incised layout line. As you chisel out the waste between the tails and pins, the edge of the chisel will drop precisely into the baseline to give you that great fit that you're striving for. Other layout tools you'll need include a layout knife, a square and a dovetail marker. An X-acto knife works well; it's razor sharp Mark the baseline on the faces of both the pin board and the tail board with a marking gauge. Also mark the baseline on the long edges of the tail board. Use your dovetail square to mark the shape of the pins on the end grain. Then mark the face of the pins using your adjustable square. 62 Popular Woodworking February 2005 |


