Popular Woodworking 2005-02 № 146, страница 66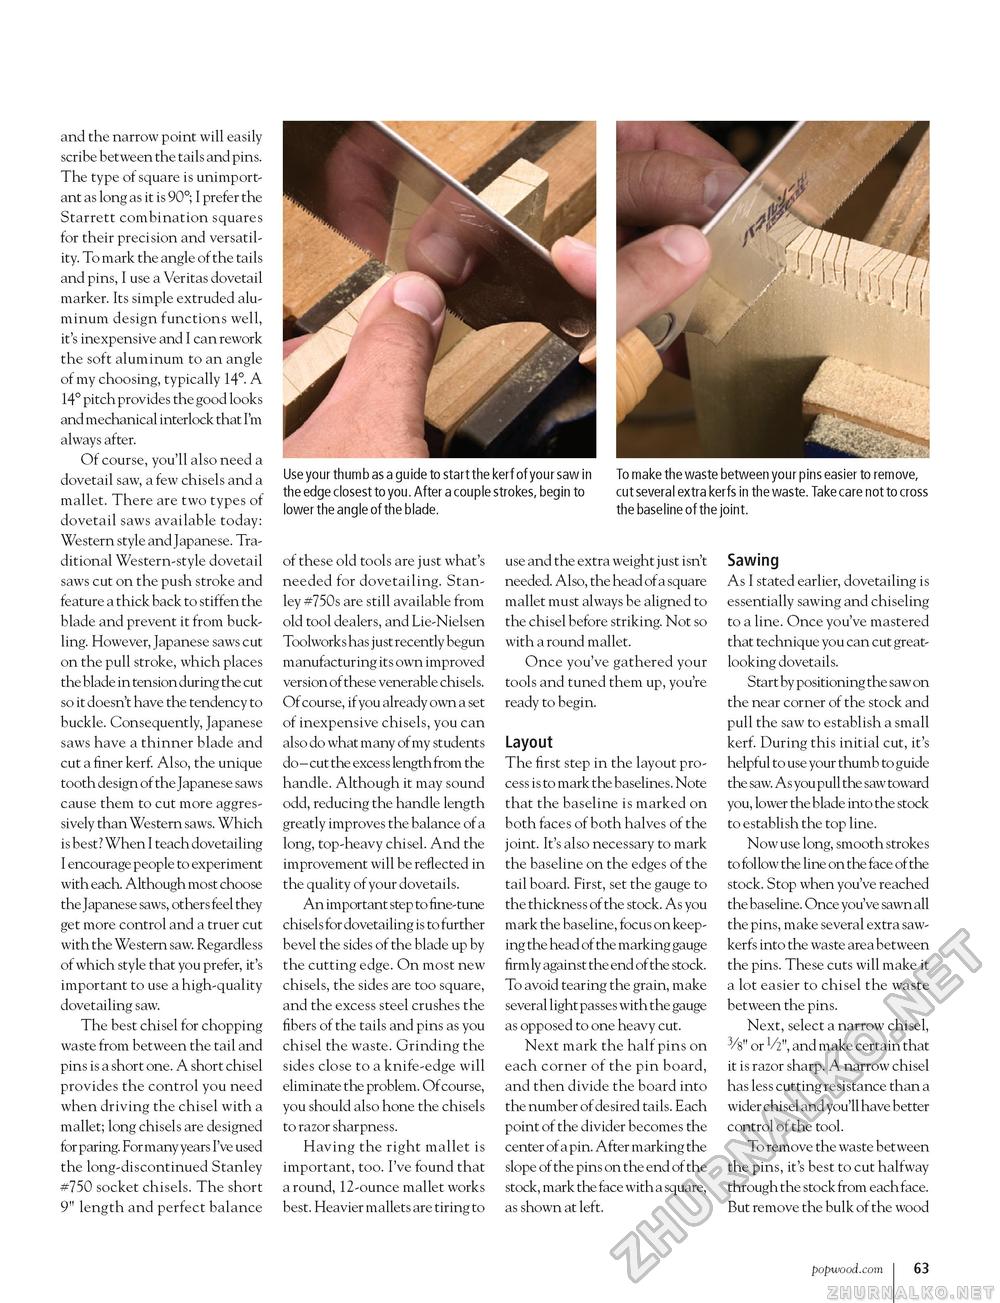
Use your thumb as a guide to start the kerf of your saw in To make the waste between your pins easier to remove, the edge closest to you. After a couple strokes, begin to cut several extra kerfs in the waste. Take care not to cross lower the angle of the blade. the baseline of the joint. and the narrow point will easily scribe between the tails and pins. The type of square is unimportant as long as it is 90°; I prefer the Starrett combination squares for their precision and versatility. To mark the angle of the tails and pins, I use a Veritas dovetail marker. Its simple extruded aluminum design functions well, it's inexpensive and I can rework the soft aluminum to an angle of my choosing, typically 14°. A 14° pitch provides the good looks and mechanical interlock that I'm always after. Of course, you'll also need a dovetail saw, a few chisels and a mallet. There are two types of dovetail saws available today: Western style and Japanese. Traditional Western-style dovetail saws cut on the push stroke and feature a thick back to stiffen the blade and prevent it from buckling. However, Japanese saws cut on the pull stroke, which places the blade in tension during the cut so it doesn't have the tendency to buckle. Consequently, Japanese saws have a thinner blade and cut a finer kerf. Also, the unique tooth design of the Japanese saws cause them to cut more aggressively than Western saws. Which is best? When I teach dovetailing I encourage people to experiment with each. Although most choose the Japanese saws, others feel they get more control and a truer cut with the Western saw. Regardless of which style that you prefer, it's important to use a high-quality dovetailing saw. The best chisel for chopping waste from between the tail and pins is a short one. A short chisel provides the control you need when driving the chisel with a mallet; long chisels are designed for paring. For many years I've used the long-discontinued Stanley #750 socket chisels. The short 9" length and perfect balance of these old tools are just what's needed for dovetailing. Stanley #750s are still available from old tool dealers, and Lie-Nielsen Toolworks has just recently begun manufacturing its own improved version of these venerable chisels. Of course, if you already own a set of inexpensive chisels, you can also do what many of my students do - cut the excess length from the handle. Although it may sound odd, reducing the handle length greatly improves the balance of a long, top-heavy chisel. And the improvement will be reflected in the quality of your dovetails. An important step to fine-tune chisels for dovetailing is to further bevel the sides of the blade up by the cutting edge. On most new chisels, the sides are too square, and the excess steel crushes the fibers of the tails and pins as you chisel the waste. Grinding the sides close to a knife-edge will eliminate the problem. Of course, you should also hone the chisels to razor sharpness. Having the right mallet is important, too. I've found that a round, 12-ounce mallet works best. Heavier mallets are tiring to use and the extra weight just isn't needed. Also, the head of a square mallet must always be aligned to the chisel before striking. Not so with a round mallet. Once you've gathered your tools and tuned them up, you're ready to begin. Layout The first step in the layout process is to mark the baselines. Note that the baseline is marked on both faces of both halves of the joint. It's also necessary to mark the baseline on the edges of the tail board. First, set the gauge to the thickness of the stock. As you mark the baseline, focus on keeping the head of the marking gauge firmly against the end of the stock. To avoid tearing the grain, make several light passes with the gauge as opposed to one heavy cut. Next mark the half pins on each corner of the pin board, and then divide the board into the number of desired tails. Each point of the divider becomes the center of a pin. After marking the slope of the pins on the end of the stock, mark the face with a square, as shown at left. Sawing As I stated earlier, dovetailing is essentially sawing and chiseling to a line. Once you've mastered that technique you can cut great-looking dovetails. Start by positioning the saw on the near corner of the stock and pull the saw to establish a small kerf. During this initial cut, it's helpful to use your thumb to guide the saw. As you pull the saw toward you, lower the blade into the stock to establish the top line. Now use long, smooth strokes to follow the line on the face of the stock. Stop when you've reached the baseline. Once you've sawn all the pins, make several extra saw-kerfs into the waste area between the pins. These cuts will make it a lot easier to chisel the waste between the pins. Next, select a narrow chisel, 3/8" or V2", and make certain that it is razor sharp. A narrow chisel has less cutting resistance than a wider chisel and you'll have better control of the tool. To remove the waste between the pins, it's best to cut halfway through the stock from each face. But remove the bulk of the wood popwood.com 63 |


