Popular Woodworking 2005-02 № 146, страница 68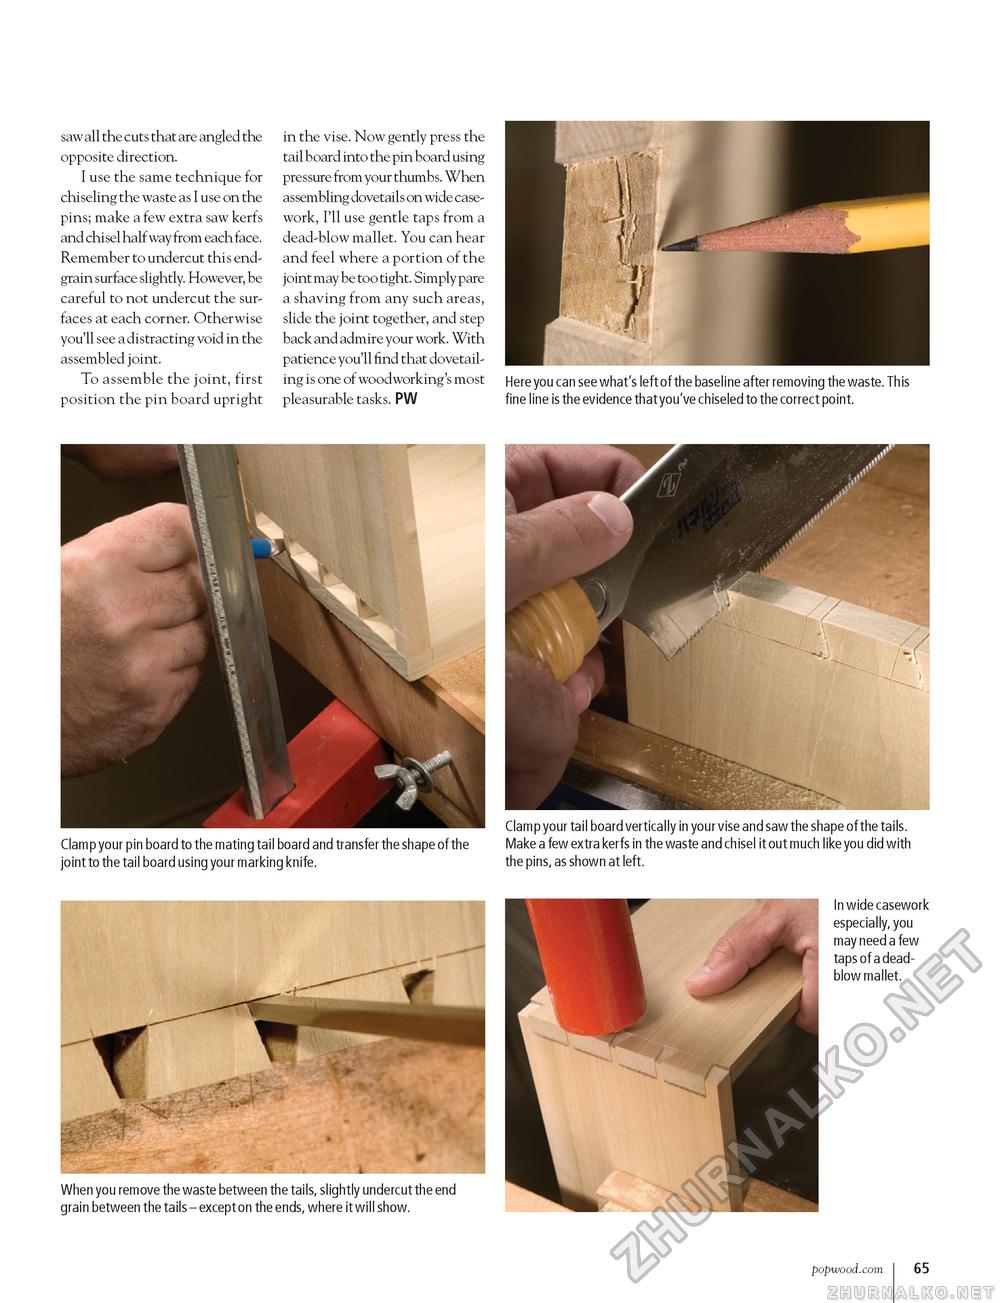
saw all the cuts that are angled the opposite direction. I use the same technique for chiseling the waste as I use on the pins; make a few extra saw kerfs and chi sel half way from each face. Remember to undercut this end-grain surface slightly. However, be careful to not undercut the surfaces at each corner. Otherwise you'll see a distracting void in the assembled joint. To assemble the joint, first position the pin board upright in the vise. Now gently press the tail board into the pin board using pressure from your thumbs. When assembling dovetails on wide casework, I'll use gentle taps from a dead-blow mallet. You can hear and feel where a portion of the joint may be too tight. Simply pare a shaving from any such areas, slide the joint together, and step back and admire your work. With patience you'll find that dovetailing is one of woodworking's most pleasurable tasks. PW Here you can see what's left of the baseline after removing the waste. This fine line is the evidence that you've chiseled to the correct point. Clamp your pin board to the mating tail board and transfer the shape of the Make a few extra kerfs in the waste and chisel it out much like you did with joint to the tail board using your marking knife. the pins, as shown at left. In wide casework especially, you may need a few taps of a dead-blow mallet. When you remove the waste between the tails, slightly undercut the end grain between the tails - except on the ends, where it will show. popwood.com 65 |


