Popular Woodworking 2005-08 № 149, страница 65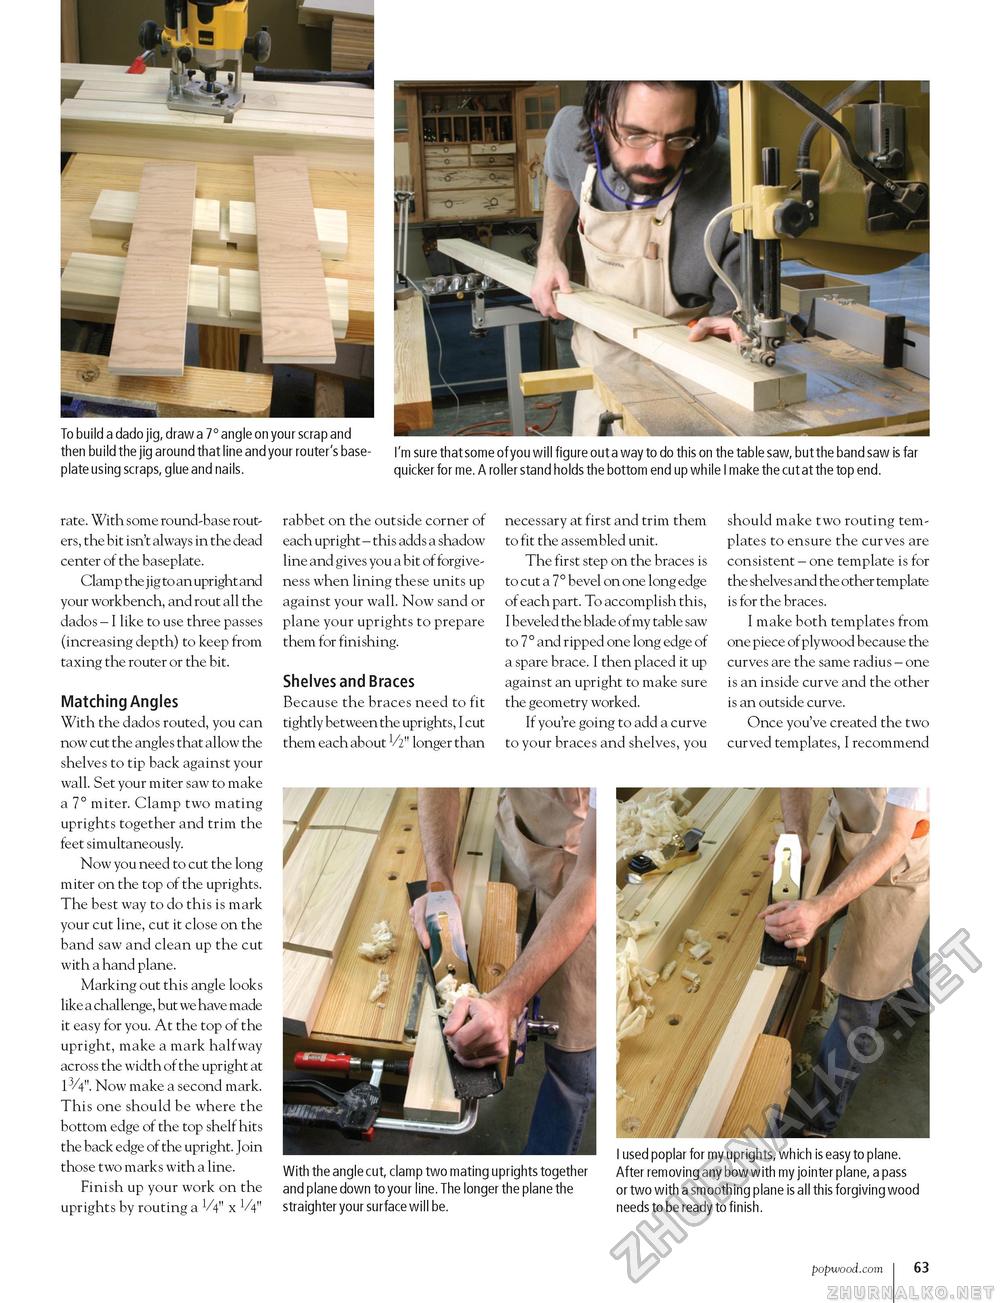
then build the jig around that line and your router's base- I'm sure that some of you will figure out a way to do this on the table saw, but the band saw is far plate using scraps, glue and nails. quicker for me. A roller stand holds the bottom end up while I make the cut at the top end. rate. With some round-base routers, the bit isn't always in the dead center of the baseplate. Clamp the j ig to an upright and your workbench, and rout all the dados - I like to use three passes (increasing depth) to keep from taxing the router or the bit. Matching Angles With the dados routed, you can now cut the angles that allow the shelves to tip back against your wall. Set your miter saw to make a 7° miter. Clamp two mating uprights together and trim the feet simultaneously. Now you need to cut the long miter on the top of the uprights. The best way to do this is mark your cut line, cut it close on the band saw and clean up the cut with a hand plane. Marking out this angle looks like a challenge, but we have made it easy for you. At the top of the upright, make a mark halfway across the width of the upright at 13/4". Now make a second mark. This one should be where the bottom edge of the top shelf hits the back edge of the upright. Join those two marks with a line. Finish up your work on the uprights by routing a V4" x V4" rabbet on the outside corner of each upright - this adds a shadow line and gives you a bit of forgiveness when lining these units up against your wall. Now sand or plane your uprights to prepare them for finishing. Shelves and Braces Because the braces need to fit tightly between the uprights, I cut them each about V2" longer than necessary at first and trim them to fit the assembled unit. The first step on the braces is to cut a 7 ° bevel on one long edge of each part. To accomplish this, I beveled the blade of my table saw to 7° and ripped one long edge of a spare brace. I then placed it up against an upright to make sure the geometry worked. If you're going to add a curve to your braces and shelves, you should make two routing templates to ensure the curves are consistent - one template is for the shelves and the other template is for the braces. I make both templates from one piece of plywood because the curves are the same radius - one is an inside curve and the other is an outside curve. Once you've created the two curved templates, I recommend With the angle cut, clamp two mating uprights together and plane down to your line. The longer the plane the straighter your surface will be. I used poplar for my uprights, which is easy to plane. After removing any bow with my jointer plane, a pass or two with a smoothing plane is all this forgiving wood needs to be ready to finish. popwood.com I 63 |


