Popular Woodworking 2005-08 № 149, страница 67
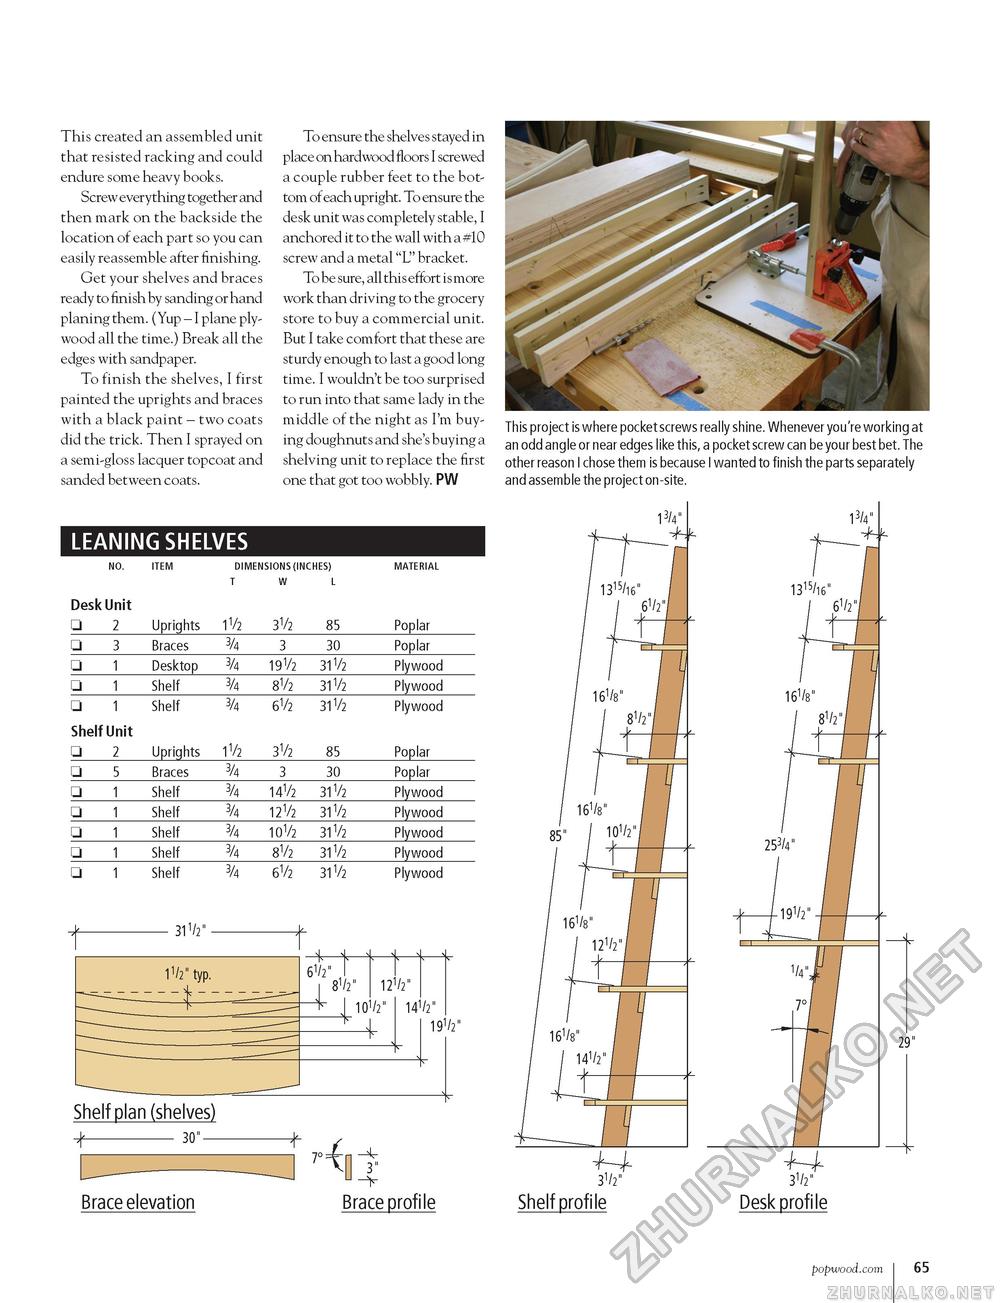
This created an assembled unit that resisted racking and could endure some heavy books. Screw everything together and then mark on the backside the location of each part so you can easily reassemble after finishing. Get your shelves and braces ready to finish by sanding or hand planing them. (Yup - I plane plywood all the time.) Break all the edges with sandpaper. To finish the shelves, I first painted the uprights and braces with a black paint - two coats did the trick. Then I sprayed on a semi-gloss lacquer topcoat and sanded between coats. To ensure the shelves stayed in place on hardwood floors I screwed a couple rubber feet to the bottom of each upright. To ensure the desk unit was completely stable, I anchored it to the wall with a #10 screw and a metal "L" bracket. To be sure, all this effort is more work than driving to the grocery store to buy a commercial unit. But I take comfort that these are sturdy enough to last a good long time. I wouldn't be too surprised to run into that same lady in the middle of the night as I'm buying doughnuts and she's buying a shelving unit to replace the first one that got too wobbly. PW LEANING SHELVES DIMENSIONS (INCHES) T W L Desk Unit DIMENSIONS (INCHES) T W L
31V 1V typ.
19V Shelf plan (shelves) ^- 30" — 3" This project is where pocket screws really shine. Whenever you're working at an odd angle or near edges like this, a pocket screw can be your best bet. The other reason I chose them is because I wanted to finish the parts separately and assemble the project on-site. Brace elevation Brace profile Shelf profile NO TEM popwood.com I 65 |
||||||||||||||||||||||||||||||||||||||||||||||||||||||||||||||||||||||||||||||||||||||||||||||


