Popular Woodworking 2005-10 № 150, страница 40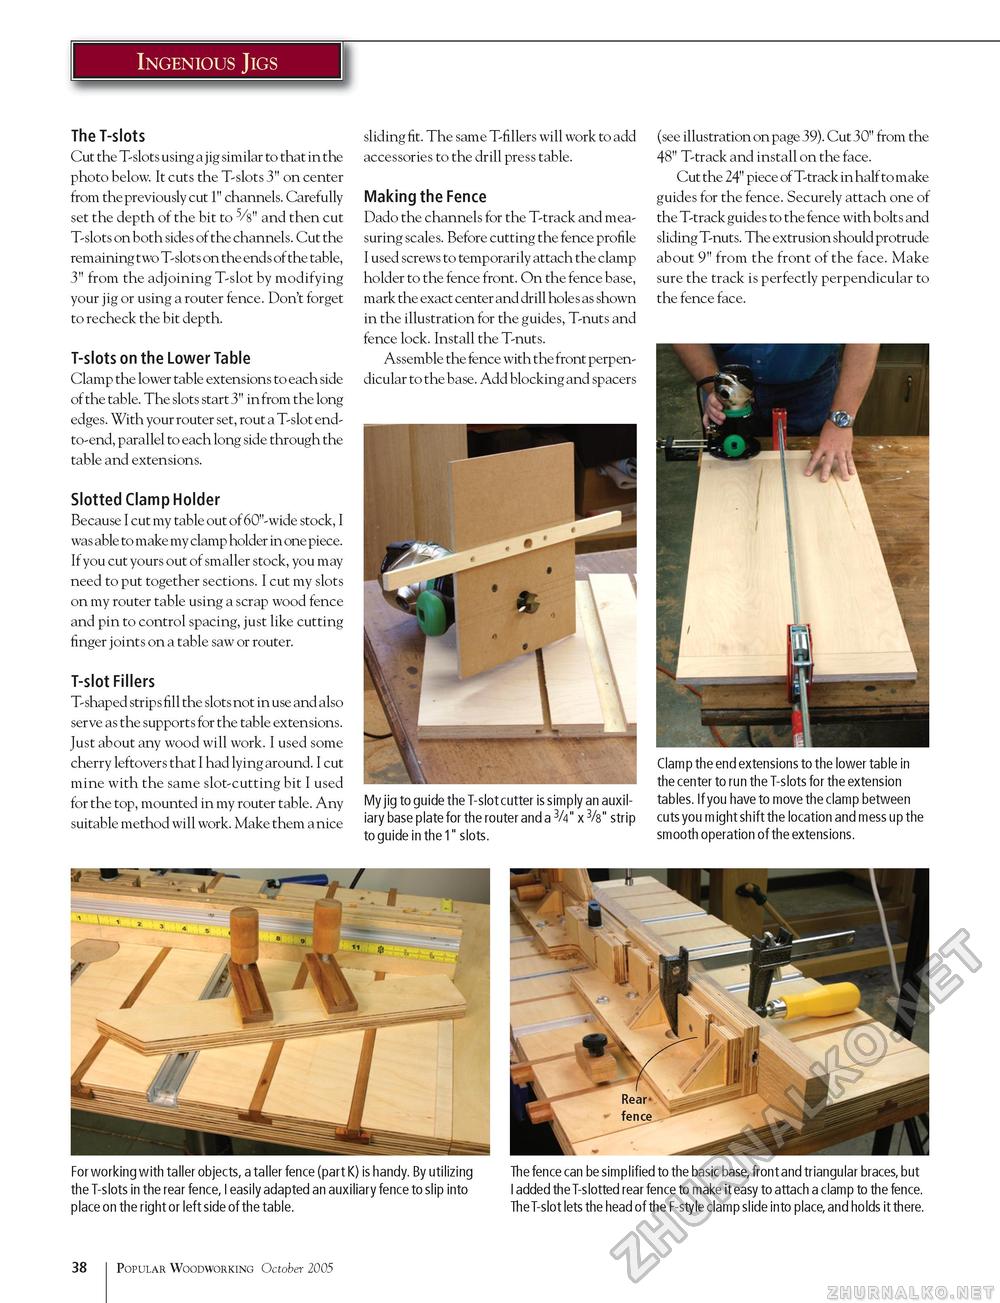
Ingenious Jigs The T-slots Cut the T-slots using a jig similar to that in the photo below. It cuts the T-slots 3" on center from the previously cut 1" channels. Carefully set the depth of the bit to 5/8" and then cut T-slots on both sides of the channels. Cut the remaining two T-slots on the ends of the table, 3" from the adjoining T-slot by modifying your jig or using a router fence. Don't forget to recheck the bit depth. T-slots on the Lower Table Clamp the lower table extensions to each side of the table. The slots start 3" in from the long edges. With your router set, rout a T-slot end-to-end, parallel to each long side through the table and extensions. Slotted Clamp Holder Because I cut my table out of 60"-wide stock, I was able to make my clamp holder in one piece. If you cut yours out of smaller stock, you may need to put together sections. I cut my slots on my router table using a scrap wood fence and pin to control spacing, just like cutting finger joints on a table saw or router. T-slot Fillers T- shaped strip s fill the slots not in use and also serve as the supports for the table extensions. Just about any wood will work. I used some cherry leftovers that I had lying around. I cut mine with the same slot-cutting bit I used for the top, mounted in my router table. Any suitable method will work. Make them a nice sliding fit. The same T-fillers will work to add accessories to the drill press table. Making the Fence Dado the channels for the T-track and measuring scales. Before cutting the fence profile I used screws to temporarily attach the clamp holder to the fence front. On the fence base, mark the exact center and drill hole s as shown in the illustration for the guides, T-nuts and fence lock. Install the T-nuts. Assemble the fence with the front perpendicular to the base. Add blocking and spacers My jig to guide the T-slot cutter is simply an auxiliary base plate for the router and a 3/4" x 3/s" strip to guide in the 1" slots. (see illustration on page 39). Cut 30" from the 48" T-track and install on the face. Cut the 24" piece of T-track in half to make guides for the fence. Securely attach one of the T-track guides to the fence with bolts and sliding T-nuts. The extrusion should protrude about 9" from the front of the face. Make sure the track is perfectly perpendicular to the fence face. Clamp the end extensions to the lower table in the center to run the T-slots for the extension tables. If you have to move the clamp between cuts you might shift the location and mess up the smooth operation of the extensions. For working with taller objects, a taller fence (part K) is handy. By utilizing the T-slots in the rear fence, I easily adapted an auxiliary fence to slip into place on the right or left side of the table. The fence can be simplified to the basic base, front and triangular braces, but I added the T-slotted rear fence to make it easy to attach a clamp to the fence. The T-slot lets the head of the F-style clamp slide into place, and holds it there. 38 Popular Woodworking October 2005 |


