Popular Woodworking 2005-10 № 150, страница 74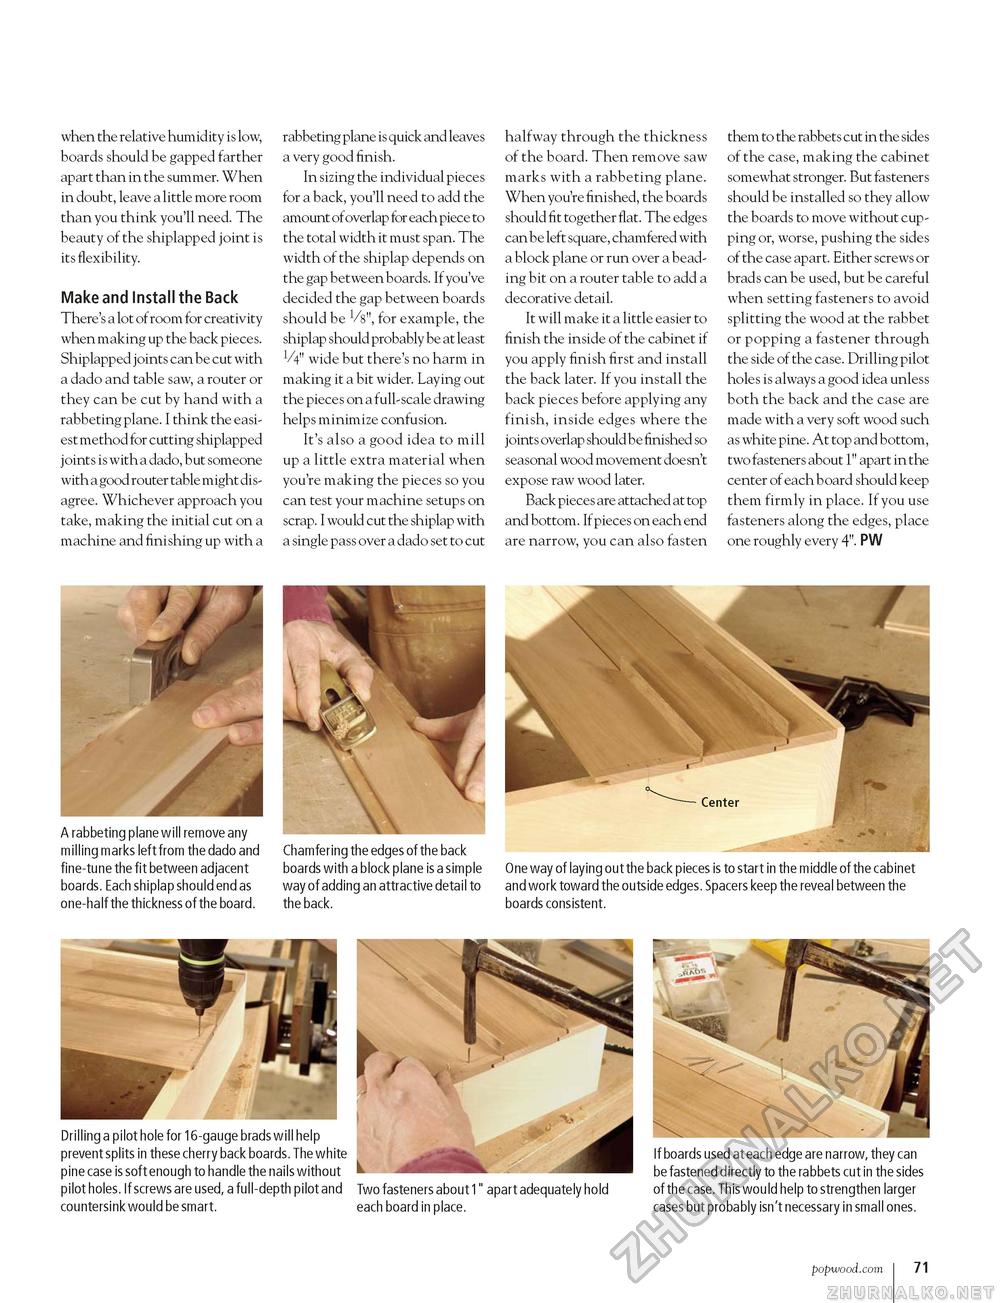
when the relative humidity is low, boards should be gapped farther apart than in the summer. When in doubt, leave a little more room than you think you'll need. The beauty of the shiplapped joint is its flexibility. Make and Install the Back There's a lot of room for creativity when making up the back pieces. Shiplapped joints can be cut with a dado and table saw, a router or they can be cut by hand with a rabbeting plane. I think the easiest method for cutting shiplapped joints is with a dado, but someone with a good router table might disagree. Whichever approach you take, making the initial cut on a machine and finishing up with a rabbeting plane is quick and leaves a very good finish. In sizing the individual pieces for a back, you'll need to add the amount of overlap for each piece to the total width it must span. The width of the shiplap depends on the gap between boards. If you've decided the gap between boards should be Vs", for example, the shiplap should probably be at least VV wide but there's no harm in making it a bit wider. Laying out the pieces on a full-scale drawing helps minimize confusion. It's also a good idea to mill up a little extra material when you're making the pieces so you can test your machine setups on scrap. I would cut the shiplap with a single pass over a dado set to cut halfway through the thickness of the board. Then remove saw marks with a rabbeting plane. When you're finished, the boards should fit together flat. The edge s can be left square, chamfered with a block plane or run over a beading bit on a router table to add a decorative detail. It will make it a little easier to finish the inside of the cabinet if you apply finish first and install the back later. If you install the back pieces before applying any finish, inside edges where the joints overlap should be finished so seasonal wood movement doesn't expose raw wood later. Back pieces are attached at top and bottom. If pieces on each end are narrow, you can also fasten them to the rabbets cut in the sides of the case, making the cabinet somewhat stronger. But fasteners should be installed so they allow the boards to move without cupping or, worse, pushing the sides of the case apart. Either screws or brads can be used, but be careful when setting fasteners to avoid splitting the wood at the rabbet or popping a fastener through the side of the case. Drilling pilot holes is always a good idea unless both the back and the case are made with a very soft wood such as white pine. At top and bottom, two fasteners about 1" apart in the center of each board should keep them firmly in place. If you use fasteners along the edges, place one roughly every 4". PW A rabbeting plane will remove any milling marks left from the dado and fine-tune the fit between adjacent boards. Each shiplap should end as one-half the thickness of the board. Chamfering the edges of the back boards with a block plane is a simple way of adding an attractive detail to the back. One way of laying out the back pieces is to start in the middle of the cabinet and work toward the outside edges. Spacers keep the reveal between the boards consistent. Drilling a pilot hole for 16-gauge brads will help prevent splits in these cherry back boards. The white pine case is soft enough to handle the nails without pilot holes. If screws are used, a full-depth pilot and countersink would be smart. Two fasteners about 1" apart adequately hold each board in place. f boards used at each edge are narrow, they can be fastened directly to the rabbets cut in the sides of the case. This would help to strengthen larger cases but probably isn't necessary in small ones. popwood.com i 71 |


