Popular Woodworking 2005-10 № 150, страница 72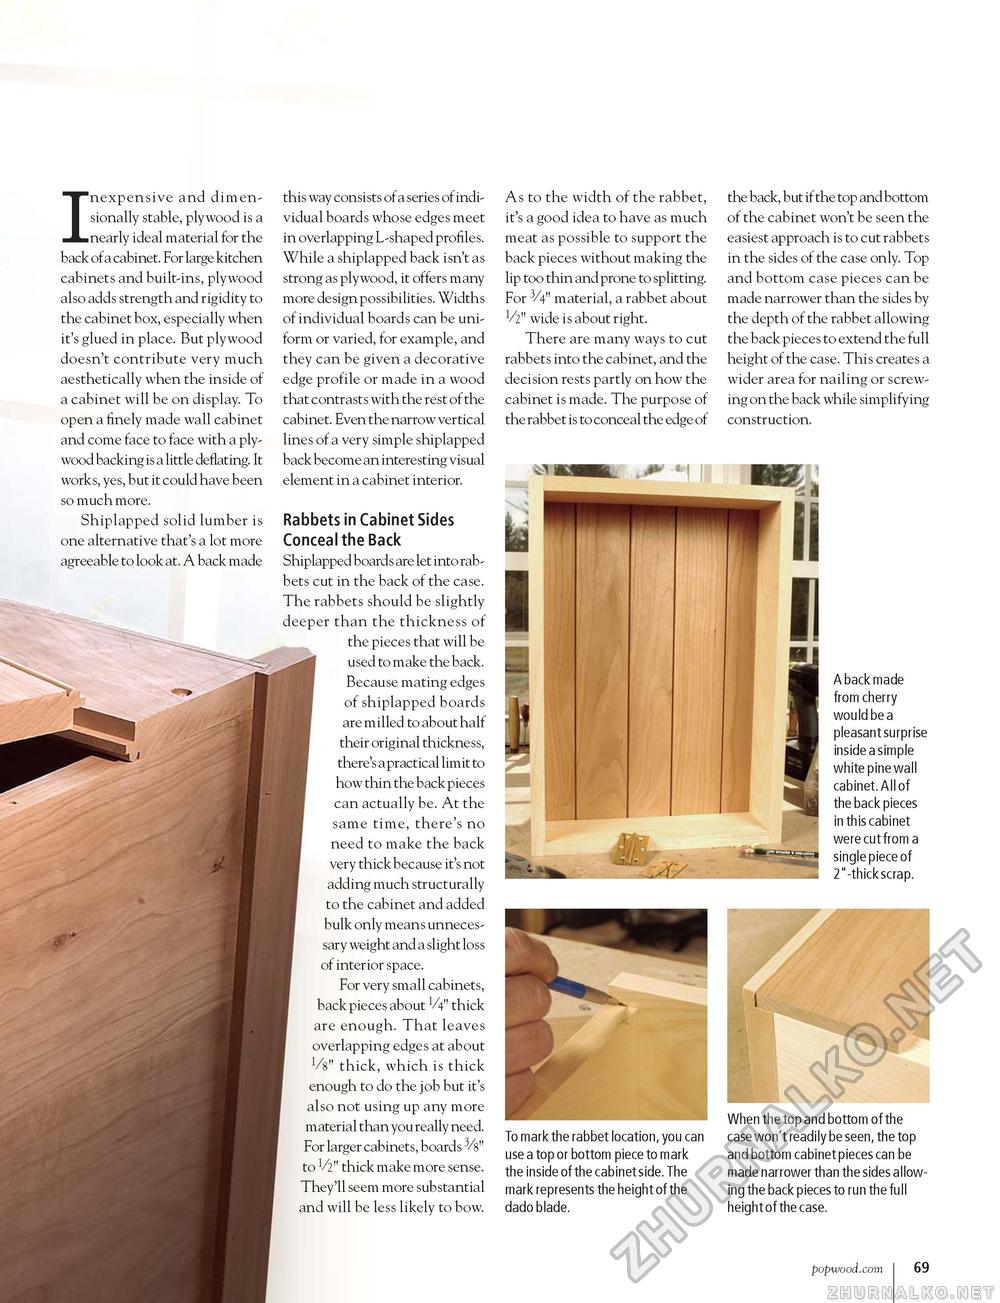
Inexpensive and dimen-sionally stable, plywood is a nearly ideal material for the back of a cabinet. For large kitchen cabinets and built-ins, plywood also adds strength and rigidity to the cabinet box, especially when it's glued in place. But plywood doesn't contribute very much aesthetically when the inside of a cabinet will be on display. To open a finely made wall cabinet and come face to face with a plywood backing is a little deflating. It works, yes, but it could have been so much more. Shiplapped solid lumber is one alternative that's a lot more agreeable to look at. A back made this way consists of a series of individual boards whose edges meet in overlapping L-shaped profiles. While a shiplapped back isn't as strong as plywood, it offers many more design possibilities. Widths of individual boards can be uniform or varied, for example, and they can be given a decorative edge profile or made in a wood that contrasts with the rest of the cabinet. Even the narrow vertical lines of a very simple shiplapped back become an interesting visual element in a cabinet interior. Rabbets in Cabinet Sides Conceal the Back Shiplapped boards are let into rabbets cut in the back of the case. The rabbets should be slightly deeper than the thickness of the pieces that will be used to make the back. Because mating edges of shiplapped boards are milled to about half their original thickness, there's a practical limit to how thin the back pieces can actually be. At the same time, there's no need to make the back very thick because it's not adding much structurally to the cabinet and added bulk only means unnecessary weight and a slight loss of interior space. For very small cabinets, back pieces about V4" thick are enough. That leaves overlapping edges at about Vs" thick, which is thick enough to do the job but it's also not using up any more material than you really need. For larger cabinets, boards 3/s" to V2" thick make more sense. They'll seem more substantial and will be less likely to bow. As to the width of the rabbet, it's a good idea to have as much meat as possible to support the back pieces without making the lip too thin and prone to splitting. For 3/4" material, a rabbet about V2" wide is about right. There are many ways to cut rabbets into the cabinet, and the decision rests partly on how the cabinet is made. The purpose of the rabbet is to conceal the edge of the back, but if the top and bottom of the cabinet won't be seen the easiest approach is to cut rabbets in the sides of the case only. Top and bottom case pieces can be made narrower than the sides by the depth of the rabbet allowing the back pieces to extend the full height of the case. This creates a wider area for nailing or screwing on the back while simplifying construction. A back made from cherry would be a pleasant surprise inside a simple white pine wall cabinet. All of the back pieces in this cabinet were cut from a single piece of 2"-thick scrap. To mark the rabbet location, you can use a top or bottom piece to mark the inside of the cabinet side. The mark represents the height of the dado blade. When the top and bottom of the case won't readily be seen, the top and bottom cabinet pieces can be made narrower than the sides allowing the back pieces to run the full height of the case. popwood.com i 69 |


