Popular Woodworking 2005-12 № 152, страница 24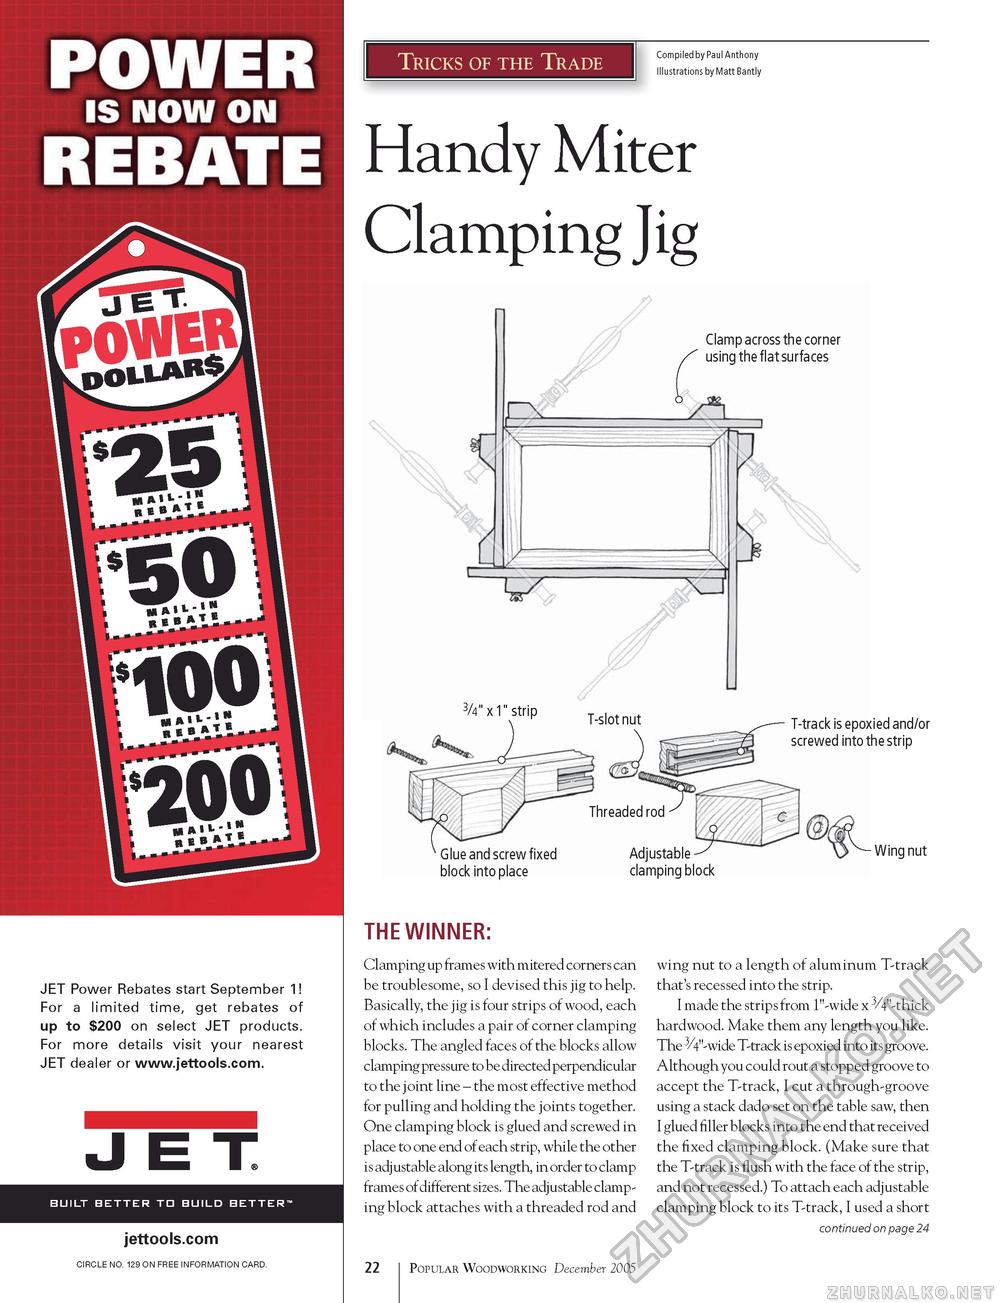
JET Power Rebates start September 1! For a limited time, get rebates of up to $200 on select JET products. For more details visit your nearest JET dealer or www.jettools.com. JET BUILT BETTER TD BUILD BETTER" jettools.com CIRCLE NO. 129 ON FREE INFORMATION CARD. Tricks of the Trade Compiled by Paul Anthony Illustrations by Matt Bantly Handy Miter Clamping Jig Clamp across the corner using the flat surfaces T-track is epoxied and/or screwed into the strip ' Glue and screw fixed block into place Adjustable -clamping block Wing nut THE WINNER: Clamping up frames with mitered corners can be troublesome, so I devised this jig to help. Basically, the jig is four strips of wood, each of which includes a pair of corner clamping blocks. The angled faces of the blocks allow clamping pressure to be directed perpendicular to the joint line - the most effective method for pulling and holding the joints together. One clamping block is glued and screwed in place to one end of each strip, while the other is adjustable along its length, in order to clamp frames of different sizes. The adjustable clamping block attaches with a threaded rod and wing nut to a length of aluminum T-track that's recessed into the strip. I made the strips from 1"-wide x 3/4"-thick hardwood. Make them any length you like. The 3/4"-wide T-track is epoxied into its groove. Although you could rout a stopped groove to accept the T-track, I cut a through-groove using a stack dado set on the table saw, then I glued filler blocks into the end that received the fixed clamping block. (Make sure that the T-track is flush with the face of the strip, and not recessed.) To attach each adjustable clamping block to its T-track, I used a short continued on page 24 22 Popular Woodworking December 2005 |


