Popular Woodworking 2005-12 № 152, страница 68
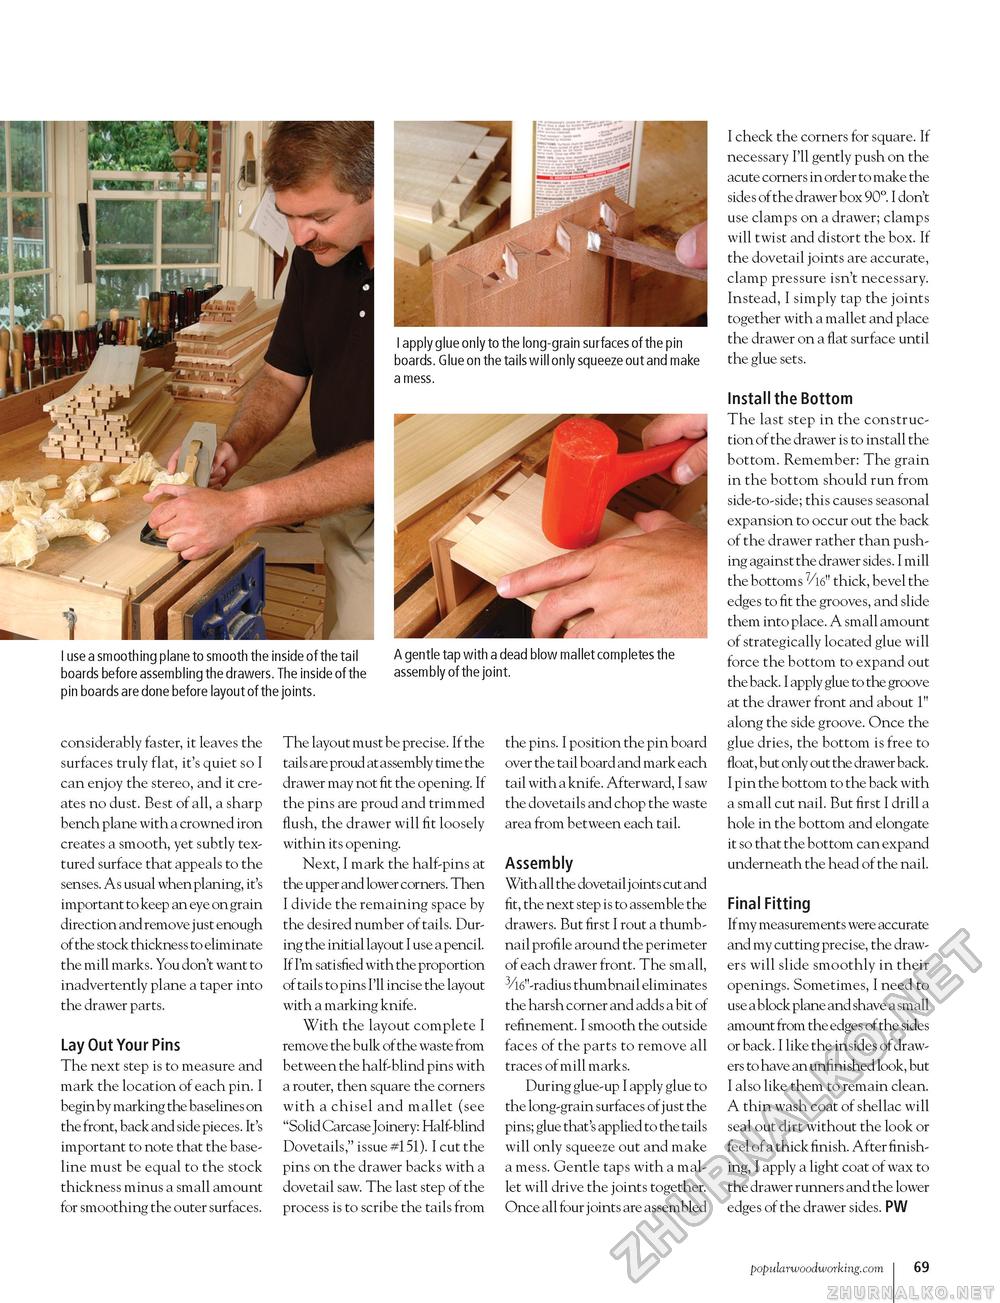
I use a smoothing plane to smooth the inside of the tail A gentle tap with a dead blow mallet completes the boards before assembling the drawers. The inside of the assembly of the joint. pin boards are done before layout of the joints. considerably faster, it leaves the surfaces truly flat, it's quiet so I can enjoy the stereo, and it creates no dust. Best of all, a sharp bench plane with a crowned iron creates a smooth, yet subtly textured surface that appeals to the senses. As usual when planing, it's important to keep an eye on grain direction and remove just enough of the stock thickness to eliminate the mill marks. You don't want to inadvertently plane a taper into the drawer parts. Lay Out Your Pins The next step is to measure and mark the location of each pin. I begin by marking the baselines on the front, back and side pieces. It's important to note that the baseline must be equal to the stock thickness minus a small amount for smoothing the outer surfaces. The layout must be precise. If the tails are proud at assembly time the drawer may not fit the opening. If the pins are proud and trimmed flush, the drawer will fit loosely within its opening. Next, I mark the half-pins at the upper and lower corners. Then I divide the remaining space by the desired number of tails. During the initial layout I use a pencil. If I'm satisfied with the proportion of tails to pins I'll incise the layout with a marking knife. With the layout complete I remove the bulk of the waste from between the half-blind pins with a router, then square the corners with a chisel and mallet (see "Solid Carcase Joinery: Half-blind Dovetails," issue #151). I cut the pins on the drawer backs with a dovetail saw. The last step of the process is to scribe the tails from the pins. I position the pin board over the tail board and mark each tail with a knife. Afterward, I saw the dovetails and chop the waste area from between each tail. Assembly With all the dovetail j oints cut and fit, the next step is to assemble the drawers. But first I rout a thumbnail profile around the perimeter of each drawer front. The small, 3/16"-radius thumbnail eliminates the harsh corner and adds a bit of refinement. I smooth the outside faces of the parts to remove all traces of mill marks. During glue-up I apply glue to the long-grain surfaces of just the pins; glue that's applied to the tails will only squeeze out and make a mess. Gentle taps with a mallet will drive the joints together. Once all four joints are assembled I check the corners for square. If necessary I'll gently push on the acute corners in order to make the sides of the drawer box 90°. I don't use clamps on a drawer; clamps will twist and distort the box. If the dovetail joints are accurate, clamp pressure isn't necessary. Instead, I simply tap the joints together with a mallet and place the drawer on a flat surface until the glue sets. Install the Bottom The last step in the construction of the drawer is to install the bottom. Remember: The grain in the bottom should run from side-to-side; this causes seasonal expansion to occur out the back of the drawer rather than pushing against the drawer sides. I mill the bottoms 7/16" thick, bevel the edges to fit the grooves, and slide them into place. A small amount of strategically located glue will force the bottom to expand out the back. I apply glue to the groove at the drawer front and about 1" along the side groove. Once the glue dries, the bottom is free to float, but only out the drawer back. I pin the bottom to the back with a small cut nail. But first I drill a hole in the bottom and elongate it so that the bottom can expand underneath the head of the nail. Final Fitting If my measurements were accurate and my cutting precise, the drawers will slide smoothly in their openings. Sometimes, I need to use a block plane and shave a small amount from the edges of the sides or back. I like the insides of drawers to have an unfinished look, but I also like them to remain clean. A thin wash coat of shellac will seal out dirt without the look or feel of a thick finish. After finishing, I apply a light coat of wax to the drawer runners and the lower edges of the drawer sides. PW popularwoodworking.com 33 |


