Popular Woodworking 2006-08 № 156, страница 52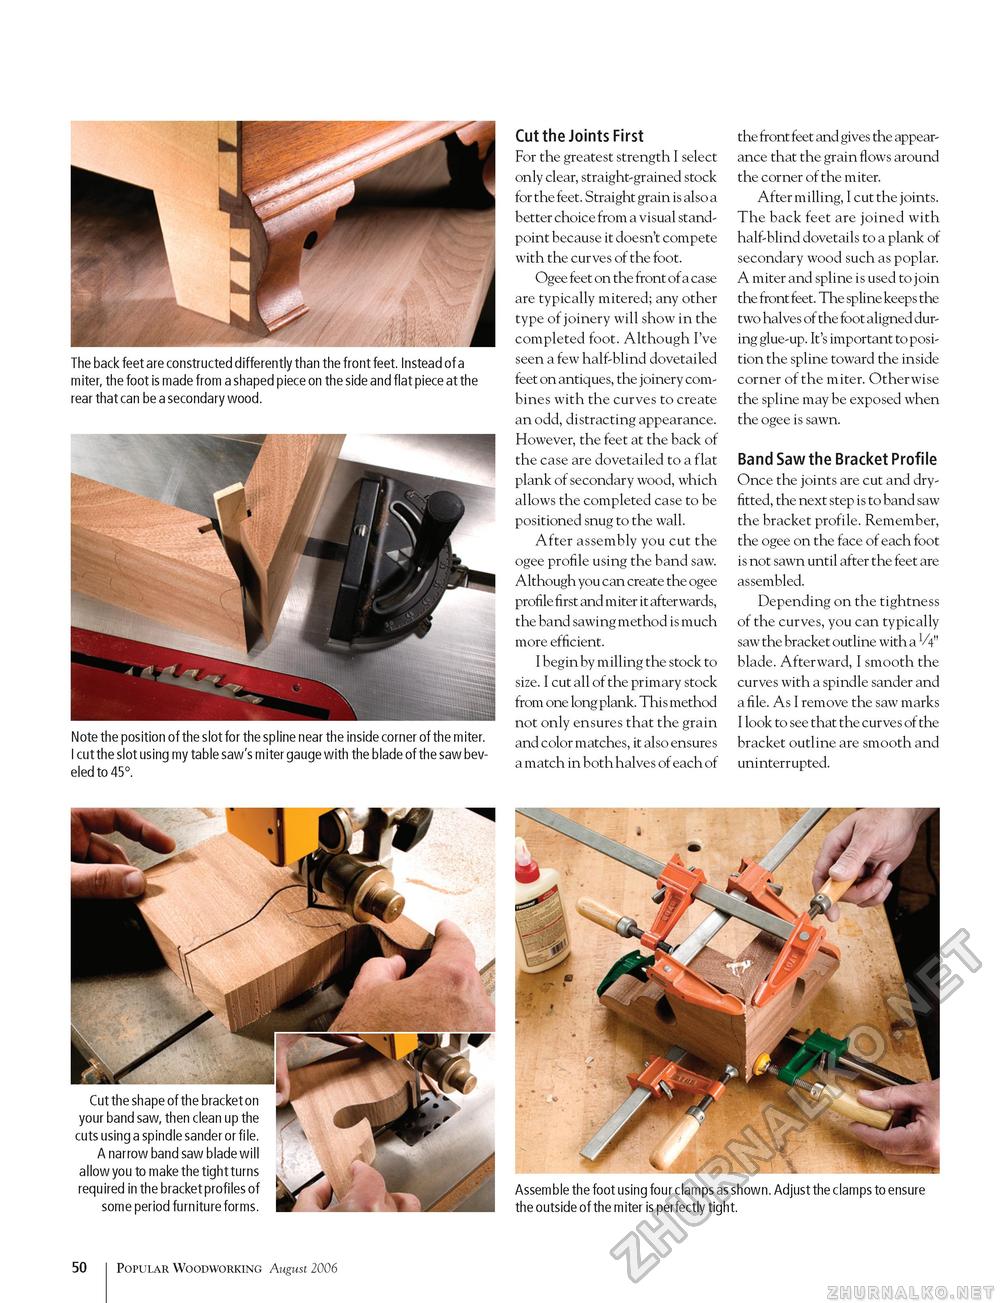
The back feet are constructed differently than the front feet. Instead of a miter, the foot is made from a shaped piece on the side and flat piece at the rear that can be a secondary wood. Note the position of the slot for the spline near the inside corner of the miter. I cut the slot using my table saw's miter gauge with the blade of the saw beveled to 45°. Cut the Joints First For the greatest strength I select only clear, straight-grained stock for the feet. Straight grain is also a better choice from a visual standpoint because it doesn't compete with the curves of the foot. Ogee feet on the front of a case are typically mitered; any other type of joinery will show in the completed foot. Although I've seen a few half-blind dovetailed feet on antiques, the joinery combines with the curves to create an odd, distracting appearance. However, the feet at the back of the case are dovetailed to a flat plank of secondary wood, which allows the completed case to be positioned snug to the wall. After assembly you cut the ogee profile using the band saw. Although you can create the ogee profile first and miter it afterwards, the band sawing method is much more efficient. I begin by milling the stock to size. I cut all of the primary stock from one long plank. This method not only ensures that the grain and color matches, it also ensures a match in both halves of each of the front feet and gives the appearance that the grain flows around the corner of the miter. After milling, I cut the joints. The back feet are joined with half-blind dovetails to a plank of secondary wood such as poplar. A miter and spline is used to join the front feet. The spline keeps the two halves of the foot aligned during glue-up. It's important to position the spline toward the inside corner of the miter. Otherwise the spline may be exposed when the ogee is sawn. Band Saw the Bracket Profile Once the joints are cut and dry-fitted, the next step is to band saw the bracket profile. Remember, the ogee on the face of each foot is not sawn until after the feet are assembled. Depending on the tightness of the curves, you can typically saw the bracket outline with a V4" blade. Afterward, I smooth the curves with a spindle sander and a file. As I remove the saw marks I look to see that the curves of the bracket outline are smooth and uninterrupted. Cut the shape of the bracket on your band saw, then clean up the cuts using a spindle sander or file. A narrow band saw blade will allow you to make the tight turns required in the bracket profiles of some period furniture forms. Assemble the foot using four clamps as shown. Adjust the clamps to ensure the outside of the m iter is perfectly tight. 50 Popular Woodworking August 2006 |


