Popular Woodworking 2006-08 № 156, страница 53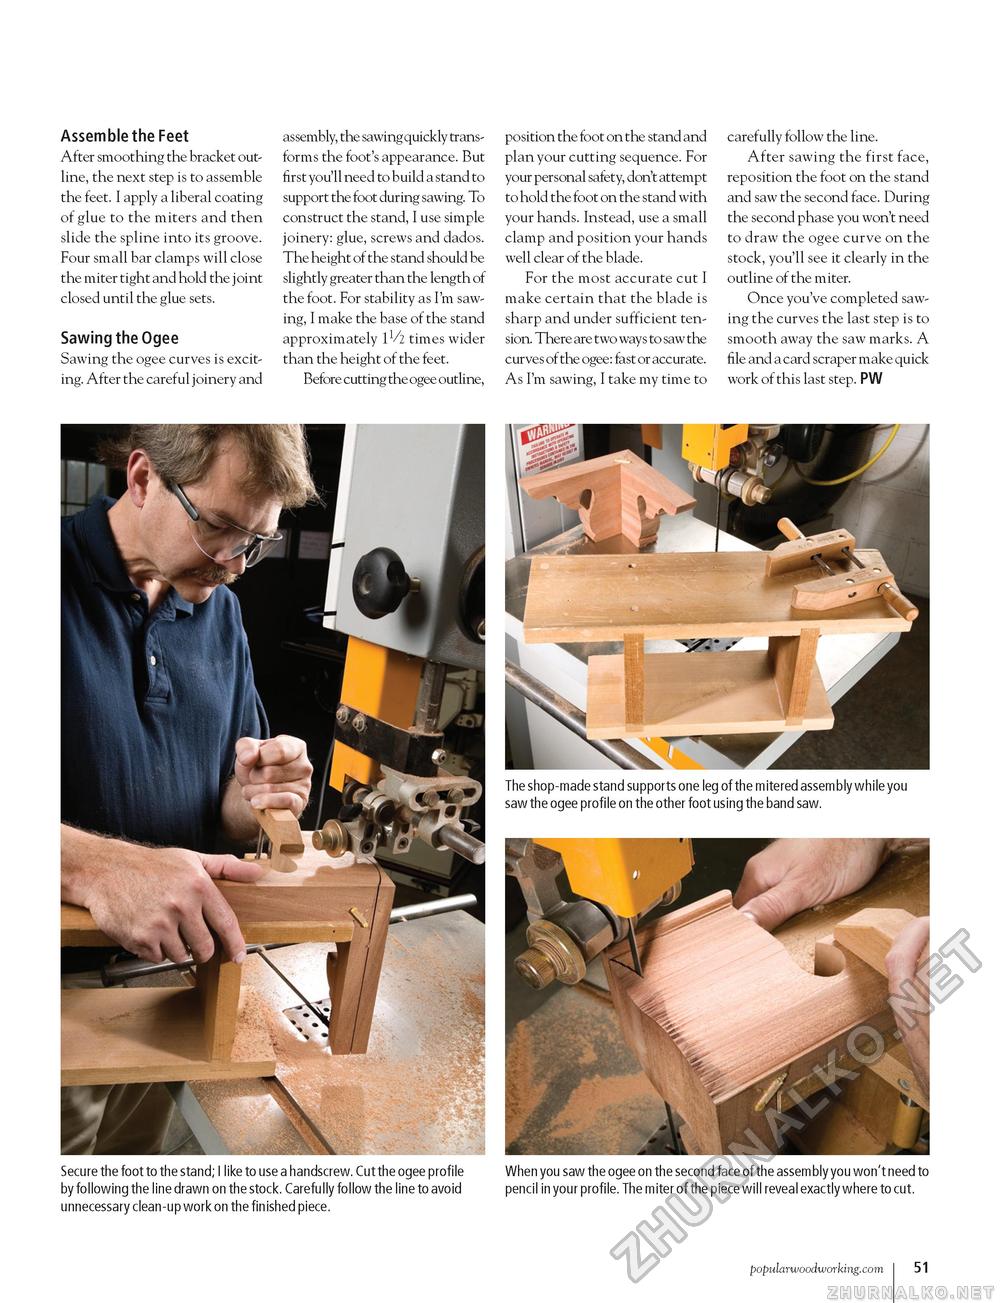
Assemble the Feet After smoothing the bracket outline, the next step is to assemble the feet. I apply a liberal coating of glue to the miters and then slide the spline into its groove. Four small bar clamps will close the miter tight and hold the j oint closed until the glue sets. Sawing the Ogee Sawing the ogee curves is exciting. After the careful joinery and assembly, the sawing quickly transforms the foot's appearance. But first you'll need to build a stand to support the foot during sawing. To construct the stand, I use simple joinery: glue, screws and dados. The height of the stand should be slightly greater than the length of the foot. For stability as I'm sawing, I make the base of the stand approximately IV2 times wider than the height of the feet. Before cutting the ogee outline, position the foot on the stand and plan your cutting sequence. For your personal safety, don't attempt to hold the foot on the stand with your hands. Instead, use a small clamp and position your hands well clear of the blade. For the most accurate cut I make certain that the blade is sharp and under sufficient tension. There are two ways to saw the curves of the ogee: fast or accurate. As I'm sawing, I take my time to carefully follow the line. After sawing the first face, reposition the foot on the stand and saw the second face. During the second phase you won't need to draw the ogee curve on the stock, you'll see it clearly in the outline of the miter. Once you've completed sawing the curves the last step is to smooth away the saw marks. A file and a card scraper make quick work of this last step. PW Secure the foot to the stand; I like to use a handscrew. Cut the ogee profile When you saw the ogee on the second face of the assembly you won't need to by following the line drawn on the stock. Carefully follow the line to avoid pencil in your profile. The miter of the piece will reveal exactly where to cut. unnecessary clean-up work on the finished piece. popularwoodworking.com I 51 |


