Popular Woodworking 2006-08 № 156, страница 67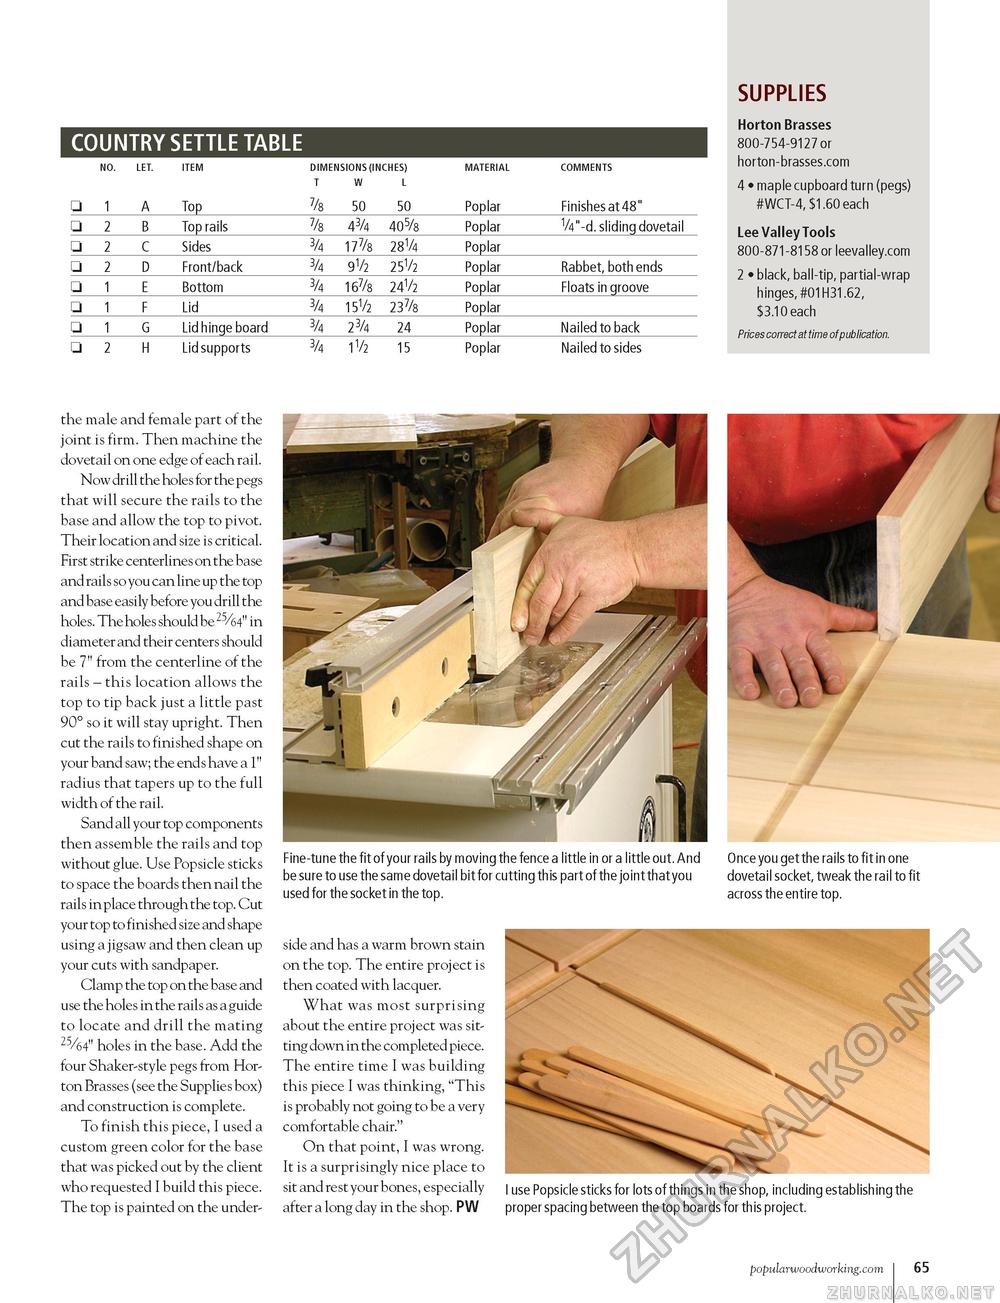
SUPPLIES COUNTRY SETTLE TABLE
Horton Brasses 800-754-9127 or horton-brasses.com 4 • maple cupboard turn (pegs) #WCT-4, $1.60 each Lee Valley Tools 800-871-8158 or leevalley.com 2 • black, ball-tip, partial-wrap hinges, #01H31.62, $3.10 each Prices correct at time of publication. the male and female part of the joint is firm. Then machine the dovetail on one edge of each rail. Now drill the holes for the pegs that will secure the rails to the base and allow the top to pivot. Their location and size is critical. First strike centerlines on the base and rails so you can line up the top and base easily before you drill the holes. The holes should be 64" in diameter and their centers should be 7" from the centerline of the rails - this location allows the top to tip back just a little past 90° so it will stay upright. Then cut the rails to finished shape on your band saw; the ends have a 1" radius that tapers up to the full width of the rail. Sand all your top components then assemble the rails and top without glue. Use Popsicle sticks to space the boards then nail the rails in place through the top. Cut your top to finished size and shape using a jigsaw and then clean up your cuts with sandpaper. Clamp the top on the base and use the holes in the rails as a guide to locate and drill the mating 25/64" holes in the base. Add the four Shaker-style pegs from Horton Brasses (see the Supplies box) and construction is complete. To finish this piece, I used a custom green color for the base that was picked out by the client who requested I build this piece. The top is painted on the under- Fine-tune the fit of your rails by moving the fence a little in or a little out. And be sure to use the same dovetail bit for cutting this part of the joint that you used for the socket in the top. side and has a warm brown stain on the top. The entire project is then coated with lacquer. What was most surprising about the entire project was sitting down in the completed piece. The entire time I was building this piece I was thinking, "This is probably not going to be a very comfortable chair." On that point, I was wrong. It is a surprisingly nice place to sit and rest your bones, especially after a long day in the shop. PW Once you get the rails to fit in one dovetail socket, tweak the rail to fit across the entire top. I use Popsicle sticks for lots of things in the shop, including establishing the proper spacing between the top boards for th is project. popularwoodworking.com I 65 |
|||||||||||||||||||||||||||||||||||||||||||||||||||||||||||||||||||||||||||||||||


